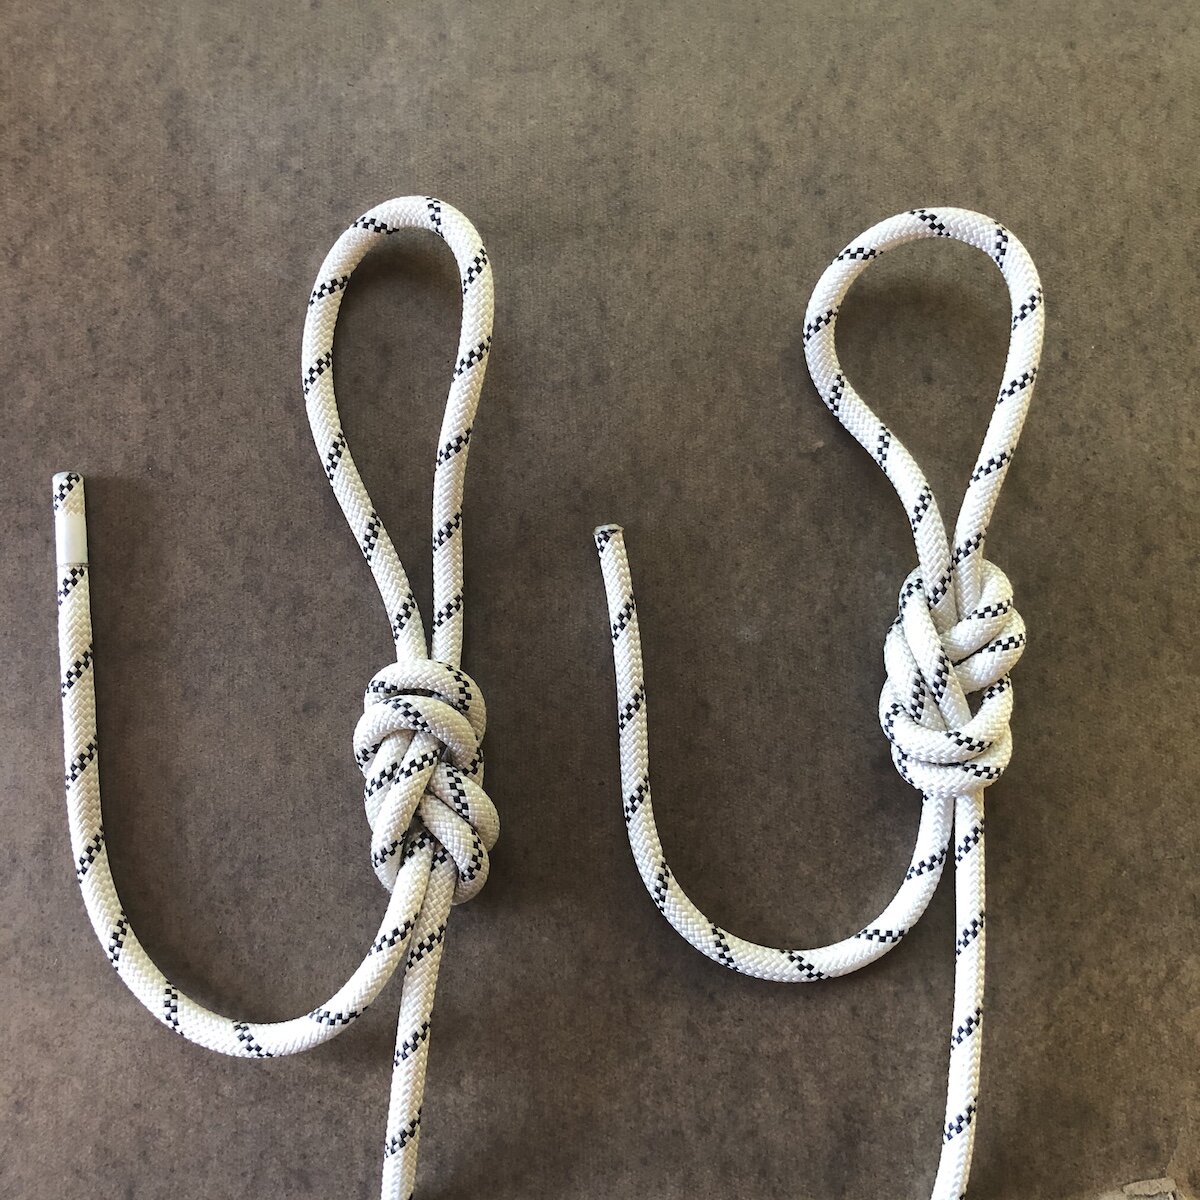
A better way to tie the figure 8?
Here are two seemingly identical figure 8 knots. But, there’s a subtle difference that can affect how easy it is to untie after loading. Can you see what it is?
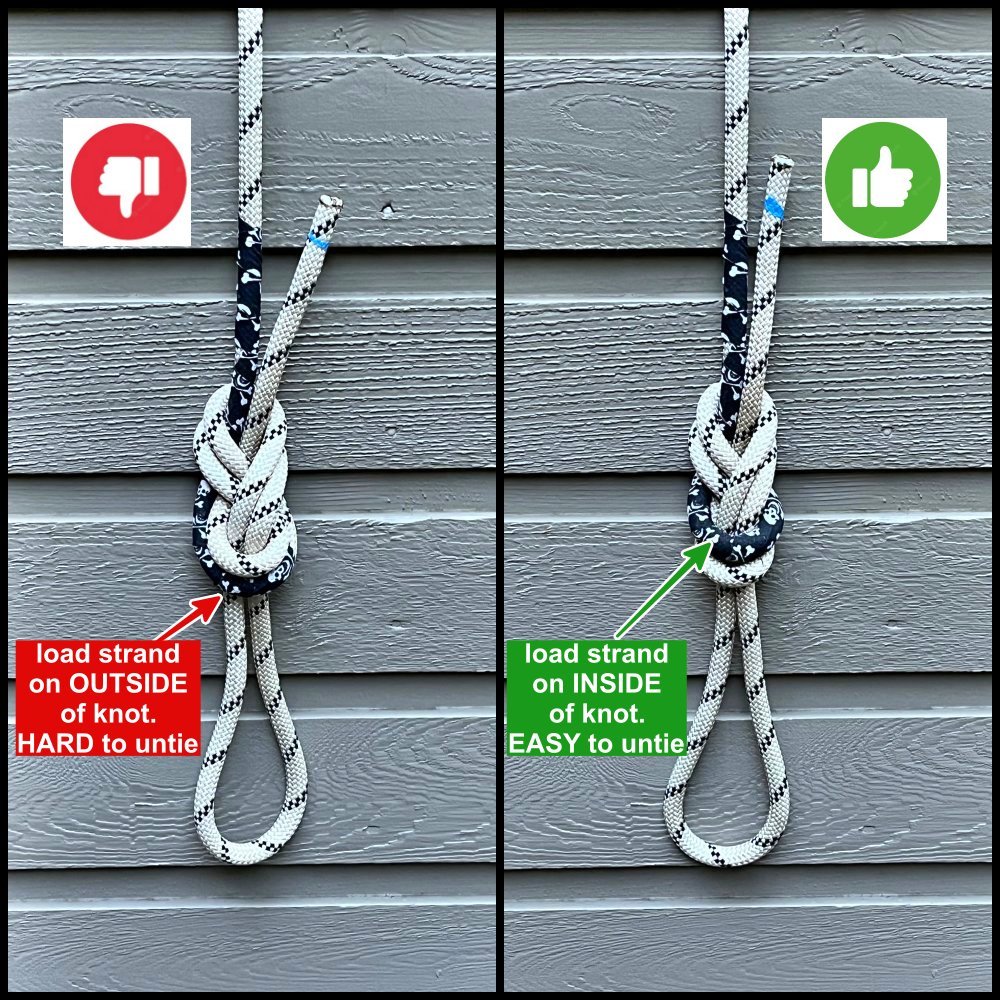
Let’s add some tape so we can more easily see what's going on. (Note the skull and crossbones hockey tape, my favorite for marking soft goods like slings! =^)
The load strand on the left comes out on the OUTSIDE of the knot. The load strand on the right goes through the MIDDLE of the knot.
Most people find the knot on the left to be significantly harder to untie. (It can depend a bit on how much load you're putting on it, the type / diameter of rope you’re using, etc.)
Why?
Load strand on the outside of the knot: When loaded, this cinches down on the entire knot, even to the point of partially deforming it. No loose strands, welded, hard to untie.
Load strand on the inside of the knot: the very top strand goes to the rope tail, and takes minimal load. This gives you a slightly looser strand to start with when you need to untie it.
Give this a try yourself. Try each version, load it with your full body weight, and bounce on it a few times. See which one works better for you!
Notes:
To emphasize, both of these knot variations are perfectly safe and acceptable to use.
Like with every knot, it should be properly “dressed and stressed”. That means no crossed strands, and pulling each of the four strands separately to snug everything down.
If you need to tie a bight knot and expect it to take a large load, a butterfly knot might be a better choice. It's almost always easier to untie than a figure 8.
The good news: if you tie a figure 8 the correct way, the load strand will almost always be in the correct position, as shown in the right side photo. (Check out the video below from the Swedish climbing instructor on one way to do this.)
If you’re a hotshot sport climber and taking loads of big falls working a project, you're probably good enough to tie in with some variation of a bowline. However, there are lots of bowline flavors, and they can be a bit hard to recognize and partner check, so I recommend a bowline only for more advanced climbers.
For beginners and intermediates, I strongly recommend using the retraced figure 8. It's been the standard tie-in knot for decades for a good reason.
Here's a YouTube video from the outstanding YouTube channel “The Rope Access Channel” where a rigging professional (Alex, he’s great) explains how this works.
Here's a short video from Swedish climbing instructor John Liungman on how to tie it with the load strand in the middle.
For a counterpoint, here’s Australian rigging expert Richard Delaney from RopeLab. Richard has a quick look at the methods of tying it, and concludes they're both equally easy to untie. (But notice he doesn't actually try to do it himself . . . )
I'm going with the Rope Access Channel on this one.


