CalTopo pro tip - Custom terrain shading
CalTopo, the BEST desktop mapping tool for backcountry travelers, has a very cool, seldom used feature: custom overlays of various combinations of slope angle, aspect, elevation and canopy cover. The interface can take some practice, but once you get the hang of it, it’s easy and powerful.
(This is based on what cartographers call a “Digital Elevation Model”, or DEM. In simple terms, it’s a three dimensional model of the world used in digital mapping.)
If you'd like to follow along and try this yourself, create a free CalTopo account, which lets you access a majority of the mapping tools. If after trying DEM shading you think this software is terrific, please consider an annual subscription (starting at $20) to support the small team of developers making this great tool available, hint hint.
Here's how to use CalTopo DEM shading.
Are you doing some off-trail travel want to avoid areas that are excessively steep? Check out the example in the photo above: all slopes between 35 and 90° get a color.
Backcountry skiers can really get some benefit from this tool, so that's the example we’ll use from now on; the Wallowa mountains in northeastern Oregon, a popular place for ski touring. There are several yurts and huts that can be reserved for winter adventures. (I’ve never been, but I’ve heard great things about it.)
If you want to follow along and use the same area I am, here are the coordinates of the ski hut. Copy paste these into the CalTopo search box.
45.2037, -117.0938
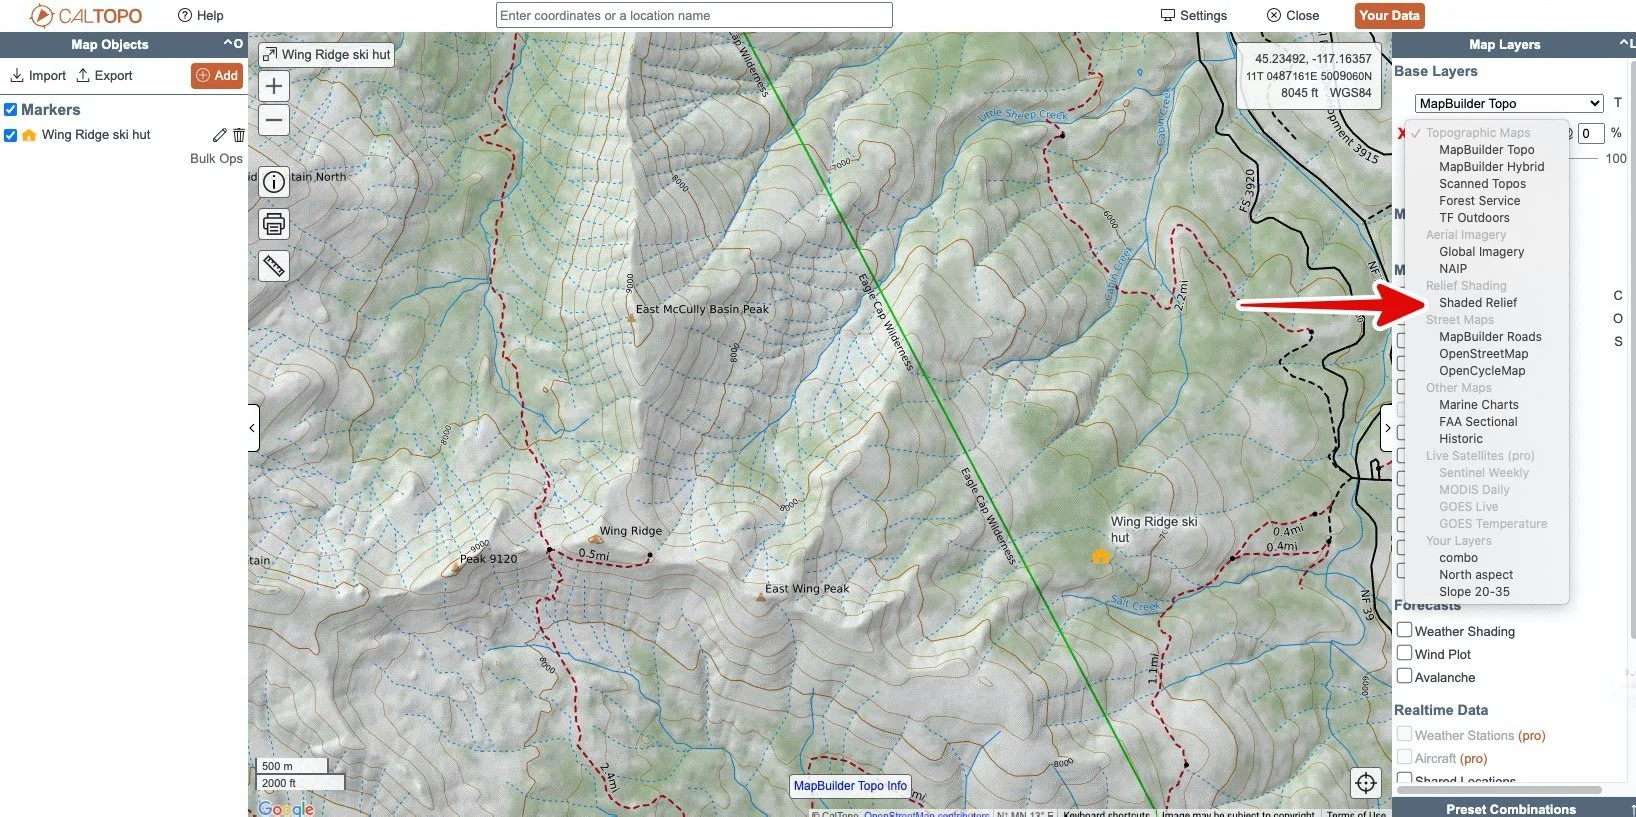
First, let’s add shaded relief to the default base layer of MapBuilder Topo. It already has a little, but let's add a bit more so we can more easily see ridges, gullies, aspect, and terrain features.
From the “Map Layers” menu in the top right, click “Stack Base Layer”.
From that drop-down menu, click “Shaded Relief”.
Play with the slider bar to adjust the opacity between zero to 100% . As you slide the bar to the right, you should see increased shading added on to your base map. I like something in between about 30 and 40%. Use what looks good to you.
Shaded relief is extremely cool, and it's a nice thing to add almost all of your maps!
Excellent, we have our base map with extra shaded relief. Let's add some custom DEM shading.
Say we’re headed in to the hut for a few days of skiing, and we’re interested in slopes that are north facing. Here’s how to show that in a custom DEM overlay.
Zoom in to your area of interest. Choose the “Add” button from the top left corner.
From the drop-down menu, select “DEM shading”
Here's where the magic happens: “Add a New Rule” to generate your overlay.
Check the box next to “Aspect”, and select “NW 315” to “NE 45” from the dropdown menu.
Click the Color box and set the color to red for both NW 315 and NE 45.
Add a descriptive name in the top left corner, here, “N aspect”.
In the “Overlay?” box, select, “No, Base Layer” from the drop down menu.
Click “Add Rule” to generate the code CalTopo needs to make your map.
Click “Save to Account”.
Finally, click “Save”.
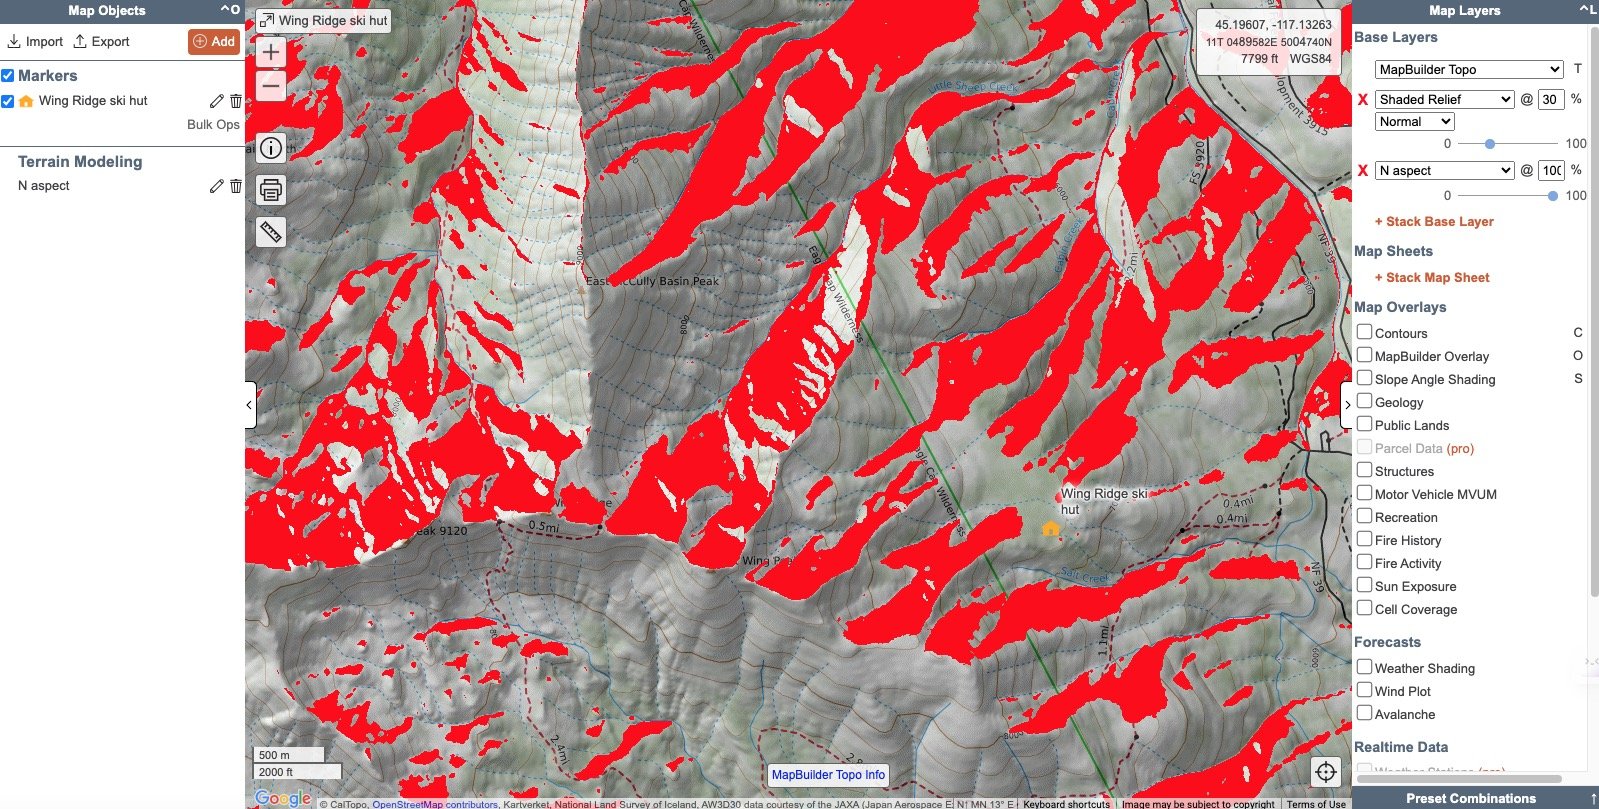
Voilà! You should now see an overlay on your map showing all north-ish slopes colored red.
Notice that because we chose “Base Layer” in the previous step, our named overlay has been added as an overlay, sort of like tracing paper, over the top of the base map. You can see this at the top of the menu on the right side.
Ouch, that red is hard on the eyes! In the top right corner, use the slider bar to set the opacity to a lower level. I like something between about 30 and 40%. That's easier to look at, and lets you see underlying map features.
Because you clicked “Save to Account”, this custom overlay is saved. This is slick, because you can use this overlay on any future map without recreating the rule. Here's how to find it.
Click the orange “Your Data” button in the top right corner.
Then, click the “Your Layers” tab. You should see the layer called “N Aspect”.
To use any saved custom DEM shading in the future, open a map, select “Stack Base Layer” from the top right side, and click the drop down menu. You should see your saved layers under “Your Layers”.
Okay, are you getting the hang of this? Nice!
Let's make another overlay, this time for slopes between 20 and 40°.
As before, click the ”Add” button in the top left corner, select “DEM Shading”, and put the following into the “Add a New Rule” box.
That should generate a map looking something like this: all slopes between 20 and 40 degrees.
Maybe you're looking for flat places to camp?
No problem. Make a custom layer showing all areas with slopes between 0° and 5°.
Here’s the resulting map, showing flat areas with 50% opacity.
Let's make an overlay that shows a specific aspect AND slope.
Say you want to ski in the following terrain:
north facing slope
slope angle between 20 and 40°
Here’s the rule that generates an overlay for that.
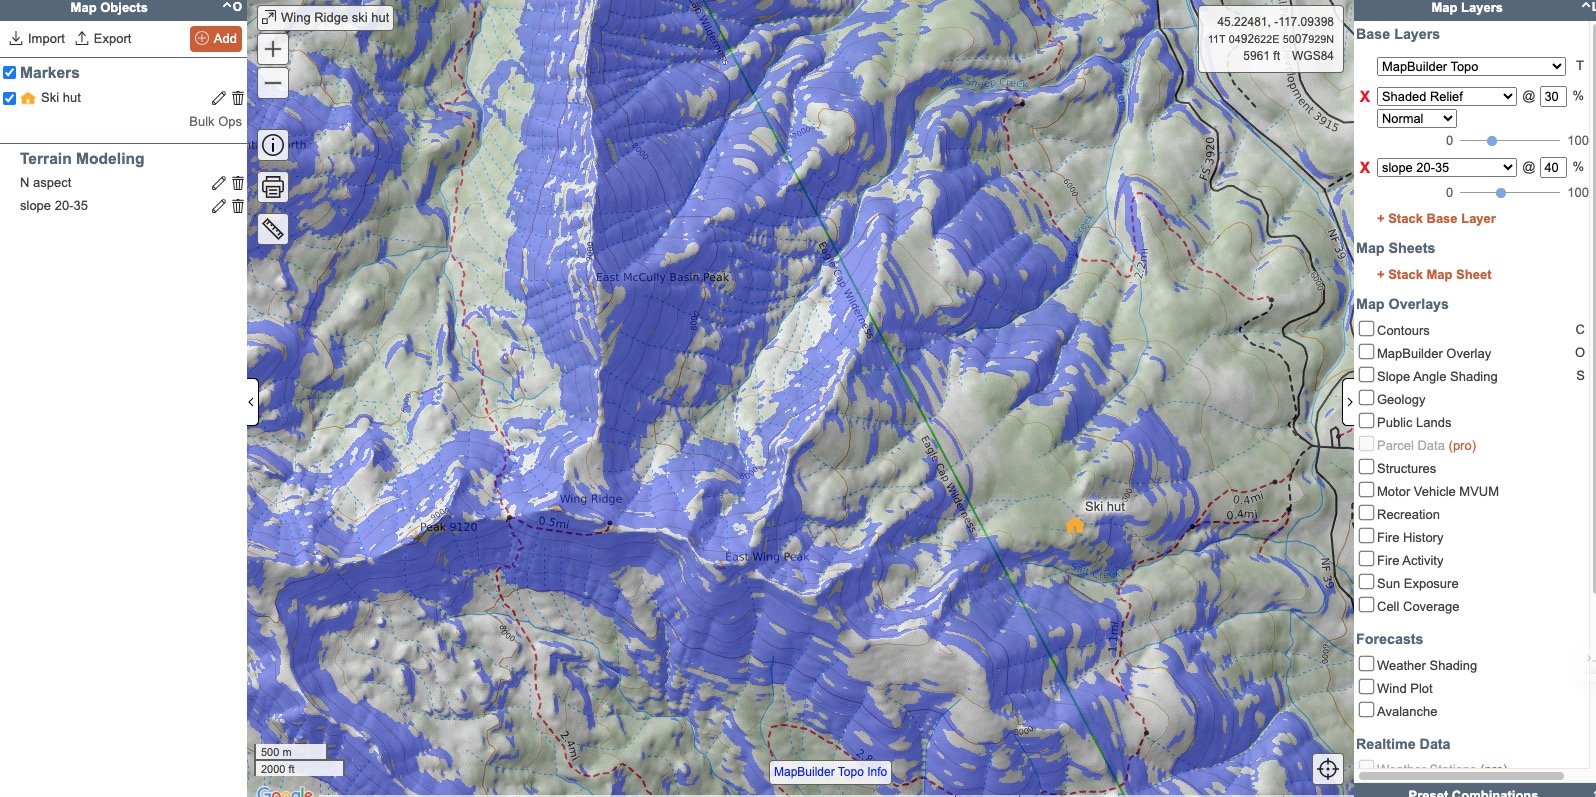
That rule generates this map: north facing aspect with slope angles between 20 and 40°.
Schweeeet, looks like there's some great terrain very close to the hut.
Create an elevation gradient DEM overlay
You can also use a pair of colors to create a gradient between a single condition, here elevation.
Let's make a gradient DEM shading with these elevations and colors:
Terrain between 5,000 and 7,000 feet, light green to green
Terrain between 7000 and 10,000 feet, green to purple
First, we make a rule for elevation 5K to 7K, and use the color picker to select light green to green. Click “Add Rule”, and the code is generated.
Next, create a second rule: change elevations from 7K to 10 K, change the colors from green to purple, and click “Add Rule”. Notice a second rule is added as a new line in the “Rules” box.
You can do this for as many different categories as you want. For example, if you wanted to show slope angle between 25 to 30, 30 to 33, 33-36, etc, keep adding rules and changing the colors.
The elevation gradient overlay looks like this. Nice! It looks even better on a big screen, give it a try!
So, that's a pretty detailed tutorial of custom DEM shading in CalTopo. Play with it, save your overviews, and, as suggested before, please consider a modest subscription (starts at $20 annually) to support the development team making this great tool available.
If you made it this far, here's a small bonus. Yes there's international coverage!
Here's a portion of the classic Haute Route from Chamonix to Zermatt, with that 20% to 35% slope shading added.


