Improvised progress capture
In most any kind of hauling system, you need a way to capture the progress of your hauling, so the load doesn’t slip when you ease up on your pulling.
Sure, it’s great to have a nice progress capturing pulley like a Petzl Micro Traxion) every time you might need one, or maybe a prusik minding pulley. But, dang, those little suckers are expensive! Plus, often in a self rescue situation, you need to improvise and adapt with the gear you have available.
Another option is the so-called “prusik minding” pulley. This is a pulley with the narrow “sidewalls”. This means that the prusik catches on the pulley, and doesn’t get sucked into it. Yes, these work well, but for some reason they seem to cost about twice as much as a standard pulley. I don't understand this at all, and that's why I don't own one nor recommend them.
Here are a few methods.
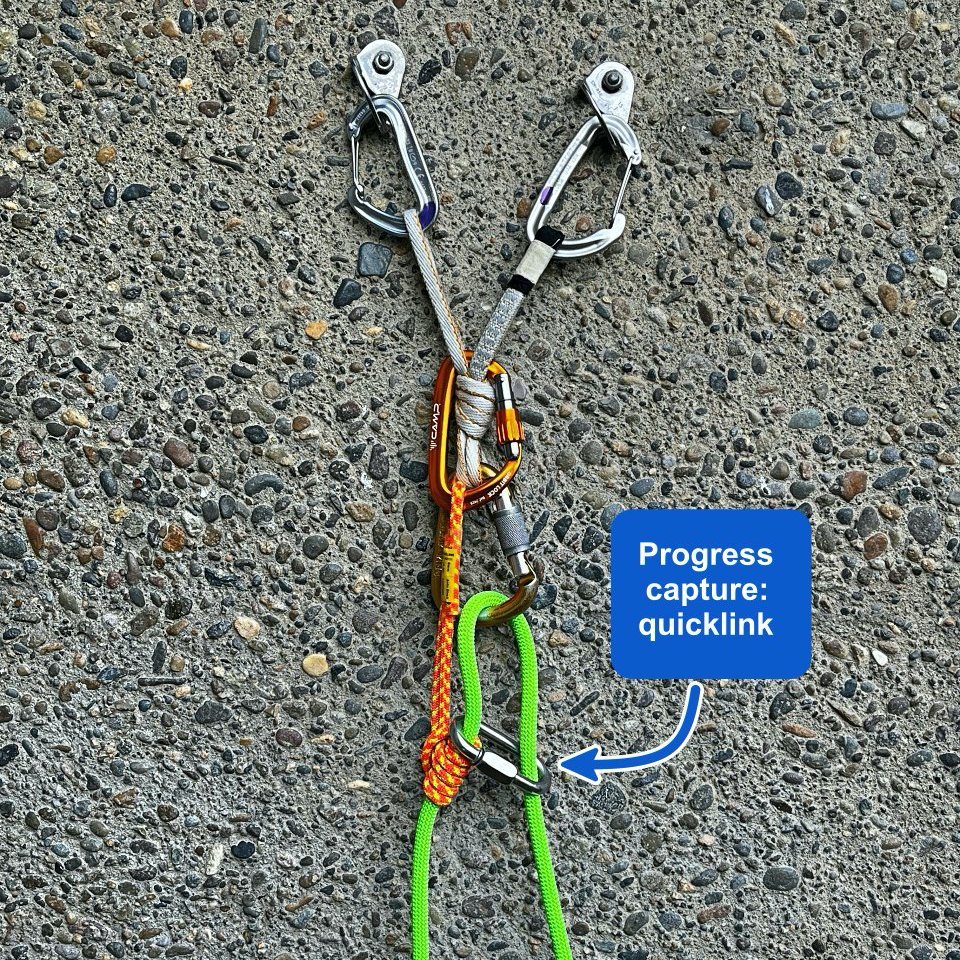
In all the photos below, the load strand is on the left, the pull strand is on the right.
In most of the photos below, I’m using a carabiner rather than a pulley. Pulleys are better to reduce friction but minimalist climbers do not often have one.
1 - Quicklink
Add a quicklink to both rope strands as shown, above the prusik. This keeps prusik from getting sucked into the carabiner.
The success of this depends on quicklink size, rope diameter, prusik diameter, etc. Like with all self rescue techniques, be sure and test this at home before you rely on it in the field. (And yes, I get it that quicklinks are a heavy, single use piece of kit that some people choose not to carry. You’re especially unlikely to have one on a glacier climb.)
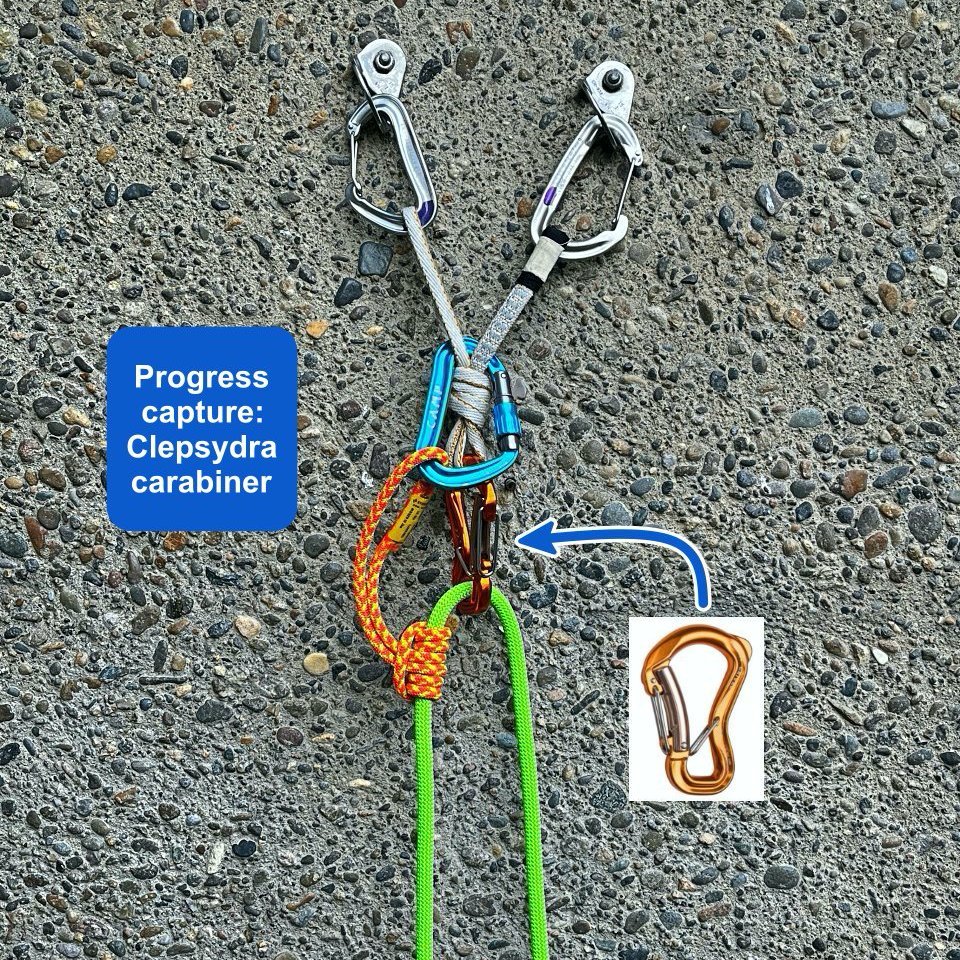
2 - Captive eye carabiner (here, a Grivel Clepsydra)
That tiny end of that carabiner that fits nicely around your belay loop? That also does a nice job of keeping the prusik hitch from pulling through.
I love this carabiner for glacier travel. Your carabiner never gets cross loaded, which can be important when you're clipped to the rope rather than tying in to the rope, the double gate design means it will never freeze shut or wiggle open, and it does extra duty as shown below if you need it.
3 - Belay device
Use a tube style belay device such as a Black Diamond ATC. However, this has a few downsides.
You have to be clever enough to install it when you’re building your system; you can't put it on after the rope is loaded. The benefit of the quicklink is that it can be added after the rope is loaded.
You just “lost” your ATC into the hauling system. Generally it's best to keep important personal gear available if possible in case you have to use it later.
For moderate glacier travel, many people choose not to bring a belay device at all. So you may not have one when you're most likely to need it. But for other hauling situations, it works pretty well.

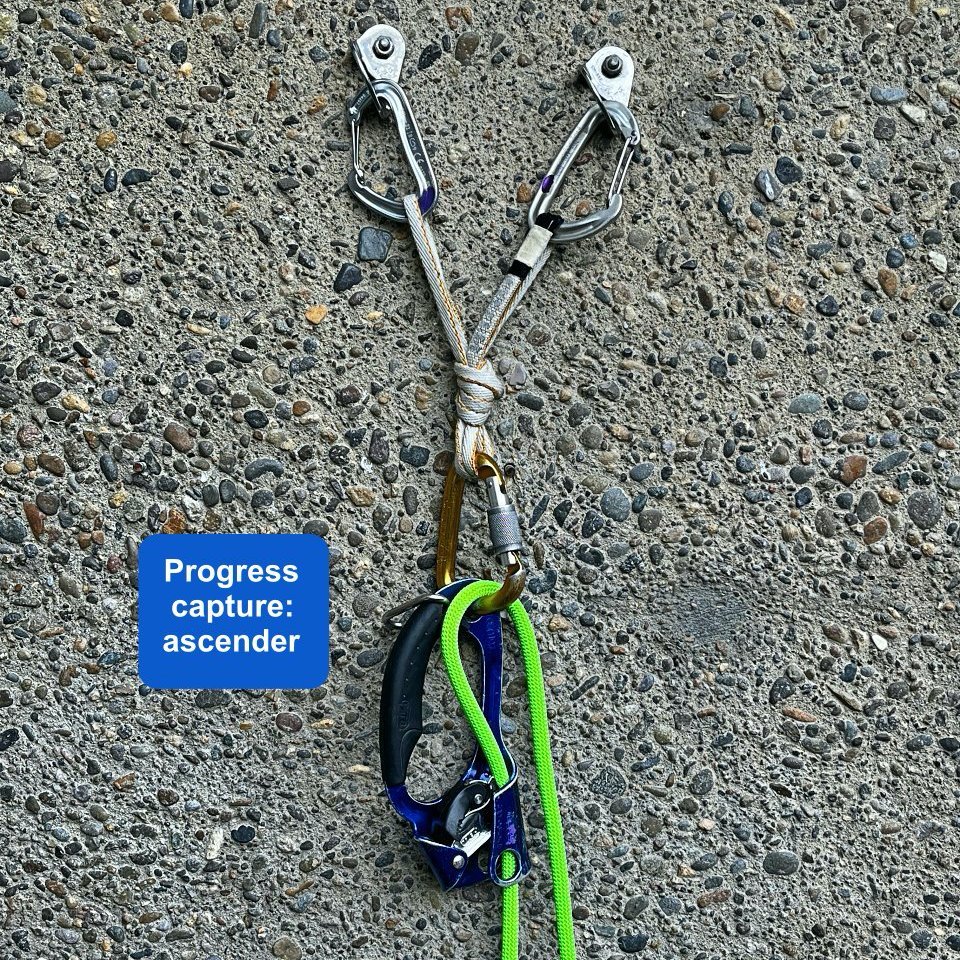
4 - Ascender
Here's one for the aid climbers, who are likely to have a pulley and an ascender. Before progress capture pulleys were invented, this was the standard hauling method on big walls.
This looks like the rope is getting twisted as it goes through the pulley. In fact, once you put a load on it, the pulley and ascender line up quite nicely.