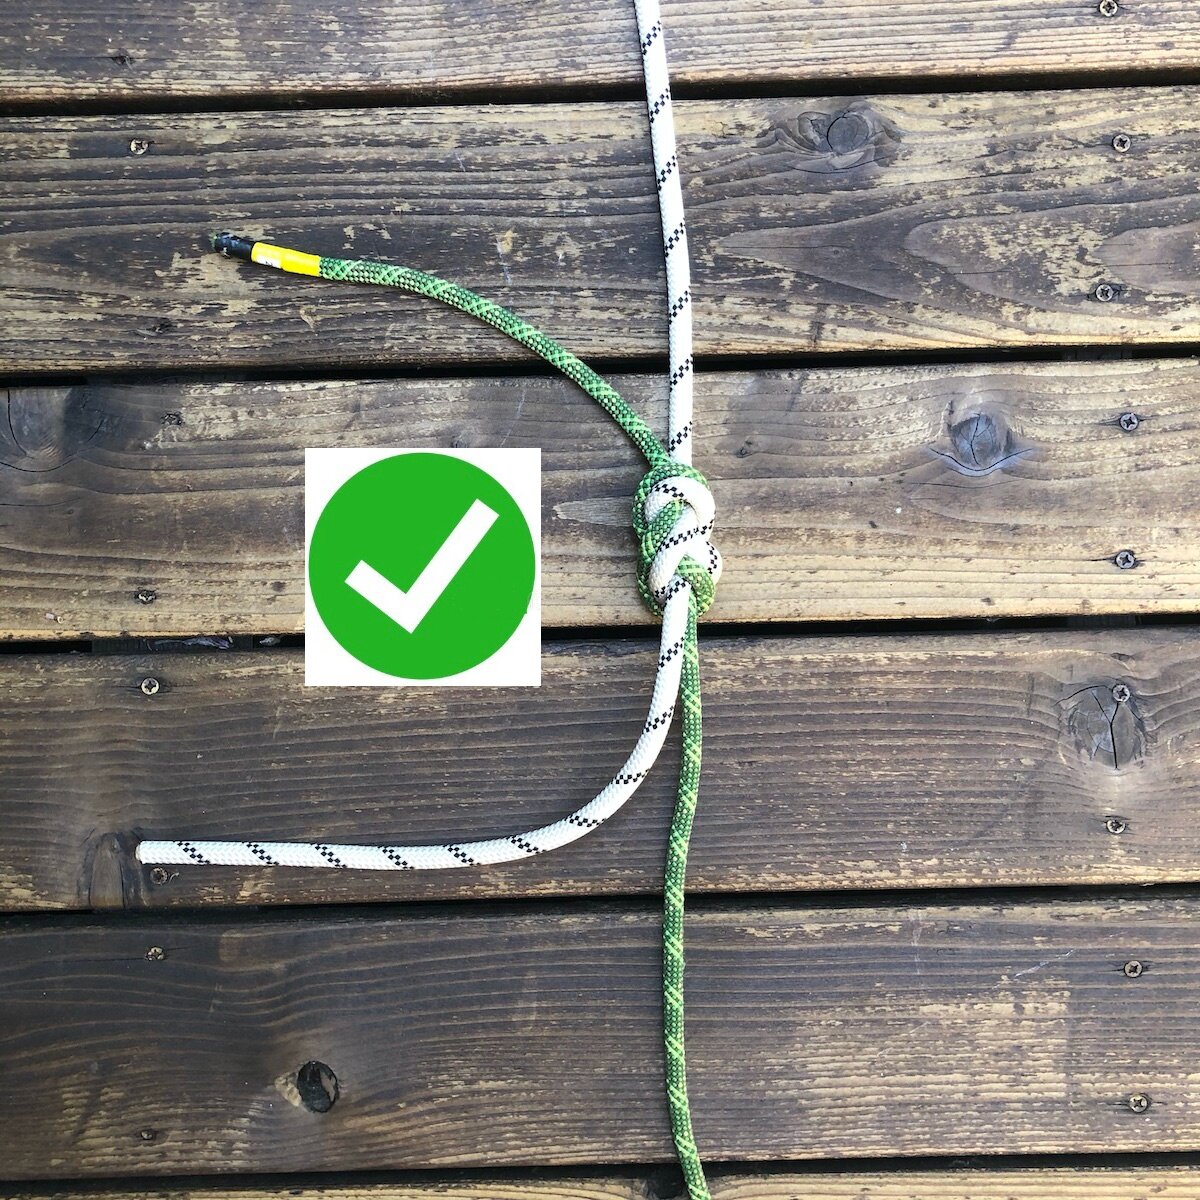
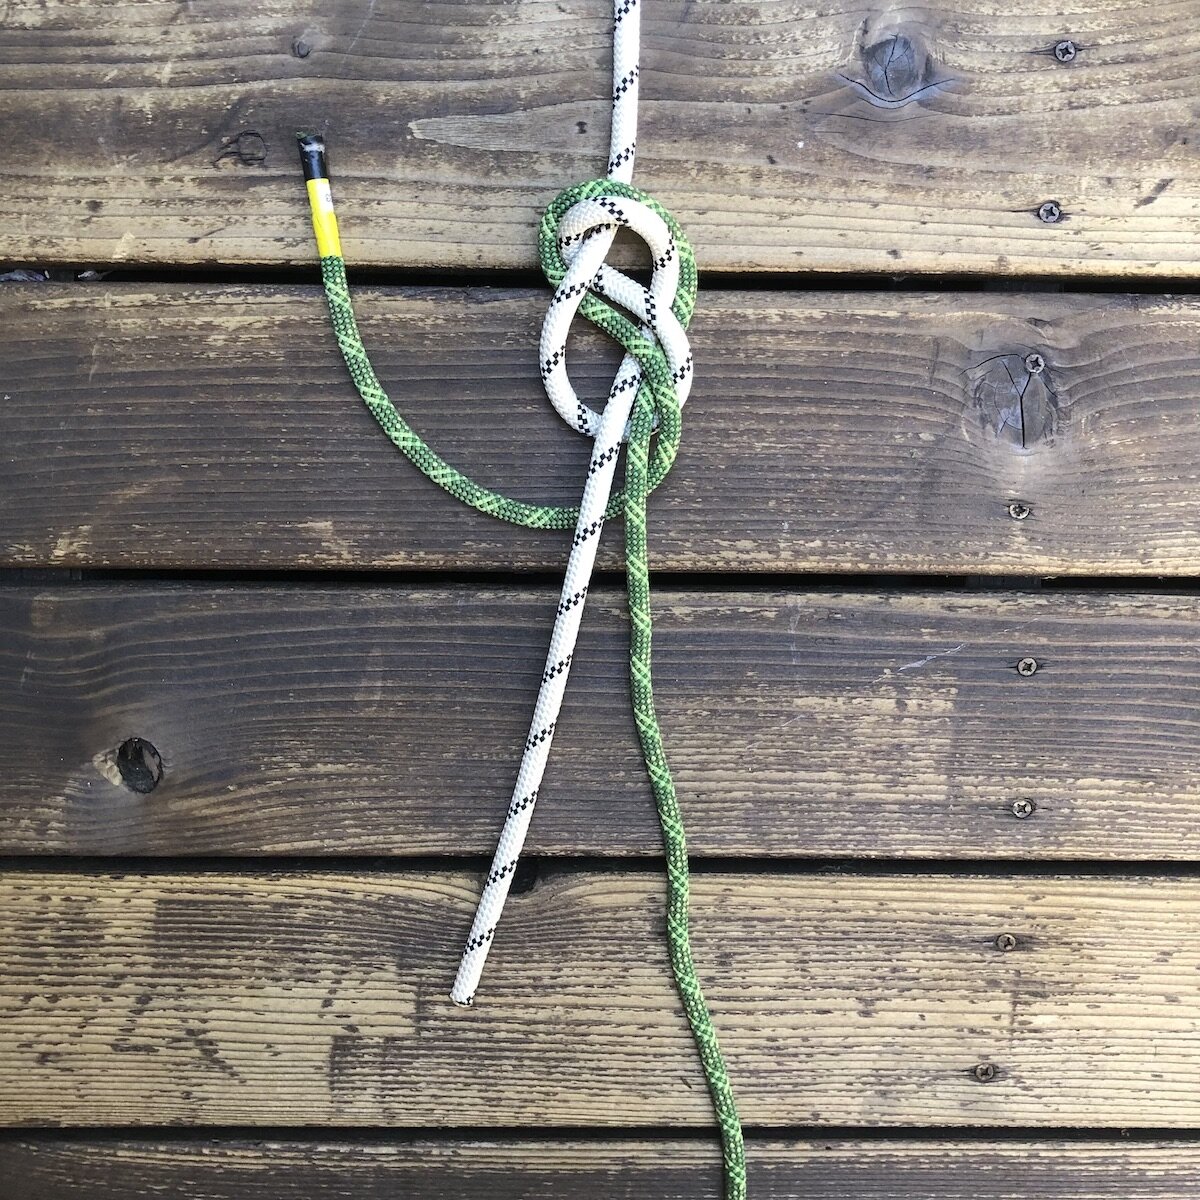
The Flemish bend for connecting two rope ends
The flat overhand bend (known for a long time with the now out-of-favor, tongue-in-cheek name of the "EDK", or "European Death Knot"), is a solid choice for tying together two rappel ropes.
Why is the flat overhand bend popular?
Quick and easy to tie
Easy to check if you tied it correctly
Strong enough, to do the job
As an “offset” knot, it tends to rotate and ride up over potential obstacles, like rock ledges, where many other knots might get hung up
But, let’s face it. Some people think it just looks sketchy. (How do you think it got that great nickname?) Doubters don’t care that 789,000+ happy rappels have been done on this knot with no issues; to them, it just doesn't look that stout. This can be especially true if you are tying it in Less Than Ideal (LTI) circumstances such as:
With two ropes of very different diameters, such as a 10 mm lead rope and a 6 mm tag line that you're using only to make double rope raps
With extra heavy loads, such as in a rescue situation, tandem rappel, or with a haulbag / heavy pack
Maybe when it's wet, dark, cold, or all of the above, and you just need a little extra mental boost to be SURE your rap knot is bomber
Or, maybe you have a scenario with a single strand, such as:
Big wall climbing, where it's common to have multiple single strands together so you can go up to a previous high point, or descend back to your bivy
Canyoning, where it’s common to rappel on a single strand
Rescue/retreat situation, when you tie two ropes together to descend a long way as quickly as possible, leaving the ropes in place to hopefully get later or be tossed by another team
Rappel situation down terrain where at least one person on the team can safely downclimb. Tie ropes together for all other team members to rappel, last person tosses the rope and climbs down unprotected
A knot that takes just a few extra seconds to tie, that uses a foundation figure 8 knot that every climber already knows, unties easily after loading, and can be a lot more confidence inspiring is called the Flemish bend, or a rewoven figure 8 bend.
(Knot geek terminology detour: a "bend" is the term for a knot that attaches the ends of two ropes together.)
This knot is fast to tie, works bomber with ropes of two different diameters, is easy to check if you’ve done it correctly because all climbers are familiar with a rewoven figure 8, can inspire confidence when doing a sketchy rappel, and super strong, even on one strand. And who doesn’t want a little more that sometimes?
Considering using the Flemish bend if you have a very clean pull for your rappel, without many obstacles. If your rappel is blocky and has potential places where the rope could get hung up, it's probably better to go with a flat overhand bend (or maybe a “stacked overhand”, which is simple 2 overhand bends tied next to each other) to minimize the chances of the rope getting caught.
Another perfectly fine option is the classic double fisherman's knot. I prefer the Flemish bend because it's faster and simpler to tie, easier to inspect, and easier to untie after loading.
Important note: The Flemish bend is completely different than the flat figure 8 bend, which looks similar but has both ends of the tail coming out the SAME SIDE of the knot.
The Flemish Bend has the rope tails coming out of OPPOSITE SIDES of the knot.
In most parts of the world, it's considered best practice to not use the figure 8 bend. The knot can roll when loaded, has caused fatal accidents.
Apparently it is quite popular in the French alps, for reasons the rest of the world does not understand yet.
Here’s a study, from Tom Moyer, that shows the relatively low loads in which the figure 8 bend can fail.
So, let's learn how to tie it correctly.
Here's a nice video showing how. (The overhand backup knots are optional, I didn’t use them below.)
Step by step instructions:
1 - Tie a figure 8 knot near the end of one of your ropes, with about a 1 foot of tail - no longer.
2 - With the end of your other rope, start retracing the figure 8 knot.
3 - Continue retracing . . .
4 - Complete the retrace, and check for about a 1 foot of tail. If you're a little short, you can push through a bit of rope to adjust the length.
Important: the ends of the ropes should be pointing in OPPOSITE directions when you're done if you've tied it correctly.
5 - “Dress it and stress it”. Remove any twists and pull the slack out of all four strands, just like you would for a rewoven figure 8 tie-in knot. There we go, all snugged down and ready to rappel.


