Top rope directional for ice and rock
Photos and article (used with permission) are from Sean Isaac. Sean is an ACMG (Association of Canadian Mountain Guides) certified Alpine guide, a former professional climber, and author of the “Ice Leader Field Handbook” and “How to Ice Climb” (2nd ed.) Follow @seanisaacguiding for more great tech tips.
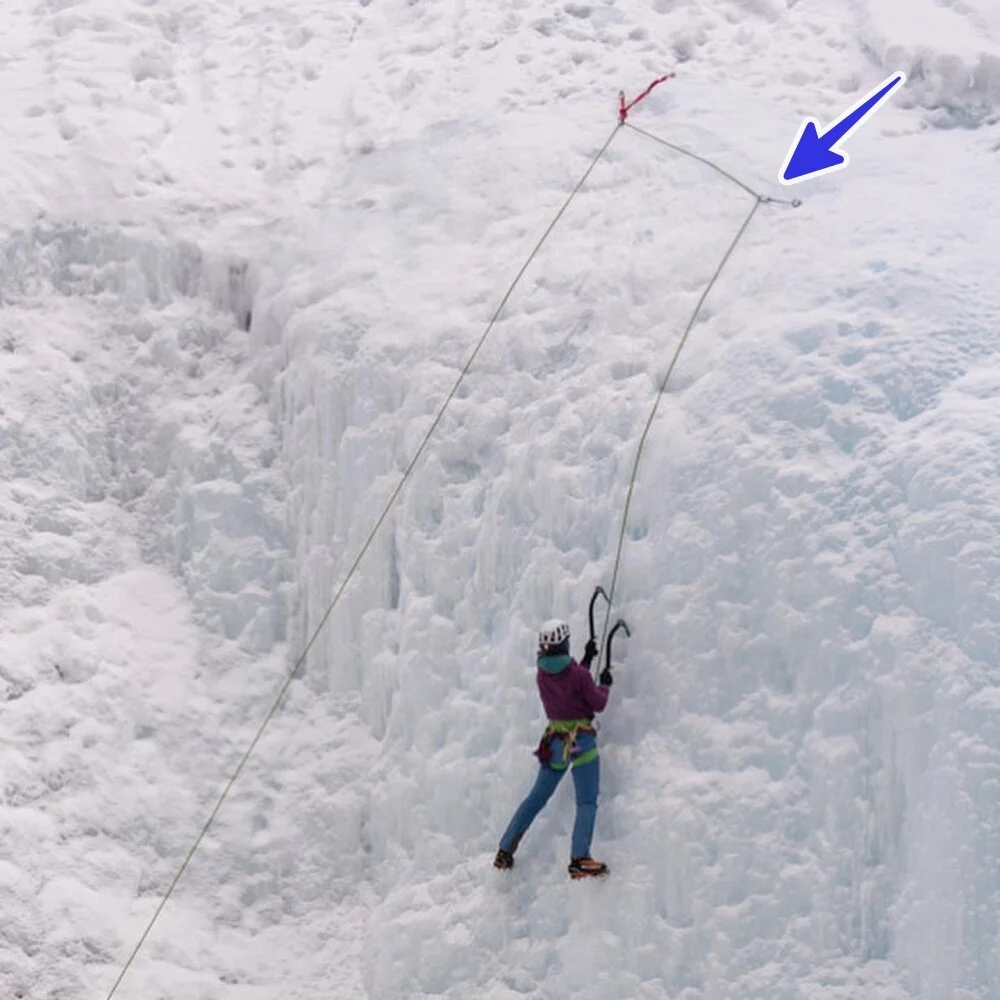
Using a directional protection point in top-rope ice climbing can significantly reduce risk and increase climber enjoyment. A top-rope directional should be used more often than not for many reasons.
One of the main ones: keep the belayer’s side of the rope away from the swinging ice tools of the climber. When rock climbing, it’s annoying when the belay rope slaps the climber in the back of the helmet, but in ice climbing this can be a major hazard. The climber can catch the belay rope behind them as they swing, which can result in either dropping the tool or putting a pick in the rope (I’ve seen both examples happen).
In addition, a top-rope directional helps to:
Keep the rope in line with the route and between ice tool placements (less chance of hitting the rope)
Keep the rope out of wet ice
Prevent a pendulum swing into hazards: ice pillars, hanging icicles, rock corners/dihedrals
Create two separate climbing lines from a single top-rope anchor
Keep the rope away from loose rock or sharp edges
Prevent swinging out away from the rock on steep mixed routes
Prevent climbers from going higher than you want them to (i.e. over a bulge, too close to an ice anchor, out of sight, etc)
Prevent the two strands of rope from crossing and twisting around each other
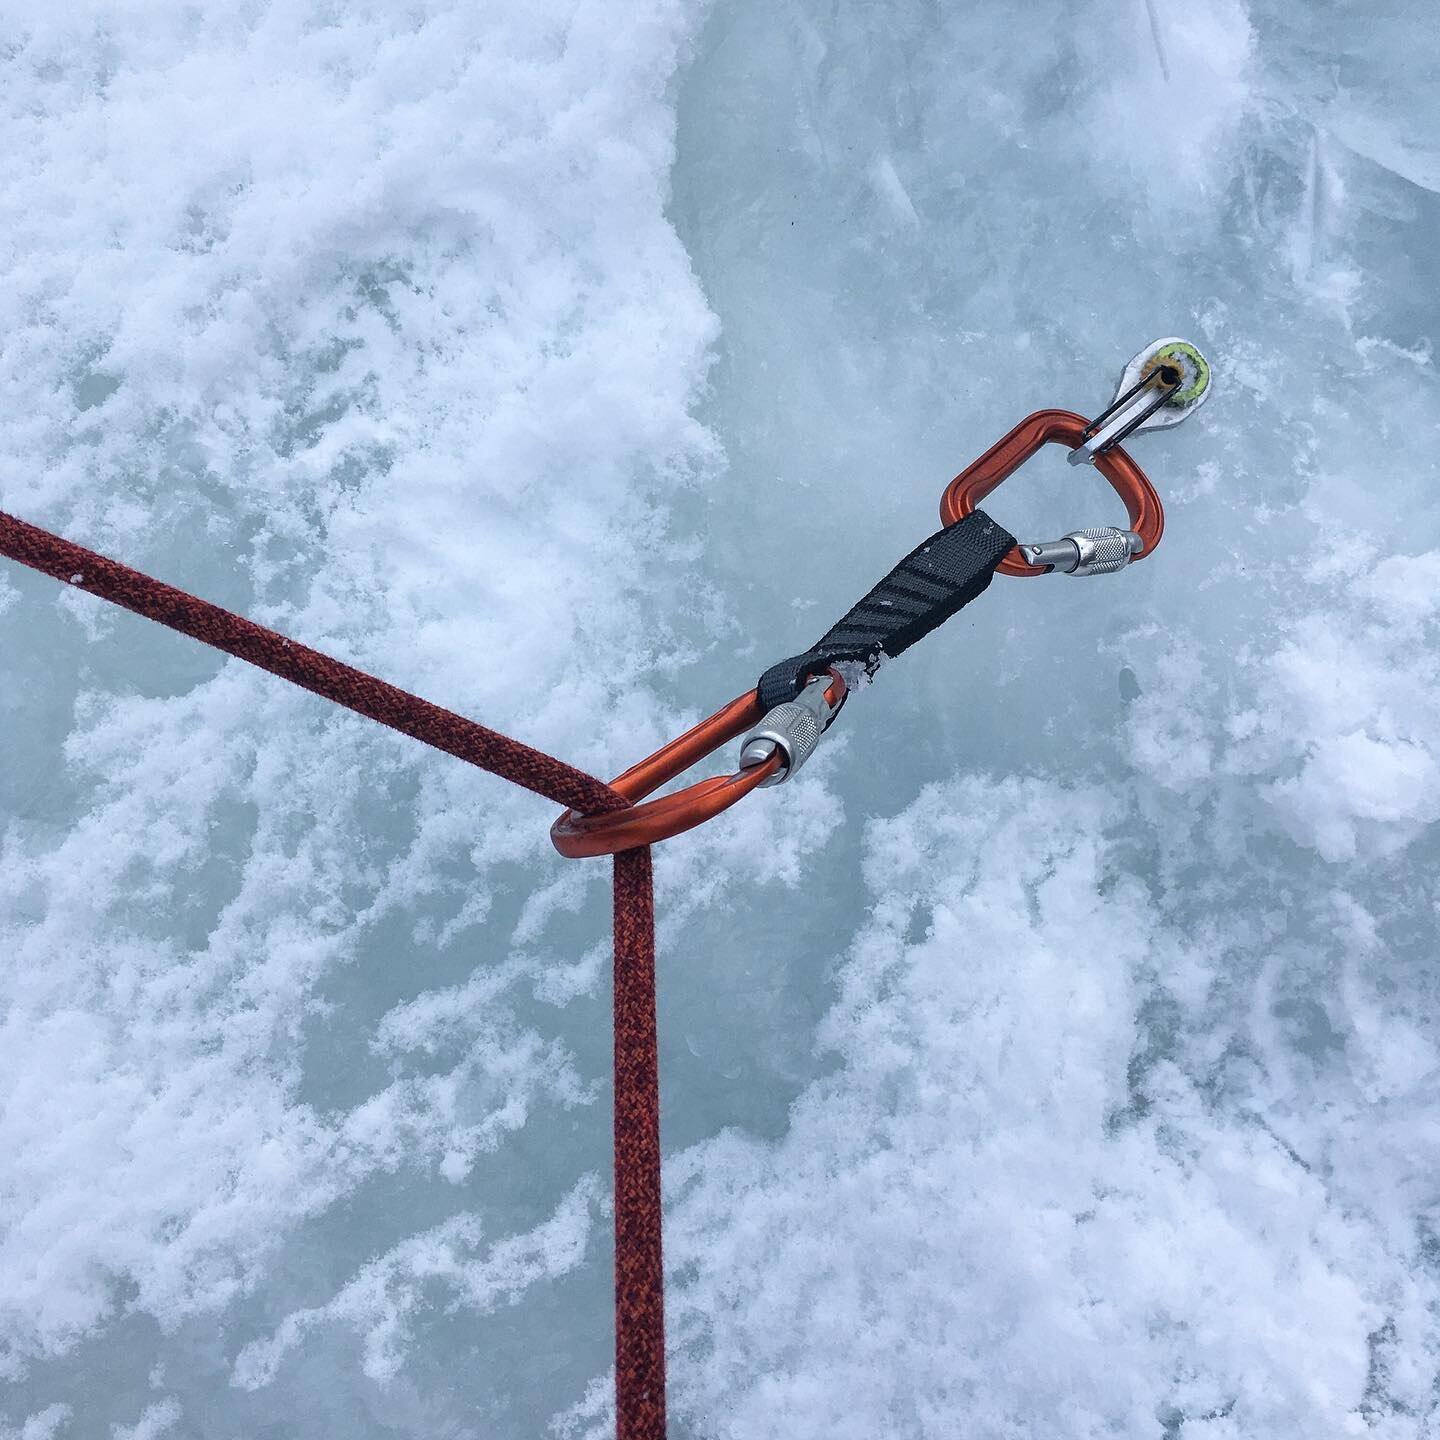
Almost any type of protection can be used as a top-rope directional including: ice screw, V-thread, tree, bolt or rock gear.
Some common concerns . . .
“Isn’t that some sort of American Death Triangle (ADT) vector, which increases forces on the main anchor and the directional?” It's not an ADT because the force doesn’t come to one point. Actually, having the directional decreases force on the main anchor, because the directional takes some of the force. For a good ice screw that can hold at least 10 kN, it’s not a concern.
“If the directional fails, doesn't it shock load the main anchor?” The directional should never fail. (If it's a warm day or the anchor is in direct sun and you're worried about the screw melting out, then making a V thread might be a better choice.) In the highly unlikely event that it fails, you're going to take a swinging lateral fall onto a very stretchy dynamic rope. Which could certainly be exciting, but not an issue for the main anchor.
Does it twist the rope? As long as the directional is below the elevation of the main anchor, the rope doesn’t get twisted. (In the small chance it does, try this simple trick to remove the twists.)
A caution: Be sure your rope is long enough. If you add a directional, this increases the length of rope required to lower to the ground. For an ice anchor directional of just a few meters as shown above, that shouldn’t be a problem. However, if it's a rock route with bolted anchors that are exactly placed, for say, a 30 meter climb, you might need more than a 60 meter rope if you add a directional. One more reason to always close your rope systems with a stopper knot.
If the directional is critical to avoiding a specific hazard, then a locker draw (below) can be a fine idea. (There are lots of other uses for a locker draw, learn them at this article.)