You don't need those dedicated prusik loops
Note - This post discusses techniques and methods used in vertical rope work. If you do them wrong, you could die. Always practice vertical rope techniques under the supervision of a qualified instructor, and ideally in a progression: from flat ground, to staircase, to vertical close to the ground before you ever try them in a real climbing situation.
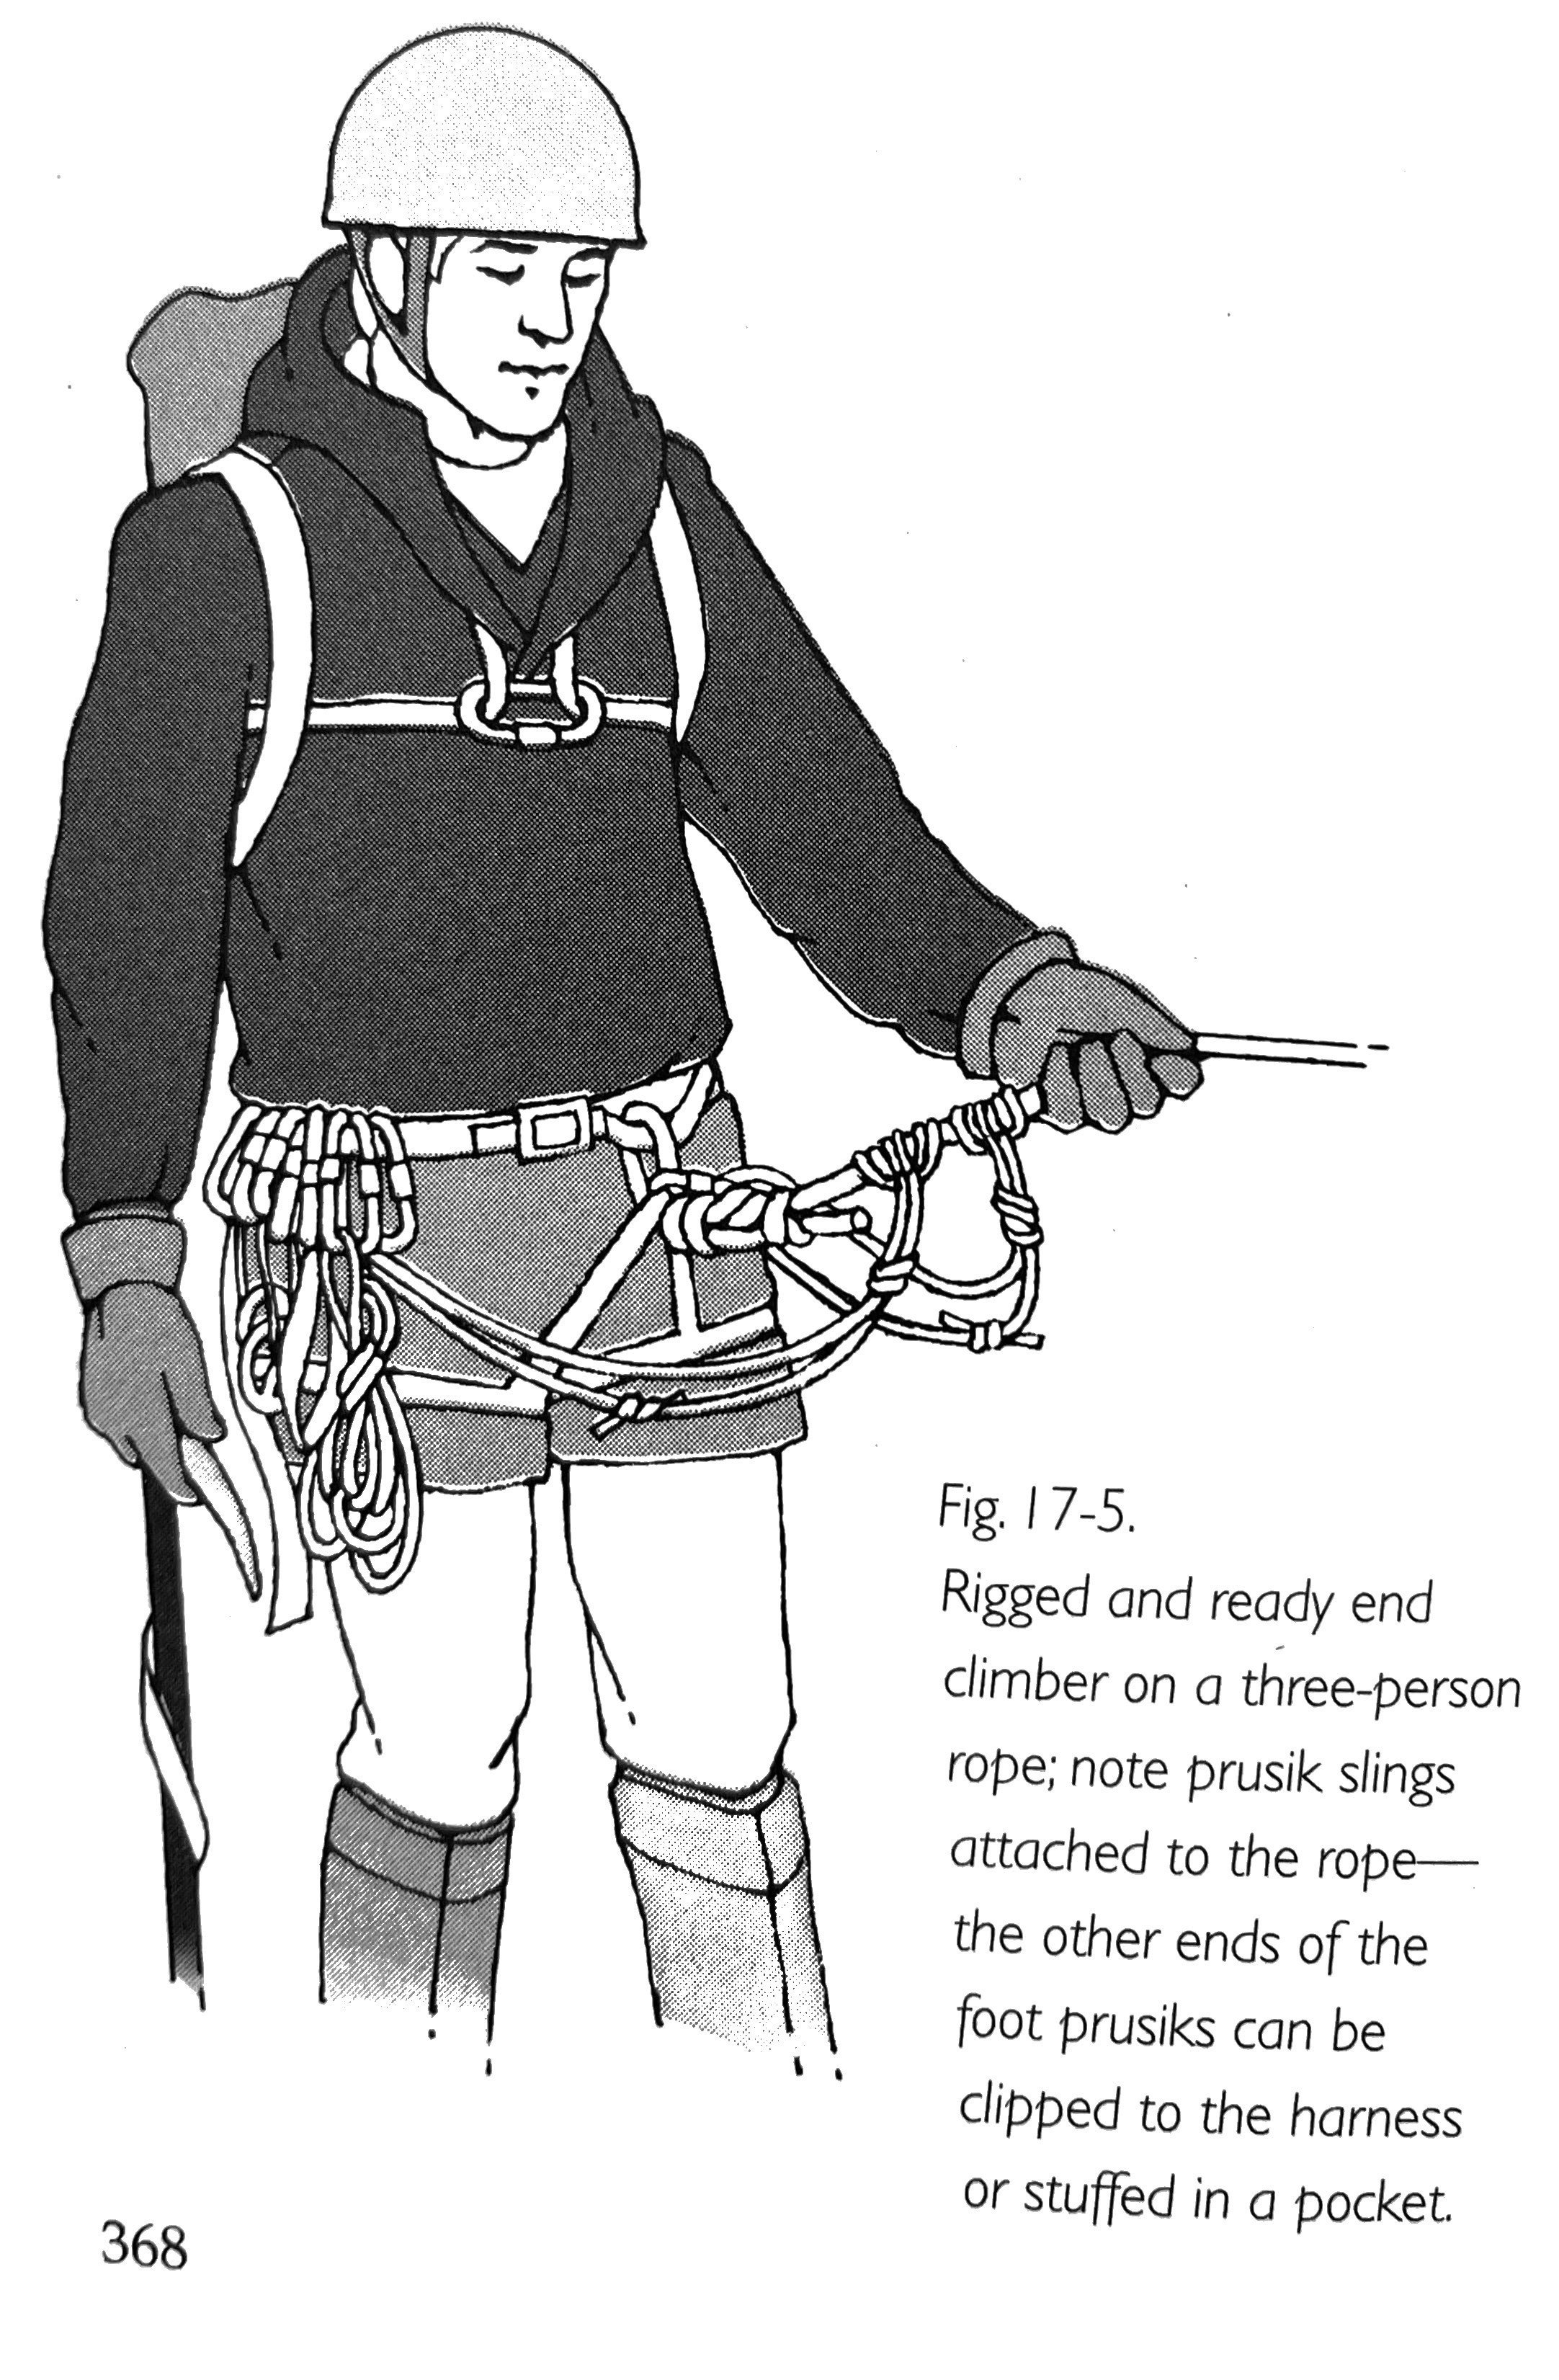
image: “mountaineering: the freedom of the hills”, 7th edition, mountaineers books
Old school crevasse rescue technique: anytime you step on a glacier, you have a waist and a leg prusik attached to the rope, immediately available for self rescue if you were to fall into a crevasse.
Some rock climbers even religiously carry a waist and a leg prusik on their harness, should they ever have a need to ascend a rope. (More on that below.)
This dogma has been part of traditional mountaineering classes for a long time. On some mountains with very high risk of crevasse falls, it's probably good practice. However, it may not be so useful outside of that.
Problem 1: Having long dangling prusiks on your rope when you’re traveling on a glacier a hassle. It’s going to be needed probably zero times in your entire climbing career, yet there they sit on every glacier climb, cluttering up the front of your harness. The instruction books say “clip it to your harness or shove it into a pocket”, both of which add to the cluster.
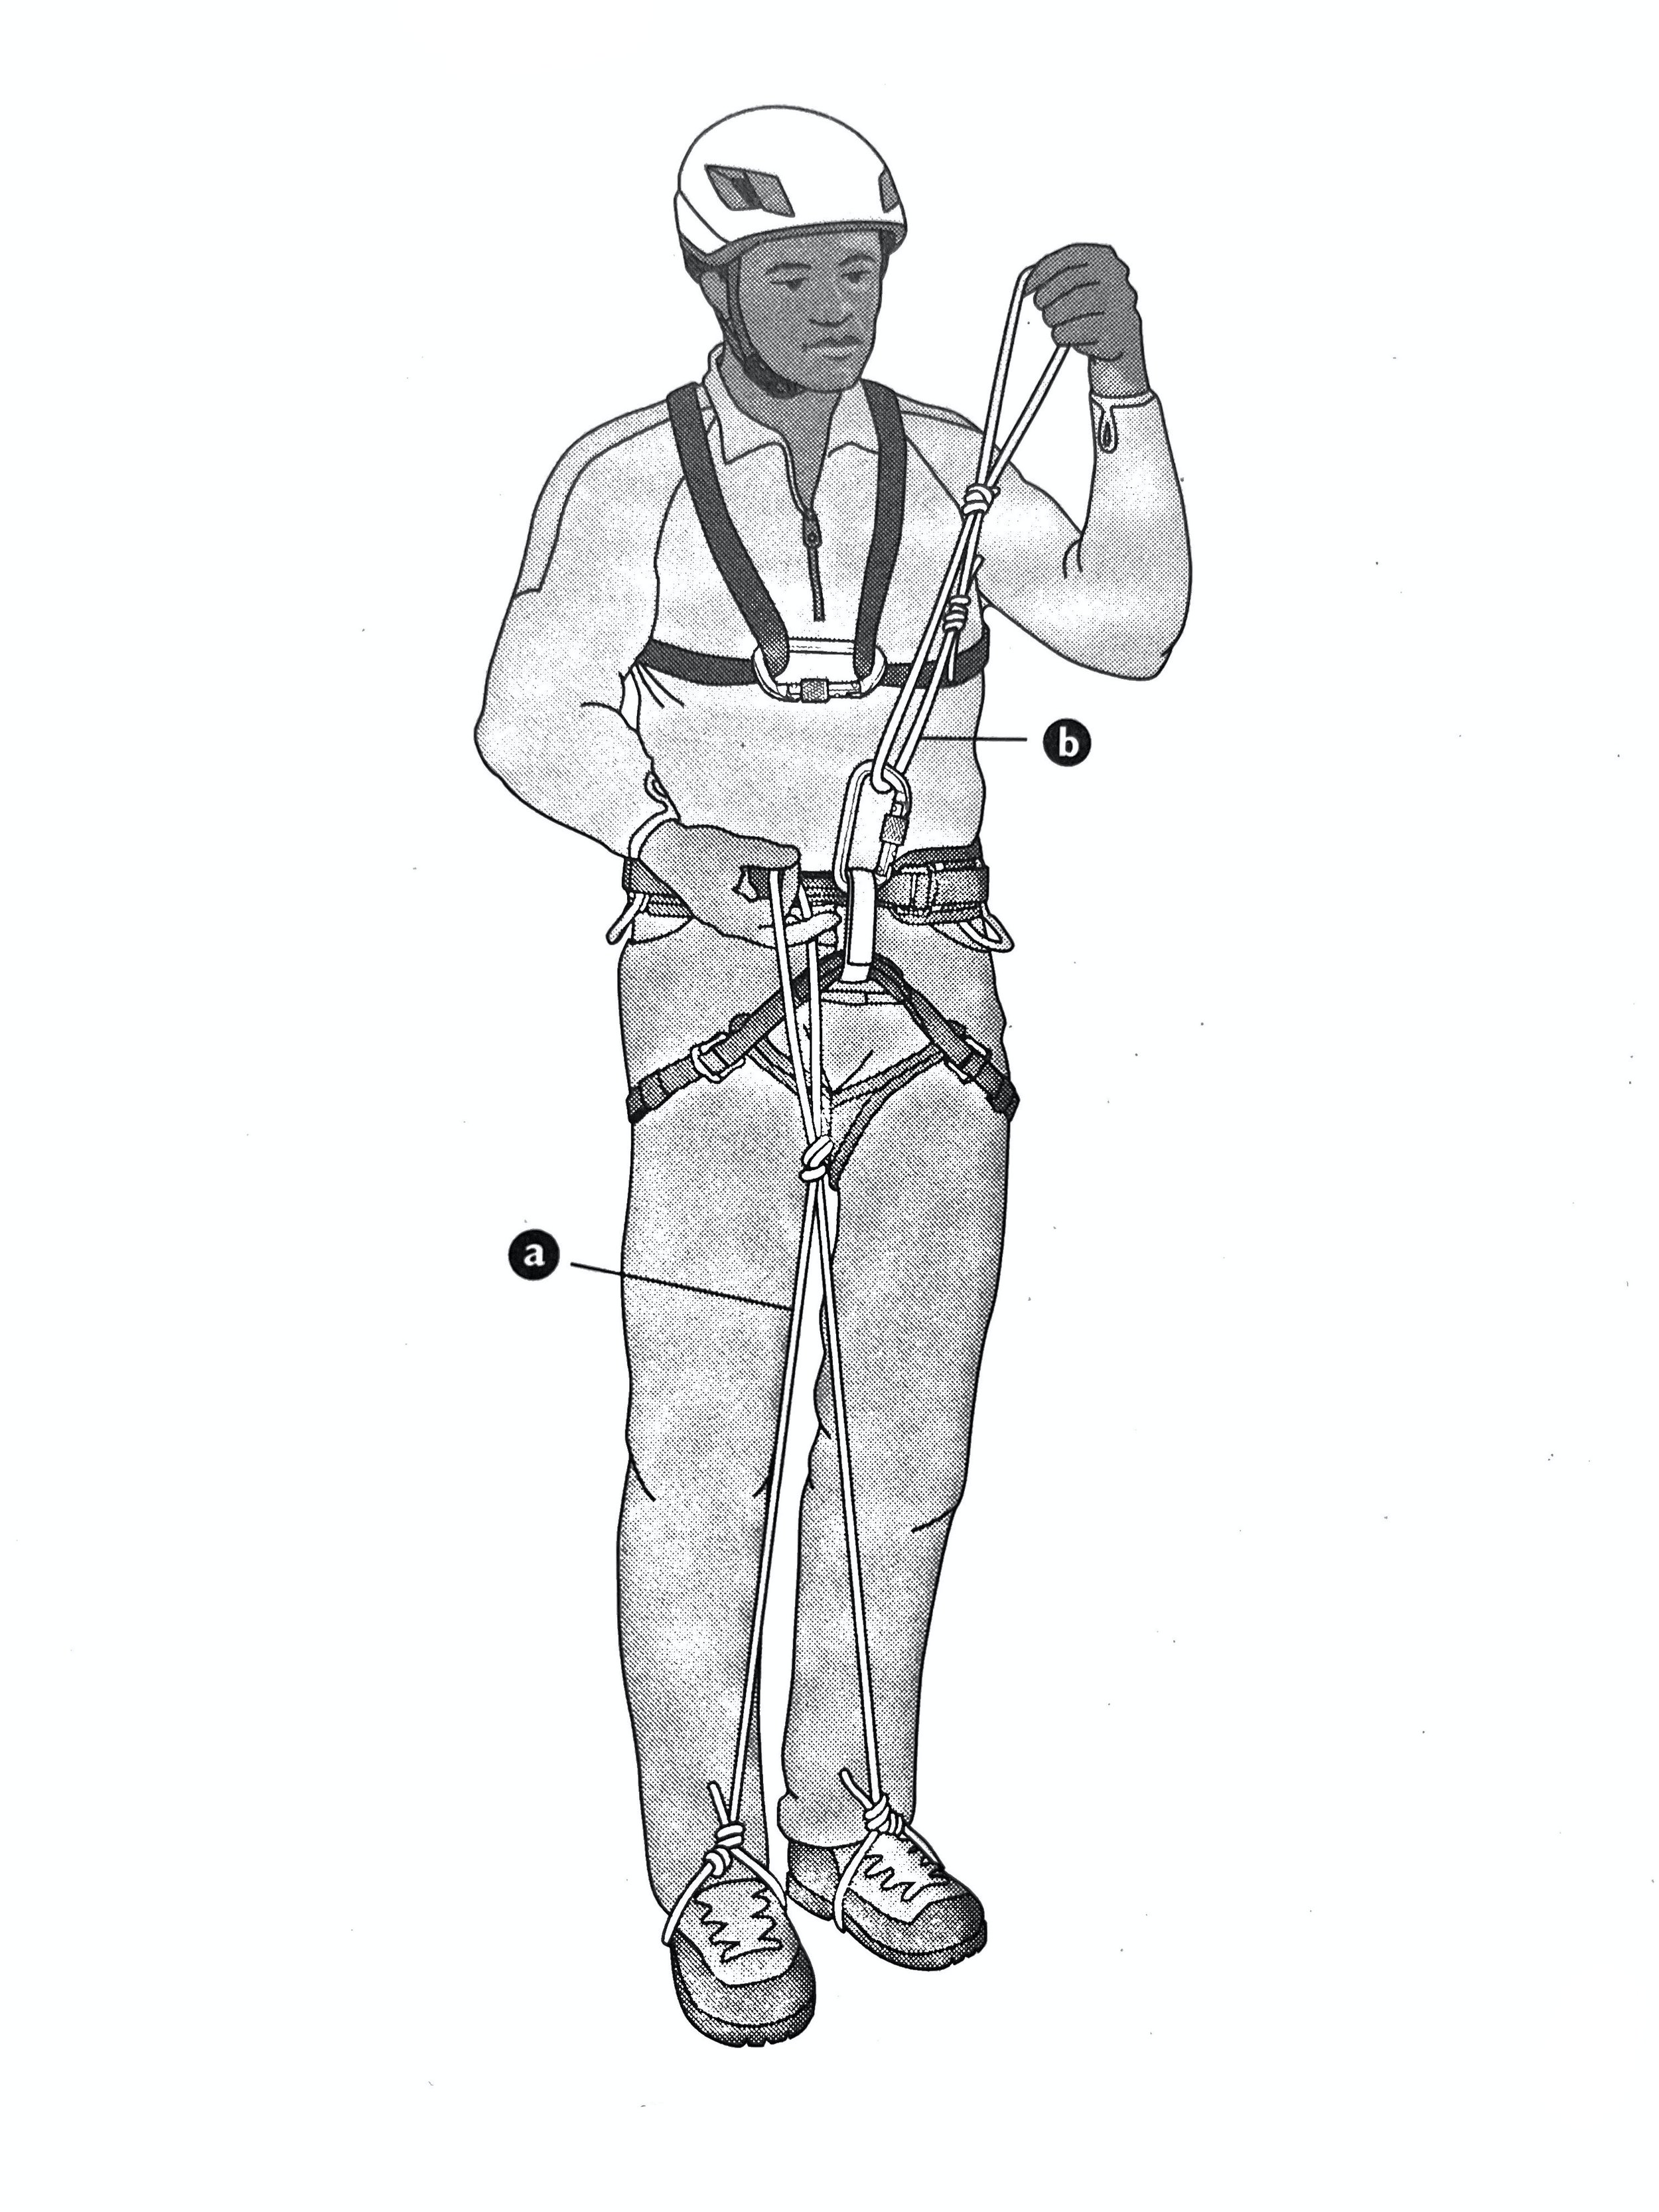
image: “mountaineering: the freedom of the hills”, 9th edition, mountaineers books
Problem 2: In a real crevasse fall, the rope is probably going to cut into the lip of the snow, making it difficult for you to get out of the crevasse entirely under your own power. The more modern approach is to rely on your teammates setting up a separate rope they drop down to you, preparing the lip of the crevasse so the rope doesn’t cut in. But that’s another topic . . .
And on the left, another way to potentially rig it, the “Texas prusik” system, with not one but two foot loops, which can get even more cluttered.
Maybe a good setup for cavers ascending a long free hanging fixed rope. For most alpine climbers, not so much.
Problem 3: You're carrying specialized rescue gear that you have very small chance of ever actually using, and can't really be used for anything else.
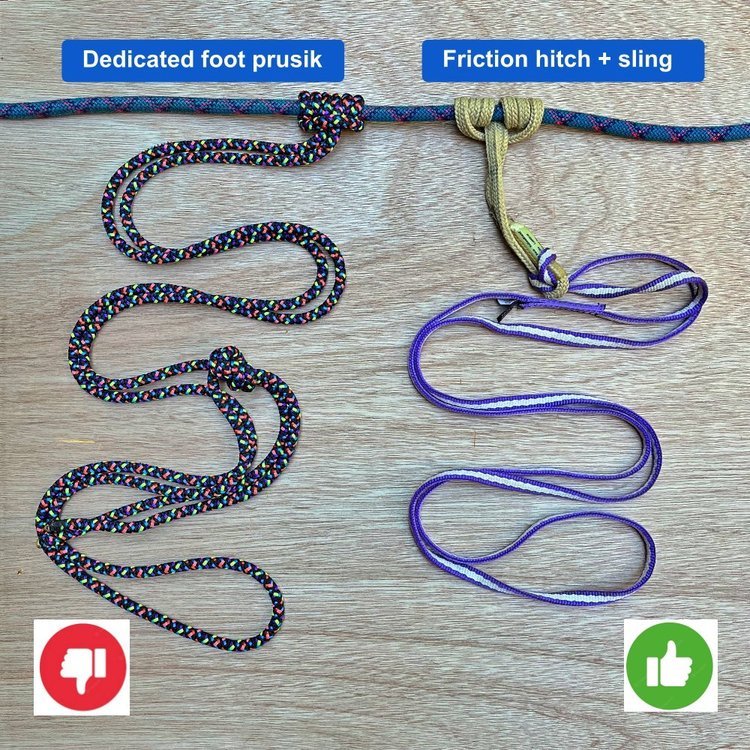
Here’s another way to think about ascending a rope: Instead of using a designated waist and foot prusik, how about improvising and getting creative with gear you’re already carrying?
There are LOADS of ways you can ascend a rope if needed with improvised gear. There are countless variations you could craft with a Tibloc, Micro Traxion, cordelette, Grigri, plaquette device . . . let’s look at one of the simpler ones for now.
Here’s some pretty typical gear to have a multi pitch climb:
short friction hitch carried for rappel backup (here the Sterling HollowBlock)
60 cm / single length sling
120 cm / double length cord (here the Edelrid Aramid, my new favorite for anchors)
With this basic gear, you can ascend a rope. Here's the set up:
Here's what it looks like connected to your harness. (Note highly recommended backup bight knot is not shown.)
The waist connection is clipped on the rope ABOVE your foot loop. An pneumonic to remember this is “waist away”, meaning the connection to your waist is always farthest away from you.
The 60 cm sling is girth hitched to the HollowBlock. This is somewhat optional, you could make a friction hitch directly with the yellow sling. However, having the friction hitch made with the HollowBlock makes it MUCH easier to slide, compared to a prusik hitch made with a Dyneema sling. It also adds a little bit of length, making ascending more efficient because you get more upward “throw” for each motion.
Note: I recently learned that Sterling specifically says in the documentation for the Hollowblock not to girth hitch another sling to it, as I’m doing here. Personally, I’m OK with it, as of course I’m tying backup knots. However, it's usually a good idea to pay attention to manufacturer recommendations, so I wanted to mention it. Another good option for a rappel backup sling/hitch that might be more appropriate in this situation is the Beal Jammy, a sewn friction hitch with an Aramid core and a nylon sheath. I just got one, and in early testing it’s looking great.
The HollowBlock is attached to the rope with a three wrap prusik. This is going to be a bit grabby; you may find an autoblock / French prusik can hold your weight and be easier to slide.
Important: Because this 60 cm sling is your only connection to the rope, tie a backup bight knot (an overhand on a bight is fine) every 5 meters or so and clip it onto your belay loop with a locking carabiner, creating a second point of connection.
What if you’re sport climbing and you don't even have a single length sling? Maybe use some quickdraws, ideally opposite and opposed, and be darn careful they don't come unclipped. Like I said, get resourceful.
The 120 cm blue sling is your foot loop. I really like the blue Edelrid Aramid slings (shown here) for lots of reasons, and one of them is that they make great friction hitches; they really bite down on the rope under load, but they’re also very easy to release and slide. Whatever you’re using to build your anchors - cordelette, quad, double runner - you can probably also use for a foot loop.
If you’re tall and the set up is too short, extend components with a locking carabiner. If you’re short and the set up is too long, tie a knot or two in a sling to shorten it up. (For me, about 5’ 10”, this setup as shown is great.)
So please, let’s stop teaching new climbers that they have to carry designated prusiks with them all the time, as standard practice.
Emergency rope ascending can even be helpful when rock climbing. A friend of mine recently had the following happen: they were traversing on a multi pitch route, took a fall, swung into overhanging terrain, and found themselves hanging in space about 5 meters below the last bolt. All they needed to do was ascend the rope and keep on climbing. They had everything they needed on their harness (pretty much the exact gear shown in the above photo) to climb back up the rope, but didn’t know how. (There was too much friction in the rope for the leader to haul them up; plus the leader didn’t know how.)
This turned into a call to the local search and rescue team, and my friend had to wait almost 4 hours to get rescued, hanging there in their harness! Ouch!
There is a crafty way to get out of this situation, and we will cover it in an upcoming article.
Finally, here's another way to think about glacier travel and crevasse rescue - you don't necessarily need to travel with prusiks on the rope at all. If a crevasse fall happens, put the hitch on the rope after, not before. This also applies to the person down the hole, not just the rescue team up top.
Here's a very interesting video on modern crevasse rescue techniques demonstrated by some top German guides. Note that none of them have prusiks on the rope while climbing. When they do add friction hitches to the rope, they use an “open” or untied, cordelette.
(YouTube: Pulleys: Crevasse rescue with pulleys on a glacier – Tutorial (15/18) | LAB ICE)


