

Alpine Tips

Rope management - clip knots to a big carabiner
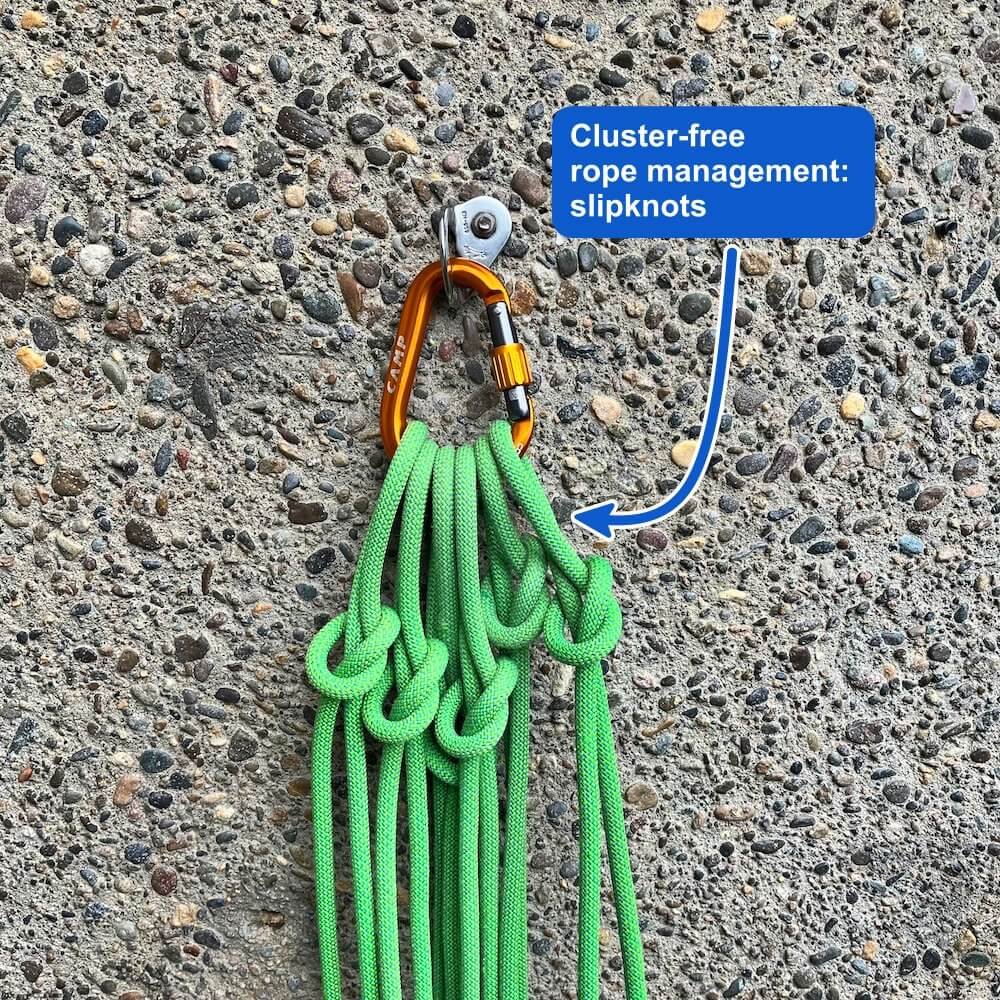
Here's a quick and simple way to manage the rope at the belay - tie slip knots as the rope comes in, and clip the loops to a largemouth carabiner. (Works even better on a big wall.)
(I first read this tip in the British climbing magazine “High” about 15 years ago, and I believe the article was written by Andy Kirkpatrick, so I‘ll give him credit here for the idea.)
Here's a link to a newer article on Andy's website that covers this in more detail.
Good rope management on a multi pitch climb is one of the keys to efficient belay transitions. There are various approaches to keeping your ropes tidy. Any system that keeps the rope out from under foot and from snagging on rocks, roots, cracks, and is easy to feed out snag-free on the next pitch, is a good choice.
What are some common methods?
If you're standing on a nice big ledge, lucky you, just make a “pancake pile”.
At a steeper stance, you can lay butterfly coils across your lap (lap coiling). I’m not a fan, as having 60 m of rope hanging right off of your tie in point is a hassle.
You can make coils and clip them into a sling. This can work pretty well, but unless you make tidy coils, you can get a royal mess can you try to feed out the rope.
Here’s an easy and elegant alternative for multi pitch rope management, that works for swinging leads or block leading.
Take a wide mouth locking carabiner, such as the CAMP Core Lock (above) and clip it somewhere to the anchor.
As the second climbs up and the belayer takes in slack, the belayer ties a slip knot every 10 meters or so and clips the loop to the big carabiner. Keep these loops loose so they are easy to untie; don’t snug them down or worry about dressing them very well. For a 60 meter rope, this will give you at most six knots in the carabiner, with the rope loops hanging about 5 meters or so down from the belay (hopefully not getting in the way of your partner as they get close to you). Do NOT lock the carabiner gate.
If the belayer is using a Grigri or plaquette style belay device guide mode, this is even easier.
When the second arrives at the anchor, the rope is in tidy loops and ready for the second to lead out. If you’re swapping leads, you’re all set to go, because the last loop to be clipped should be the first loop for the new leader to head out.
To belay the new leader, the belayer simply unclips a loop, pulls with one hand remove the slipknot, and the rope is ready to feed.
If you want to make your loops shorter, simply add a second large carabiner to the anchor and continue clipping slipknot loops to that after the first carabiner is full.
If you can, start with slightly larger loops, and make subsequent loops slightly smaller, so each loop will pull up and feed cleanly without getting tangled with the other ones.
If you're leading in blocks (with the same person leading several pitches in a row) simply rotate the carabiner clockwise 180 degrees, so the wide part is clipped to the bolt. Now the last loop that you clipped is the first one that you can unclip, which lets you block lead smoothly. (That's probably a little confusing; try it once and you'll figure it out.)
Sidenote: I received a surprising amount of hate mail when I posted this on Instagram. “This is a crazy system, I can't imagine trying to unclip a knot while I'm lead belaying, have you ever actually even tried this, blah blah blah . . .”
Idea: If you find it difficult to unclip a loosely tied slip knot with one hand and untie it, you should probably work on your skills. Yes, having a Grigri or similar assisted braking device can give you a momentary backup if you do need two hands for a second to untie the knot.
Plus, think about it this way: if your leader is moving fast, that probably means the climbing is easy for them, and they should be ready to take a momentary break of a few seconds about every 10 meters, so you can untie a knot. Conversely, if your leader is moving slowly, then the climbing is difficult. But, because they’re moving slowly, that easily gives you time to reach down and untie the knot. Either way, the system works.
The purpose of Alpinesavvy is to give ideas and information, not advice. I'm certainly not saying everybody has to use the system, but don't knock it until you try it.
Finally, keep in mind the source, Andy Kirkpatrick - he knows his stuff.
And, speaking of Andy, let's look at a couple of alternatives from his excellent website.
You don't actually even need a carabiner at all. You can tie off the rope onto the arms of the cord that makes up your anchor.

Image: https://www.andy-kirkpatrick.com/blog/view/rope-belay-wrangling
Or, you can make a sort of daisy chain. (I have not tried this variation, but it looks like it should work.)

Image: https://www.andy-kirkpatrick.com/blog/view/rope-belay-wrangling
Here's a nice video clip from Petzl via Facebook that shows a similar system. (Sorry I can’t embed this video on my webpage, you need to click the link to see it.)
This works slightly differently for big wall climbing.
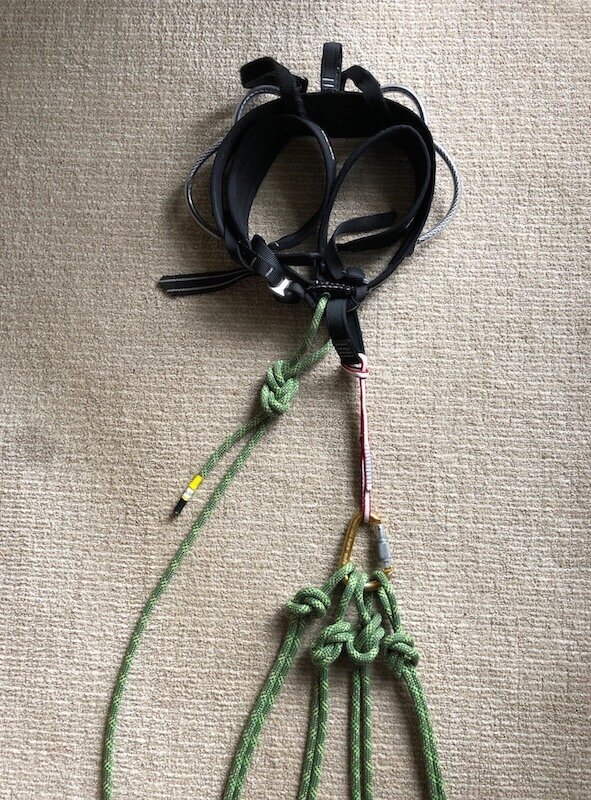
As the second ascends the fixed rope and cleans the gear, they have a large carabiner hanging from a short sling (usually about 30 cm) from their belay loop. The short sling is somewhat optional, but it declusters the front of your harness a bit and makes it slightly easier to clip in the knots. The second ties a backup knot every 10 meters or so and clips it to the carabiner.
This backup knot system is pretty standard practice in big walling, as it does two main things: 1) Protects the cleaner from a huge fall in the event their ascenders become detached from the rope, and 2) Helps prevent the rope from blowing / swinging sideways and getting hung up somewhere where you don't want it to be.
The one downside to this technique: as the cleaner nears the top of the pitch, most of the weight of the rope hanging off of their harness instead of having it hanging weightlessly beneath them. If there isn't a knot in the end of the rope that might get snagged, and if the pitch goes pretty much straight up, and if there is no wind, it might be a better call to not tie the backup knots and just let the rope hang free.
The trick is when you get to the top, you keep all of the loops tied into the carabiner, and transfer that onto the anchor. Ta dah, instant rope management for the lead rope, everything is already tied up in short 5 meter long loops, ready to belay the leader. No rope bag needed. As mentioned above, if you’re leading in blocks, you unclip the loops for a moment and reverse them, so the correct knot is on top for whoever is leading the next pitch.
Another tip for a big wall climbing: this same system of rope management can work for the haul rope also. As you pull up your piggage, generating slack in the haul rope, simply tie off a slipknot loop every 10 meters or so to keep things tidy. (But a dedicated rope bag usually is best.)
For big wall climbing, this is how the harness of the second would look when cleaning and tying the back up knots.

National Park Service technical rescue manual - free PDF
The search and rescue (SAR) experts in the National Park Service, with techniques developed over decades of experience, have a technical rescue manual. It's available online as a free PDF download. If you have more than a passing interest in self rescue, this is a good place to take a deep dive.
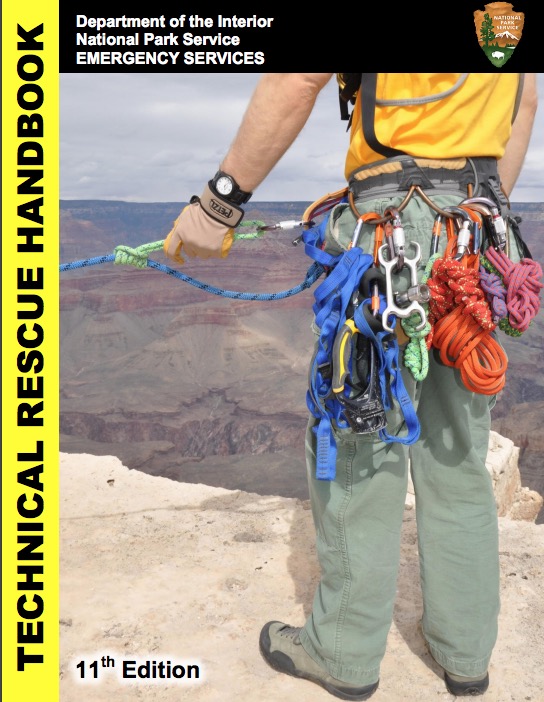
image: Department of interior National Park Service
National Park Service SAR (Search and Rescue) professionals, with skills honed over decades at parks such as Yosemite, Grand Teton, and Grand Canyon, have a technical rescue manual. It’s online as a free PDF file, hosted on the Mountain Rescue Association website, MRA.org.
If you want to get into some serious rope geek material, this is some solid reading. This 290+ page document pretty much covers it all; below is a screen grab of the table of contents to give you an idea.
It starts with the basics and then gets increasingly technical and complex. Even if you're not on a SAR team, there are some expert techniques and tricks here that can benefit anyone interested in small team self rescue. Check it out.
Note: Some of the more advanced techniques have evolved since this was published in (I think) 2014. Most recreational climbers won’t need to know the detailed benefits of the dual tension system over the older style main and belay, for example. If you're looking for a more up-to-date reference, check out “The Technical Rescue Riggers Guide, Third Edition” by Conterra.
(And, in case the MRA.org link above doesn’t work, you can see a copy here.)

image: Department of interior National Park Service

Debrief after your climb
Every trip, summit or not, is an opportunity to reflect, learn and improve. The best way to do this is with an honest talk / debrief session with your partner(s) ASAP after your climb.
Treat every climb, summit or not, as a learning experience to analyze what you did and to improve your performance next time you’re out. A great way to do this: a post climb “debrief” talk with your team (even if that’s just you and one partner). On the car ride home, the hike out, or at dinner heading home, when details are fresh in your mind, is a great time to discuss things like:
Time - How long did the climb take? Was this faster or slower than what you planned for? Look at the segments of your climb (approach, climb, descent, hike out); Were your estimated times close for each of those? What factors contributed to the overall pace/speed of the team? (If you hit your planned time within plus or minus one hour for each day, you can pat yourself on the back for good planning.)
Technical aspects - What was the technical crux of the route? Was the entire team prepared for it? Were there any aspects that could be improved to be faster or safer next time? (Think simul climbing, downclimbing rather than rapping, rope management, order of team members.)
Routefinding - Was your pre trip route planning adequate? Were you ever “lost?” Did you camp in the best spot, or did you notice a better place (and mark it with GPS or on the map for next time?) Did you take the best line, for ascent and descent? Did you take adequate photos or notes so you remember the details? Did you record a GPS track? Can you draw your route and save it in CalTopo, for future reference or to share with someone else?
Gear and food - Was the gear you brought suitable? Did you have too much or not enough or anything? (rock pro, snow pro, ropes . . . ) What pro did you bring that you did not use? Was your food sufficient and tasty?
The main question: What would I do differently next time?
Now, when you get home, if you write these details in your ongoing climb journal, you’ll really have a good record of the trip that you can learn from yourself, or pass onto someone else when they try the route. (The benefits of keeping a climb journal are covered in another Tip coming soon.)
Make a regular habit out of reviewing your climb journal, and look for repeating patterns. Are you consistently making similar “mistakes”? (For me, this is typically forgetting the lip balm and bringing a bit too much food.)
Hey, don’t just take my word for it. Expert alpinist Steve House made a video on the topic, as part of his excellent five part “Alpine Principles video series on YouTube, highly recommended. Check it out below.