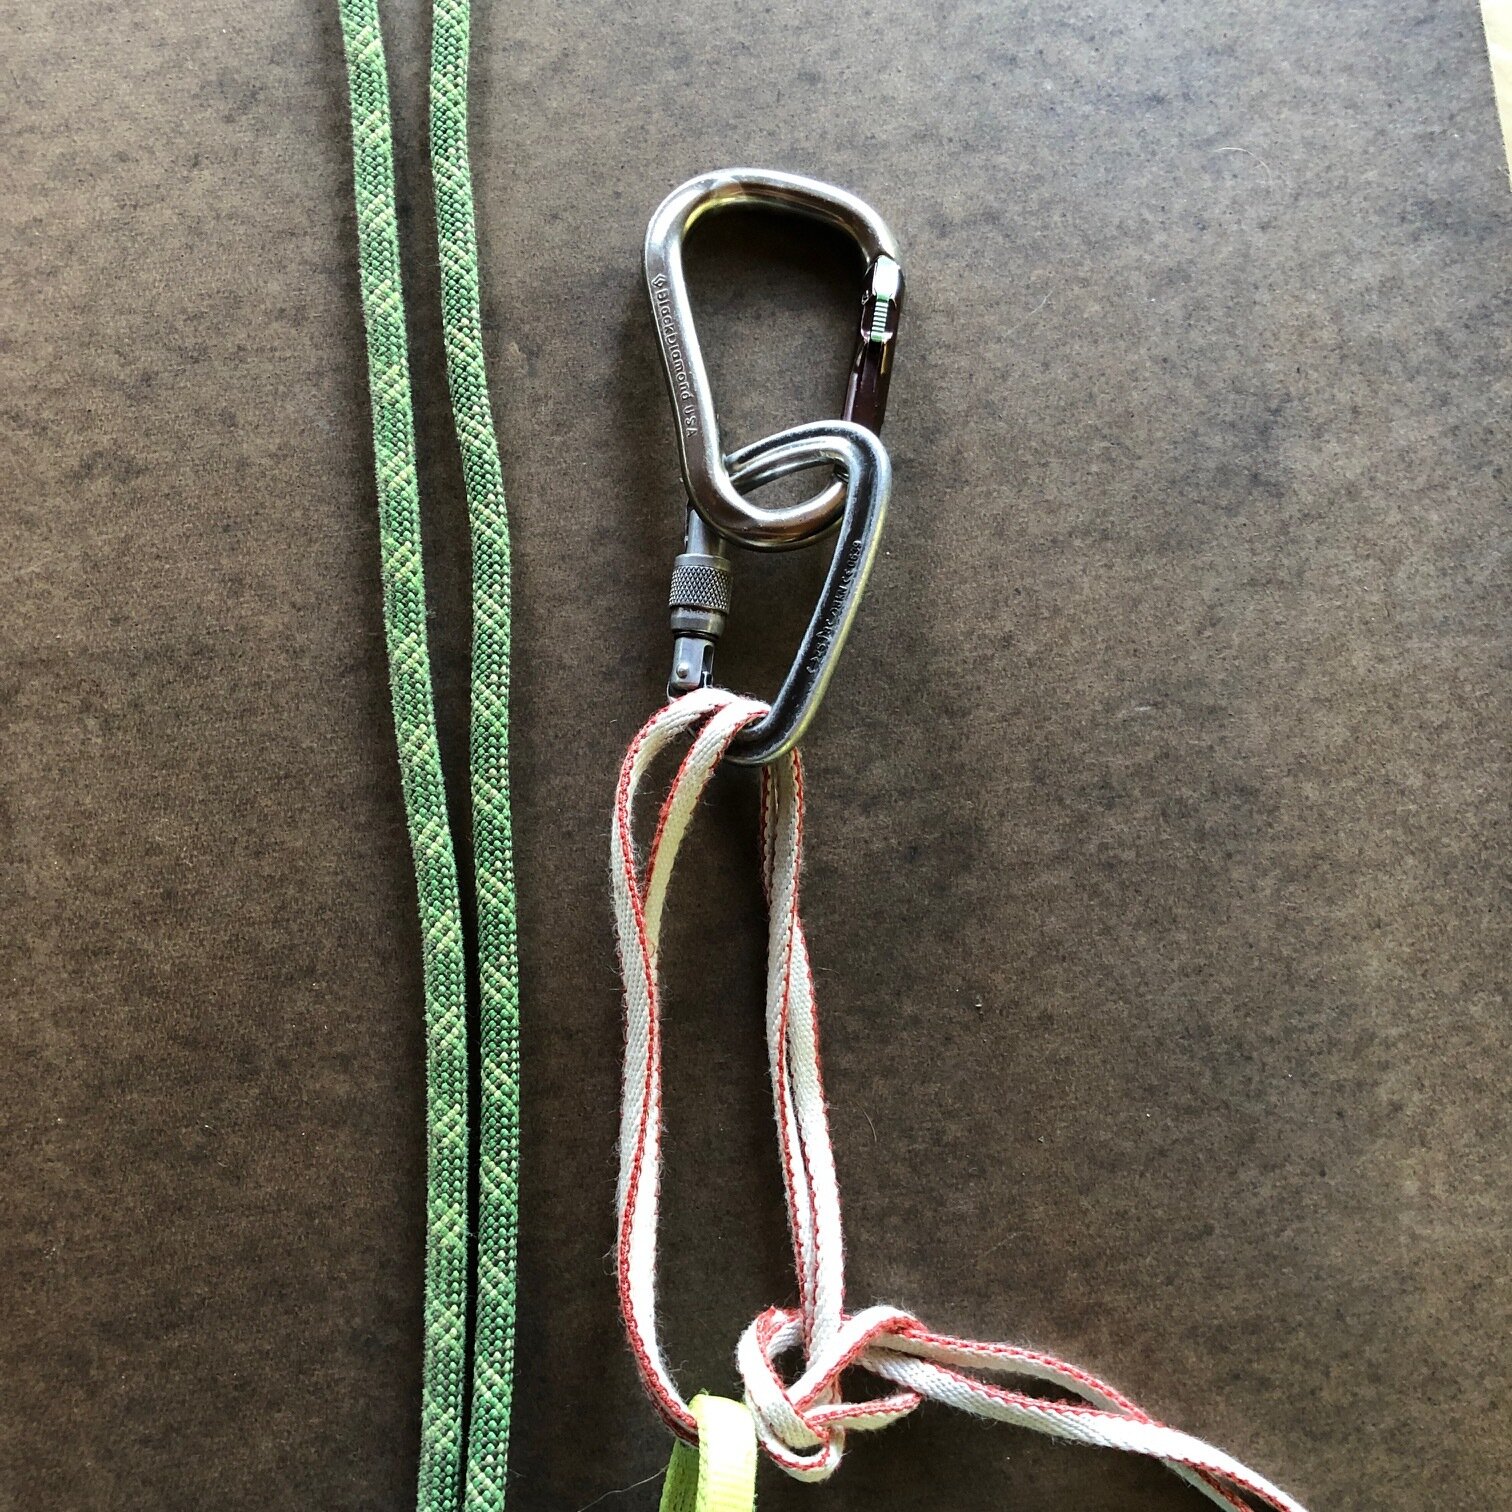
A slick carabiner rappel brake
Note - This post discusses techniques and methods used in vertical rope work. If you do them wrong, you could die. Always practice vertical rope techniques under the supervision of a qualified instructor, and ideally in a progression: from flat ground, to staircase, to vertical close to the ground before you ever try them in a real climbing situation.
If you forget your rappel device, drop it (whoops), or maybe you’re on a really long alpine climb with just a short rappel and don't even want to bring one to save weight (Mt. Olympus, I'm looking at you) the somewhat old-school technique of a carabiner brake can offer a smooth rappel with gear you already have.
Now, before you roll your eyes about this being an old-timer technique from Freedom of the Hills version 2.0, (when harnesses were made from braided blackberry vines and Mt. St. Helens was a real mountain), stay with me. This method has a place in your tool kit, and uses just three lockers.
What are some other options if you or your partner drops your rappel device?
You can rap with a Munter hitch and a single carabiner. But, it’s probably going to twist the hell out of your rope unless you use the correct technique.
Your partner can lower you, probably directly off the anchor. Learn lots of ways to do this at this article.
Safety note 1: There is a remote chance that the rope might unscrew a carabiner gate, so please keep an eye on this. In the example below, I’m using two auto locking carabiners to lessen the chances of this happening. Like I said, this is not a common-practice set up, more of an emergency kind of a thing.
Safety note 2: The friction with this technique will probably be less than using a standard rappel device. Maybe a LOT less. It depends on variables like your weight, the diameter of your rope and whether it's old and crusty or new and slick. Always use a third hand autoblock backup, and gloves are a fine idea also. Because of this diminished friction, it's probably best to use this technique in less than vertical terrain. Practice it in a controlled environment like a staircase to get a sense of how fast your rap is before you try in the real world.
You can generate slightly more friction by rotating the carabiners so the small ends are together.
This can be a fine place to use a locker draw to slightly extend your rappel.
If you don't have three locking carabiners, you can use two regular ones, opposite and opposed, on the bottom, clipped to your belay loop.
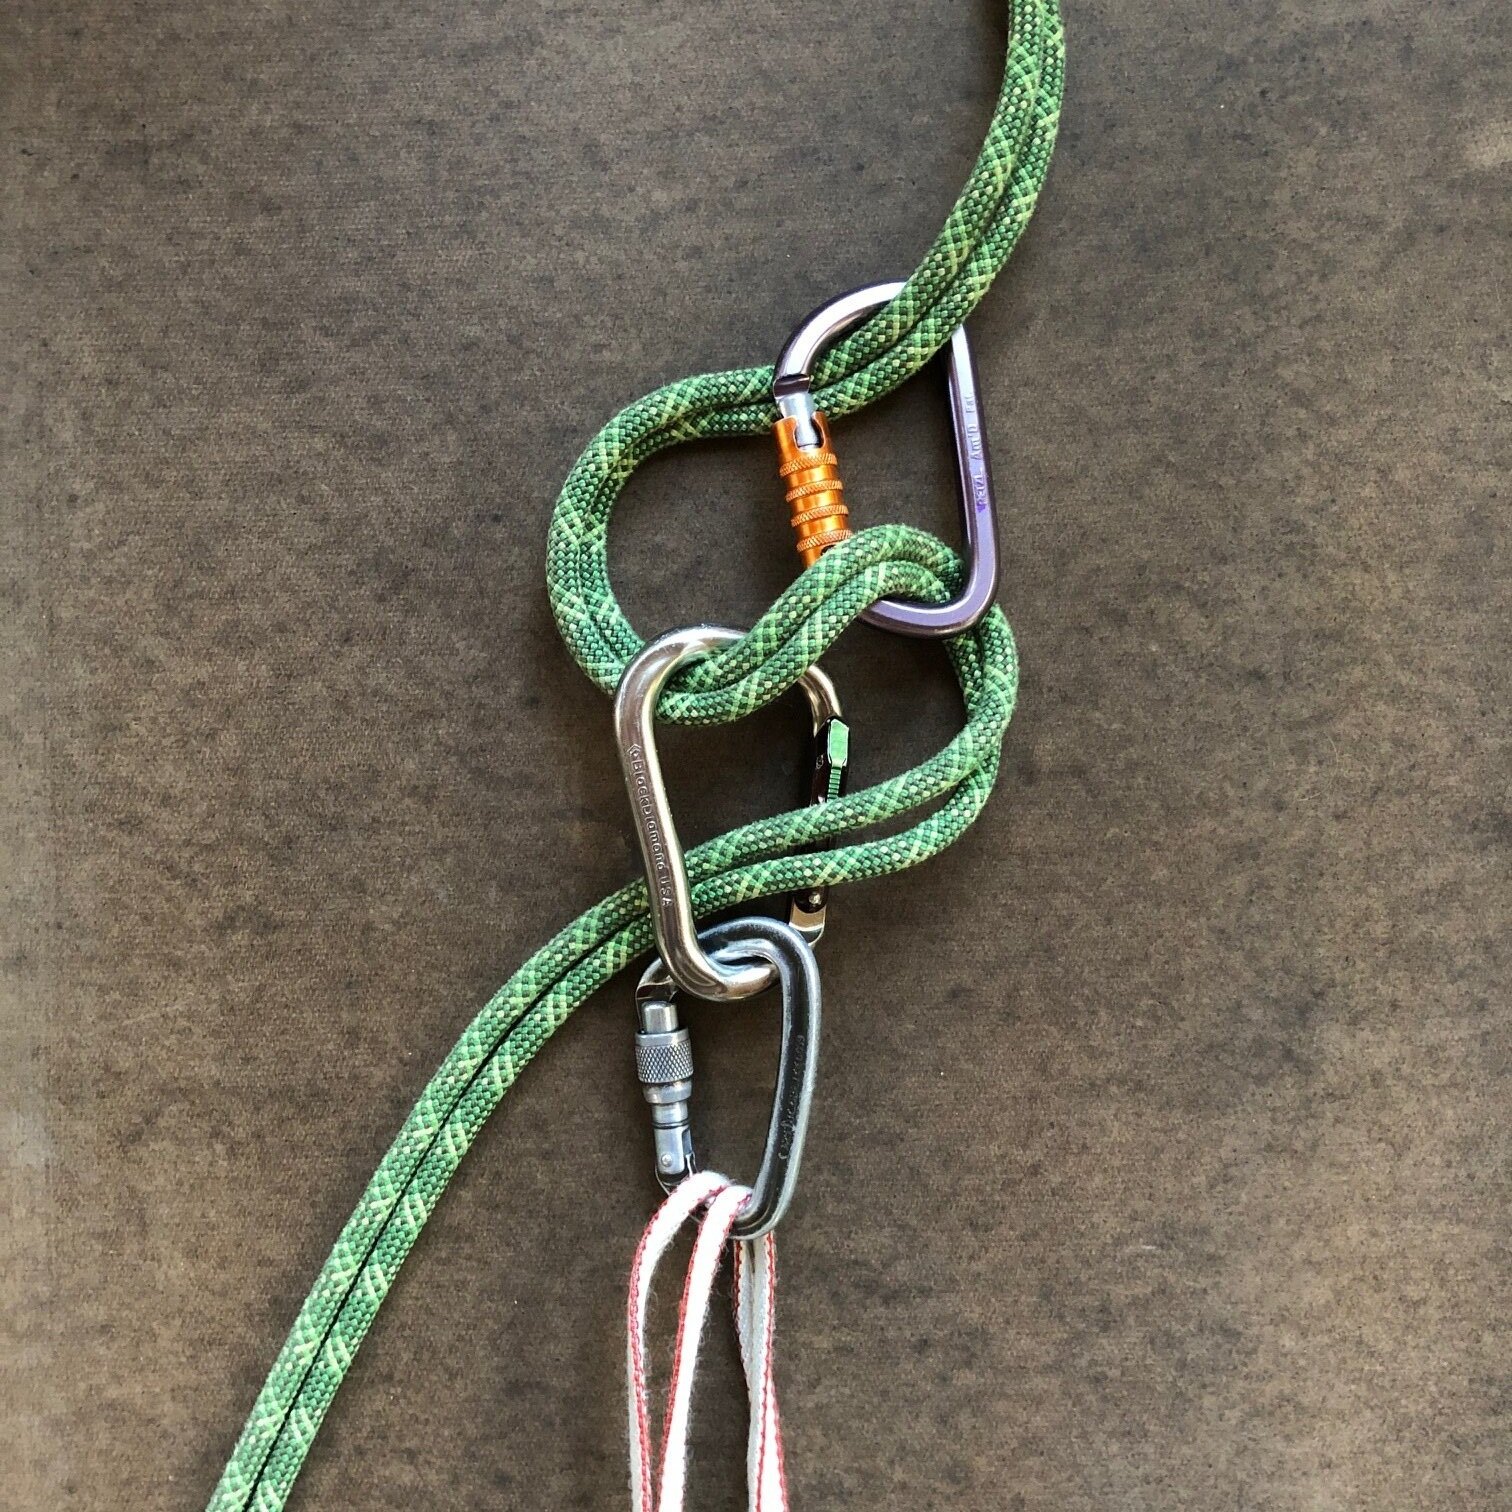
As with other flavors of carabiner brake rappels, when you remove your rope, it's really easy to drop a carabiner, because at least one of them is not attached, in this case the top one with the orange sleeve. So watch this when you take it apart.
If you're really short on gear, you can do this with two carabiners instead of three. The third carabiner is mostly to prevent the rope from rubbing on your harness or rappel extension. If you decide to use only two carabiners, keep a close eye on your rope.
Here’s how to rig it.
A rappel extension is not required for this carabiner brake, but it's good practice to use one, so we're showing it. And, as mentioned above, using a third hand /autoblock backup is usually good practice, but it's not shown here for clarity.
For a rappel extension, here we’re using a double bowline tied through the belay loop. (This is a crafty yet unconventional way to make a rappel extension, which we're going to cover in another tip soon.) You don't have to do it this way, use whatever kind of extension you like Yes, this sling is tied through the belay loop. There is no problem attaching your tether to your belay loop, it’s plenty strong, but if you prefer to go through your tie in points, then go for it.
1 - Clip a locking carabiner to your rappel extension.
2 - Clip a second locking carabiner to the first one.
3 - Pass a bight of both rappel rope strands through the second carabiner.
4 - Clip a third locking carabiner to these two strands of rope, and then . . .
Clip that third carabiner onto the strands going to the anchor. Check that ALL carabiners are locked.
Under load, it looks like this:
And finally, here’s a short Instagram video from Guide Cody Bradford showing how it's done.


