Double loop bowline for a rappel tether
Using a rappel extension is a good idea for a lot of reasons, which we cover in detail here. Why might you want to use a rappel extension?
Easier to use a third hand / autoblock backup
Lets you use a stacked, or pre-rigged, rappel
Easier to rig your rappel device correctly, especially if you have on lots of clothing
Less chance of clothing getting caught in the rappel device
There are lots of ways to rig it, but I sure learned a new one from Mark’s class. It has a few benefits and is definitely a Crafty Rope Trick (CRT)!
A double loop bowline, tied through the belay loop (or tie in points). Why is this cool?
Easy to untie after its been loaded, much more so than an overhand knot.
Two redundant loops - for anyone who’s not too excited about rappelling off of a single loop of webbing, this is an elegant solution.
Because it's tied in a loop and does not cinch down like a girth hitch, it's fine to use this on your belay loop. Using your belay loop instead of your harness tie in points can make this more comfortable when it's loaded. If you prefer your tie in points, that works fine too.
Concerns . . .
“OMG, a ring loaded bowline, you should never do that, Yer Gonna Die!” If the end of the rope is anywhere near the knot, that’s probably correct. But here were using a sling, not a rope. In this configuration, it breaks at about 18 kN. As with all knots, tie it correctly and dress it well. When rappelling you're going to put around 1 kN on this sling, so no worries.
“OMG, a knot in Dyneema, you should never do that, Yer Gonna Die!” I feel that knots in Dyneema are acceptable in most climbing situations, which we cover in this article. But if you don’t, feel free to use a double length nylon sling; that works fine too.
“OMG, you’re attaching a tether to the belay loop! You're not supposed to do that!” Even though a belay loop is rated to 15+ kN, some folks are still hesitant to girth hitch a sling directly to it. But notice, that's not what's happening here. A girth hitch cinches down on the belay loop (and if you leave it pretty much permanently attached to your harness, which is NOT recommended) and can conceivably damage the loop through repeated rubbing in the same spot. However, this is a tied loop, not a girth hitch, which puts zero significant strain on your harness. But, having said that, if you're more comfortable using your two tie in points, go for it. We cover it at this article.
How strong a ring loaded bowline in Dyneema?!
Double loop bowline in Dyneema sling being ring loaded, breaks around 20 kN. From HowNot2 (about 6:30 in the video). A belay loop usually breaks around 15 kN, so think about that for a moment . . .
Here's how to tie it. This will probably be a new knot for most people, but it's simple and once you get it down, you can literally tie in a few seconds.
You’ll need a double length/120 cm sewn runner and your harness. First, a step-by-step with photos. There’s a video link at the bottom.
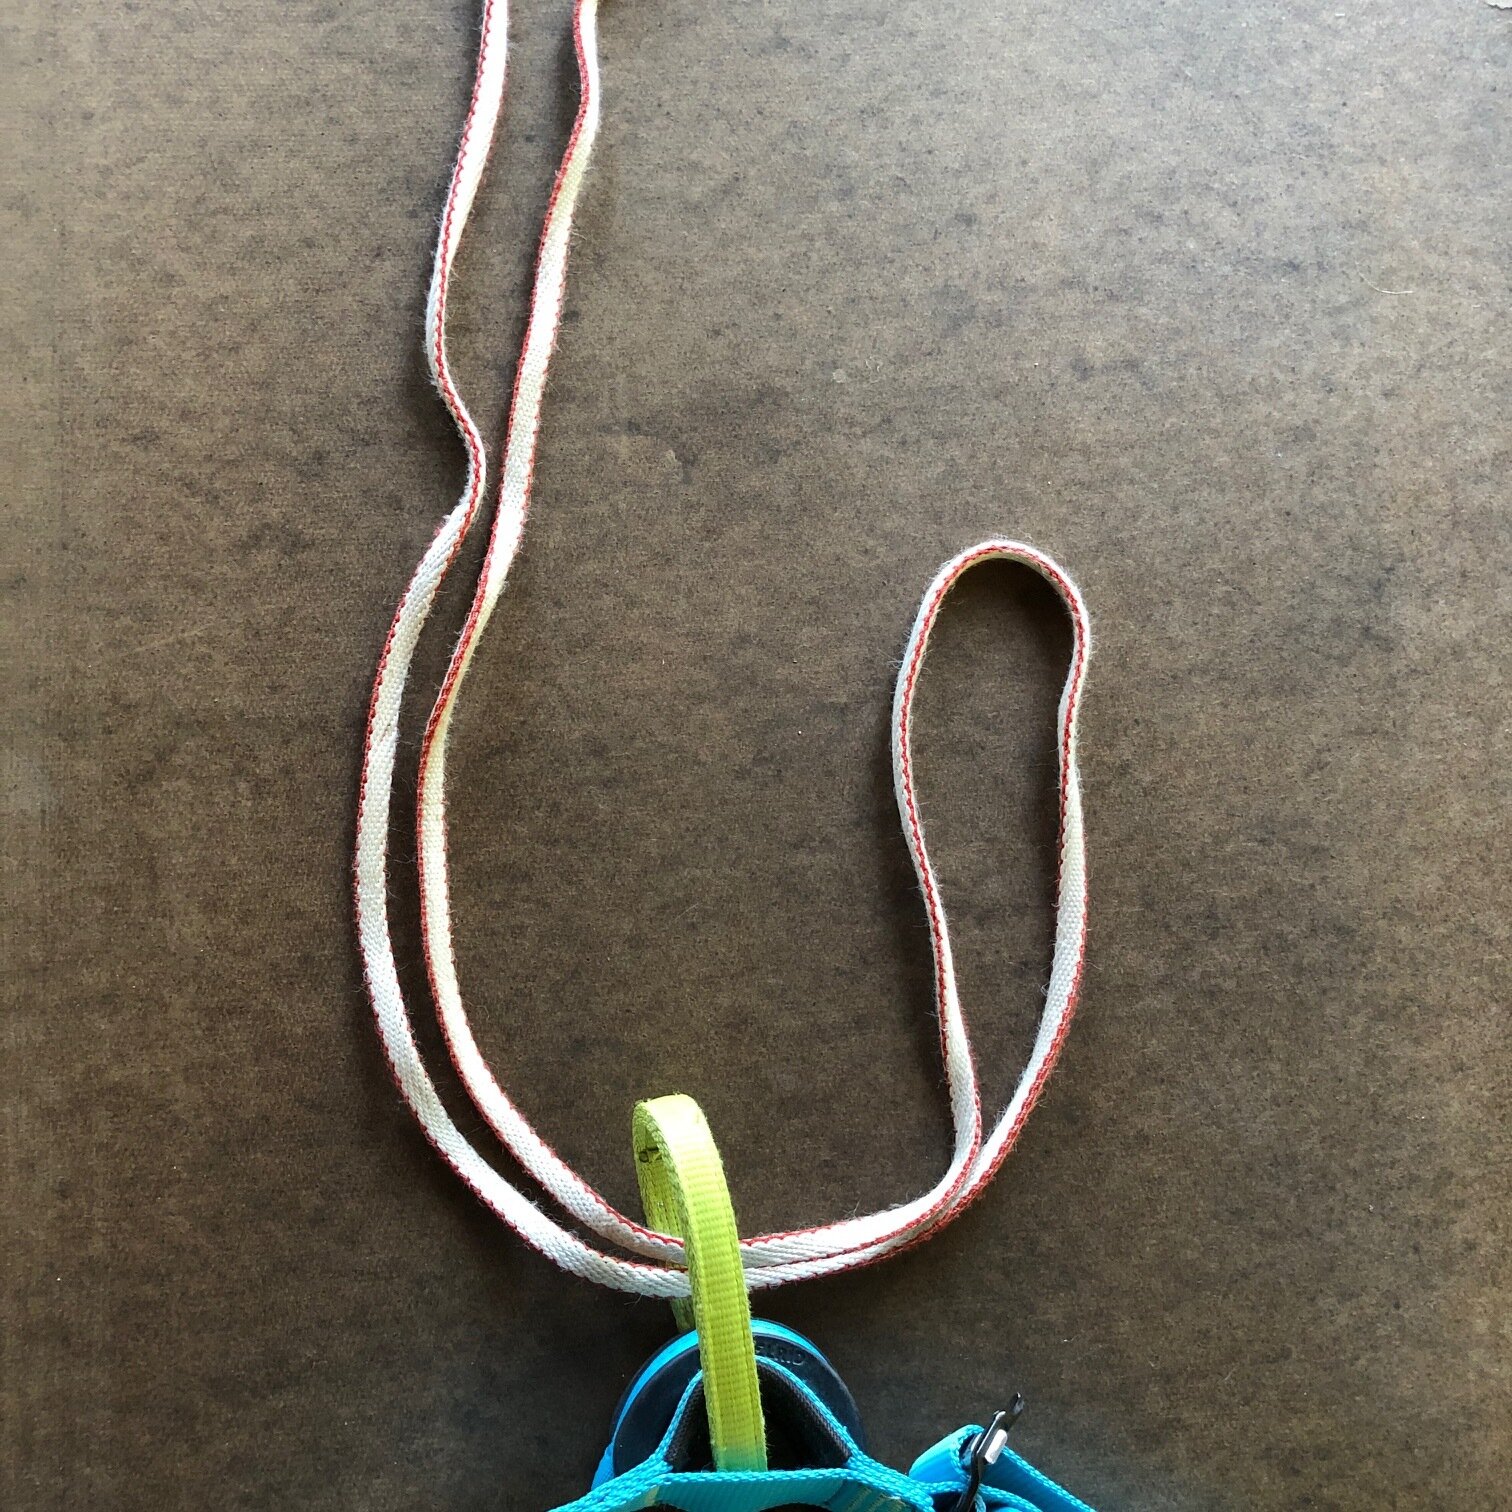
Pass the runner through your belay loop, from left to right. Keep the stitching at the far end of the sling away from you.
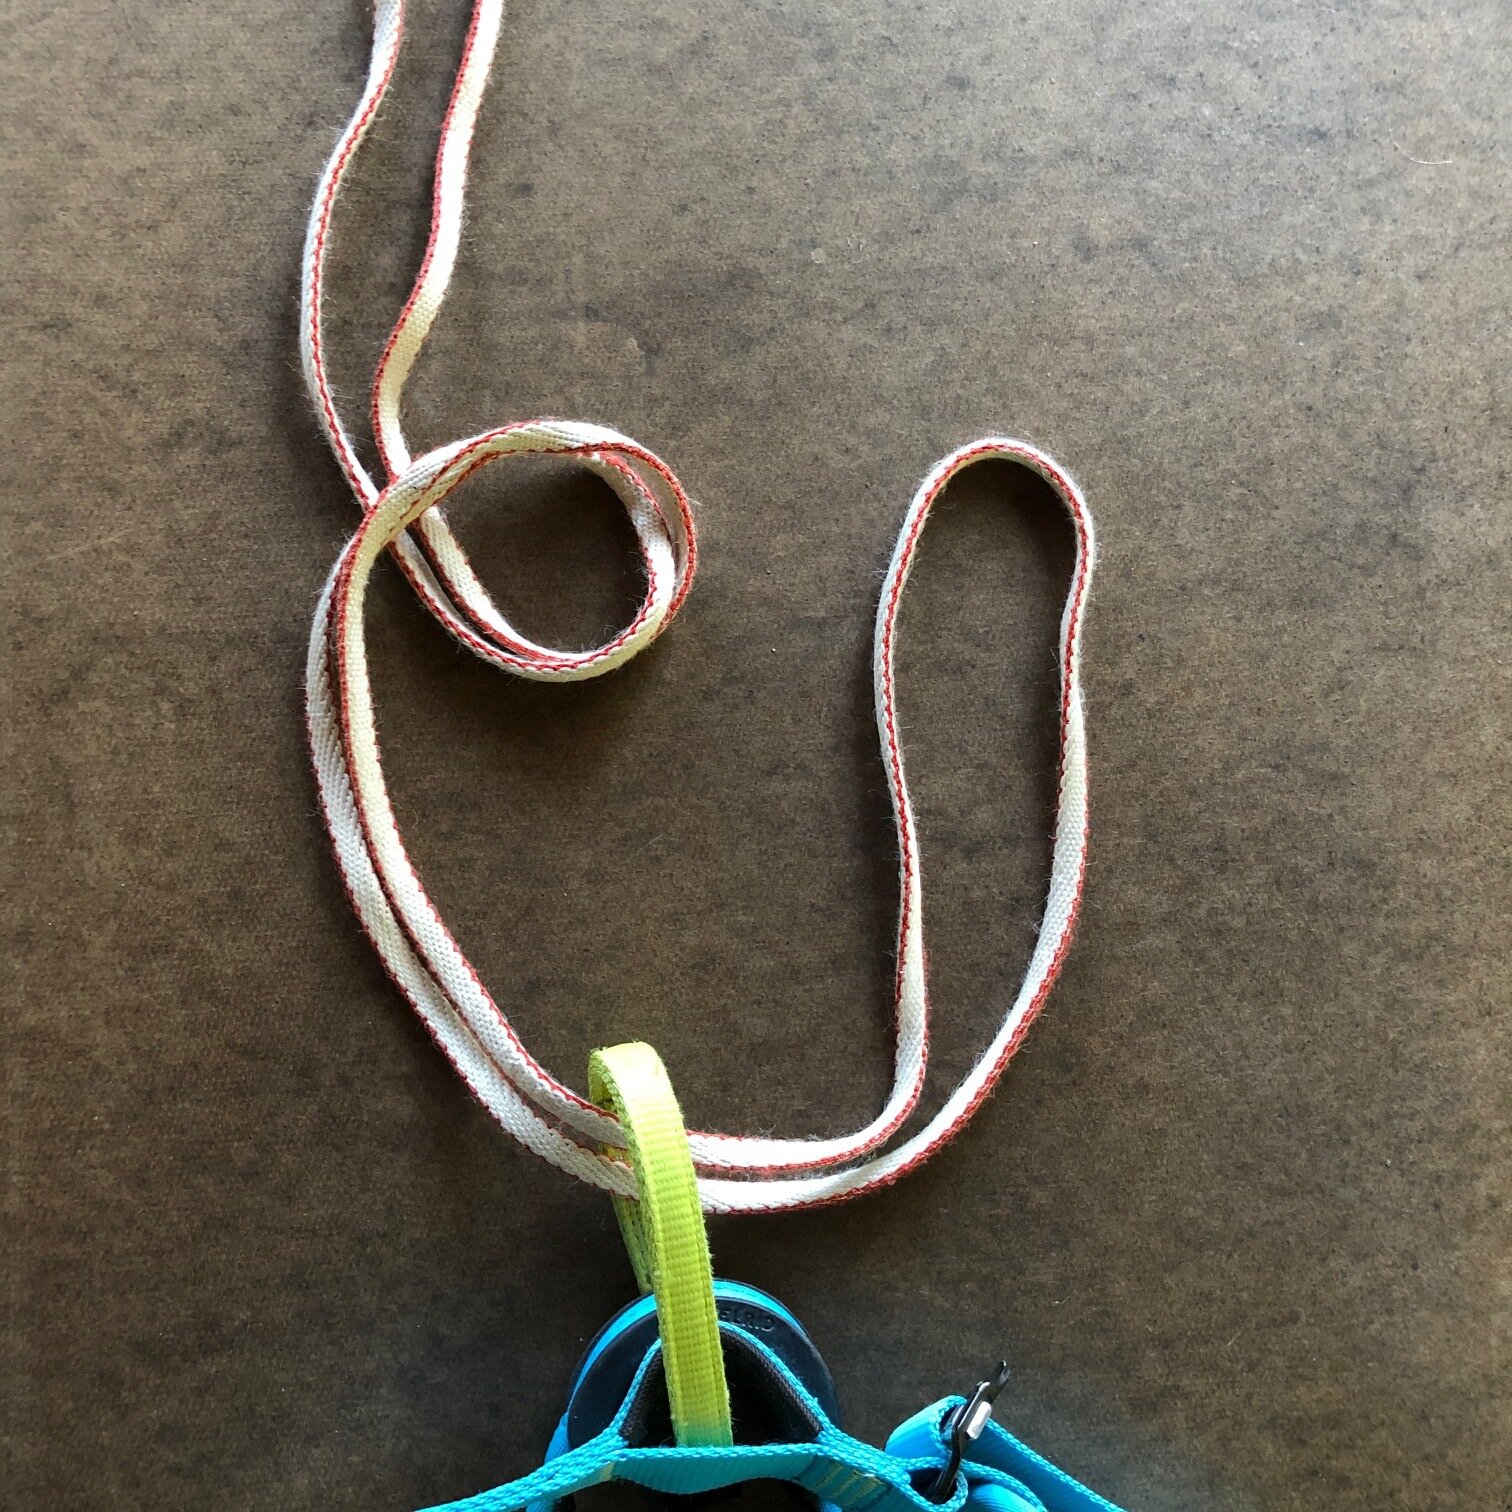
Cross two strands over to make a loop as shown. Important - Make the loop just as shown here, otherwise the knot will fail.
Pass the end of the sling up through the loop.
KEY MOVE: Instead of “running it around the tree” like a regular bowline, pass it “over the top of the tree” by passing the long tail through the small loop.
Pull on the right side of the double loop and the long tail. Voilà, you should have a bowline.
Dress the knot and snug it down. To test it, pull hard on the large loop. If you tied it wrong, the knot will collapse, or turn into a slipknot, or do something weird other than be a solid loop. (Like all knots, once you have it right, practice it 20 or so times until it gets into your muscle memory.)
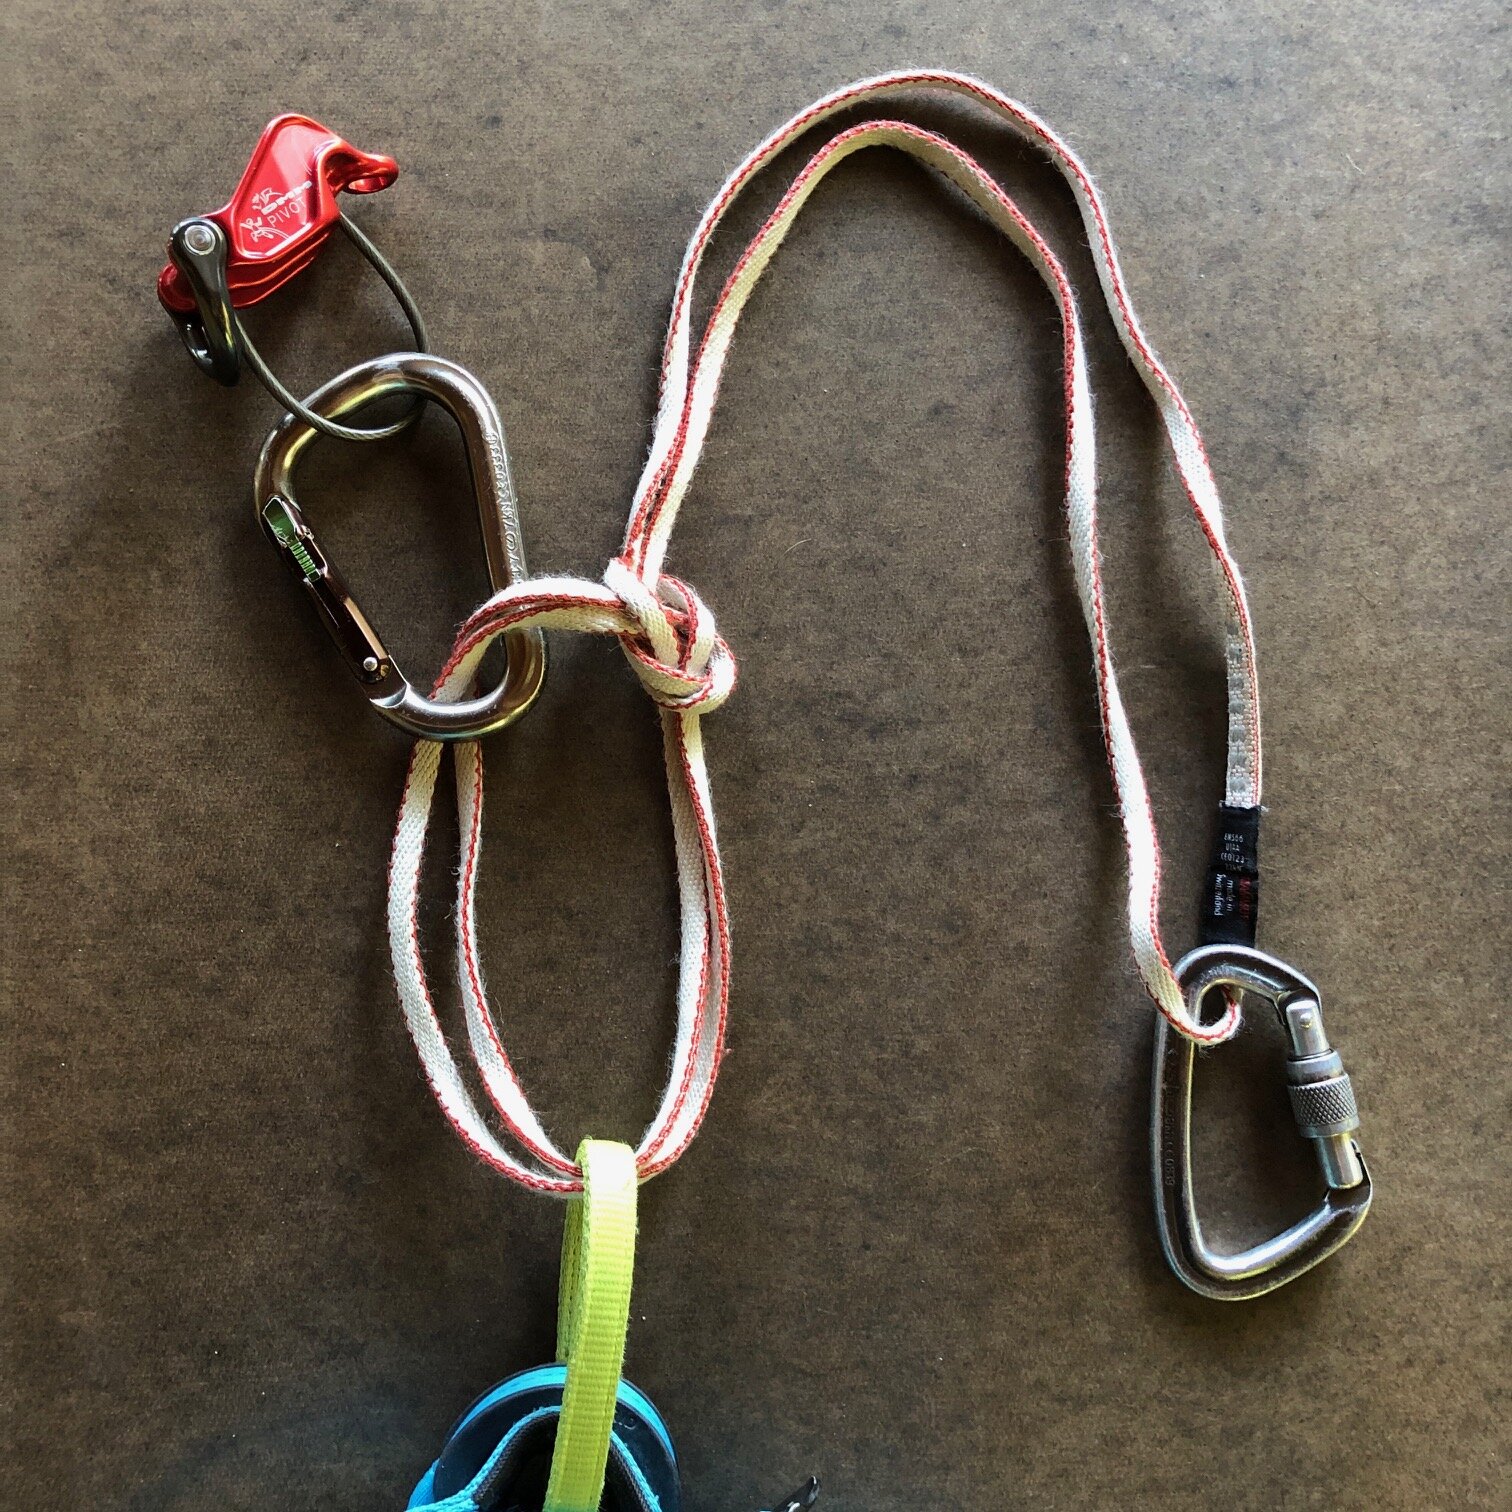
When it's dressed and ready to go, it should look about like this:
Attach a locking carabiner and rappel device to the double loop, and your anchor tether locking carabiner to the end of the single loop. You're ready to rappel.
A video:


