Google maps to GPX file with MapsToGPX.com
Thanks to my friend and expert boondock backroad navigator Daniel Mick for this tip.
Navigation on a hike or climb is more than what you do with your feet. Driving to an obscure trailhead can sometimes be the navigational crux of the whole trip. Mapping apps work great in town when your destination has an address, but what if you're looking for a trailhead or campground?
If you have the latitude longitude coordinates of a trailhead (or anything else) you can copy/paste the coordinates into Google maps and get driving directions and a map to the trailhead. (Learn how to find lat long coordinates for anywhere at this article.)
If you have decent cell coverage, this should be all you need. But in more remote areas, Google maps sometimes falls short, and you may want to take this extra step of following a GPX track instead.
Below, learn how to create a GPX track file from a Google map. (Like most things in life, it's easy once you know how.)
Why is a GPX track an improvement over the normal driving directions in Google maps?
Outside of cell phone coverage, Google maps can do some strange things. The map detail can be significantly reduced, even if you download the map. Google maps has no terrain or contours shown, so it can be trickier to see your precise location.
However, once you have a GPX track of your driving route, and a quality GPS app on your phone like Gaia GPS, you can choose whatever map base layer desired (topo, satellite, Forest Service, Open Street Map) you like. You can annotate maps with additional navigation notes, such as good car camping spots, locked gates, private property, etc.
You can also record a track of your route when you’re driving. This can confirm your exact location, which fork you took on that last intersection, and keep a record of any change in your route (locked gates, washouts, logging road change, etc.)
If you find yourself driving to a lot of remote trailheads far away from cell phone coverage, this might be a good navigation trick to have in your toolbox. This might look a bit complicated when you first read about it, but after you get the hang of it it really takes just a few minutes.
For the example below, we’ll use driving to El Dorado Peak, a popular climb in the North Cascades in Washington.
Here’s how to do it.
Step 1 - Find the latitude / longitude coordinates of your trailhead.
Probably the easiest way to find the coordinates of a trailhead is to have a GPX file of the entire hiking or climbing route. Import this GPX file in CalTopo, notice where one end of the track reaches a road, right click at that point, choose New > Marker, and copy the coordinates that appear in the box in the lower right corner.
(Note: There are three different formats of latitude longitude coordinates. By far the easiest one to deal with is called decimal degree coordinates, which look something like this: 45,1234, -122,1234.)
For example, the El Dorado Peak trailhead has lat/long coordinates of: 48.4927, -121.1234
Step 2 - Copy and paste these coordinates into the Google Maps search box. Click Enter.
Step 3 - Click “Directions”. This should give you driving directions from your current location to the trail head.
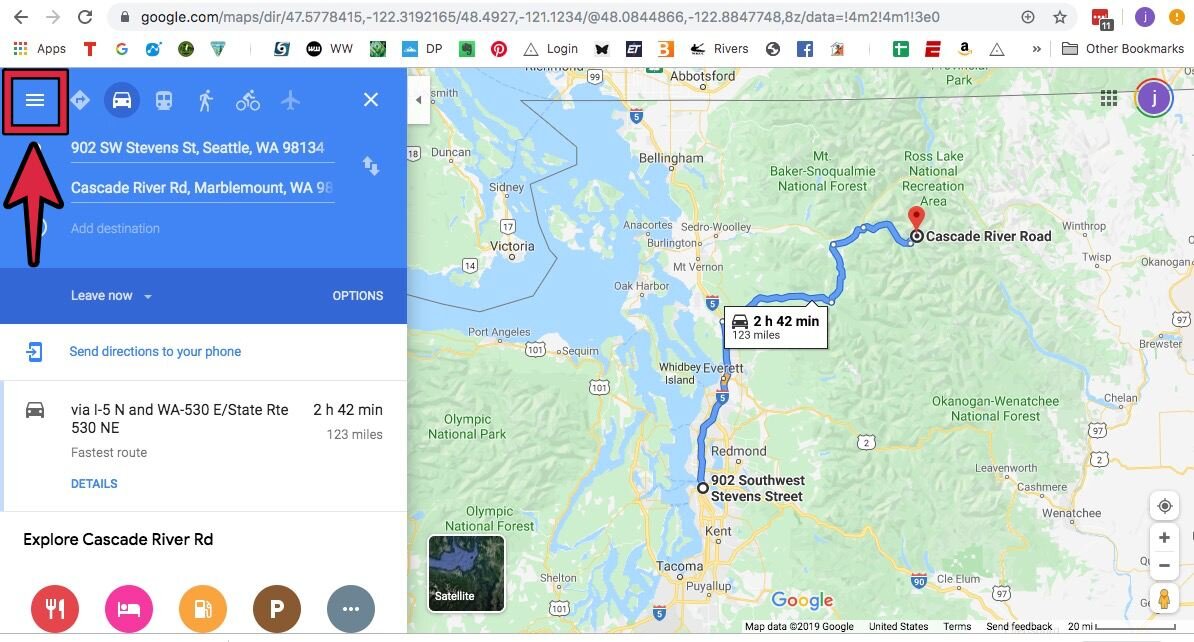
(Tip - If you don't need directions right from your front door, you can click and drag the little dot at one end of the direction line to a new location. Below, I moved it from Portland to Seattle to simplify things.)
Step 4 - Click the “3 horizontal bar / More” icon in the top left corner.
Step 5 - Click “Share or Embed map”
Step 6 - Copy the "Link to share” URL
Open a new browser tab. Go to “mapstogpx.com”.
Paste the Google directions “Link to share” URL into the box.
Click “Let’s Go”. This should download a GPX file of the Google driving directions.
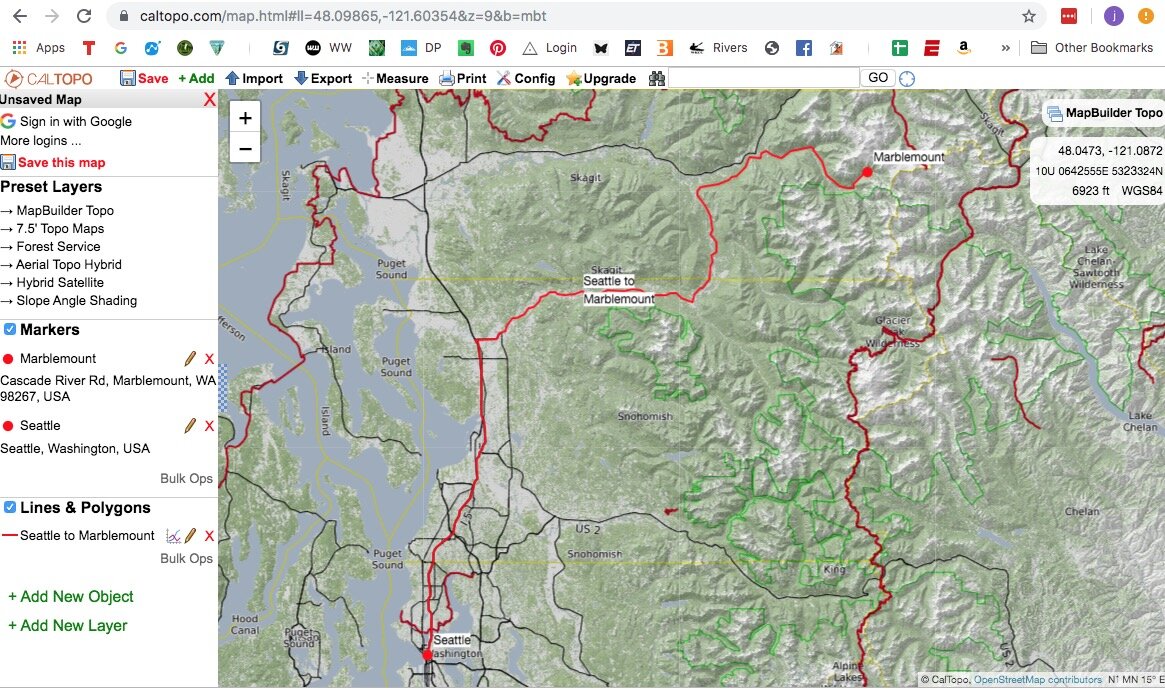
Open caltopo.com and import the GPX file. It should draw correctly, as seen below.
Make any edits or additions to the driving route, such as locked gates, camping or meeting spots, sections of rough road, any known closures or detours, etc.
When you're all done, export the GPX file from CalTopo and save it to your computer.
Now, you can put the GPX file onto your phone or GPS device for confident navigation outside cell coverage. If you use Gaia GPS, which is my favorite backcountry GPS app, the easiest way to get the file to your phone is to go to Gaia GPS.com, click your username in the top right corner, and choose “Upload” from the drop-down menu. This will sync the file from GaiaGPS.com to your phone app.
Finally, here's what the track looks like after importing it to my Gaia GPS phone app. It’s a perfect track to follow to the trailhead, even without cell coverage.


