Plush snow camping with a pyramid tent
The expertise and photos here (shared with permission) come from Graybird Guiding, a Seattle based guide company that not only leads some sweet ski trips, but also has an Instagram full of solid advice. Connect with them at their website and on Instagram. (Check out their hashtag #sknowmore for specific backcountry ski tips.)
Pyramid style, floorless tents have some advantages over standard floored tents when it comes to snow camping and multi day ski trips. Let's learn from some expert backcountry ski guides who have hundreds of combined nights sleeping with this set up.
What's great about pyramid tents in snow?
Lighter weight with larger floor area and more interior space.
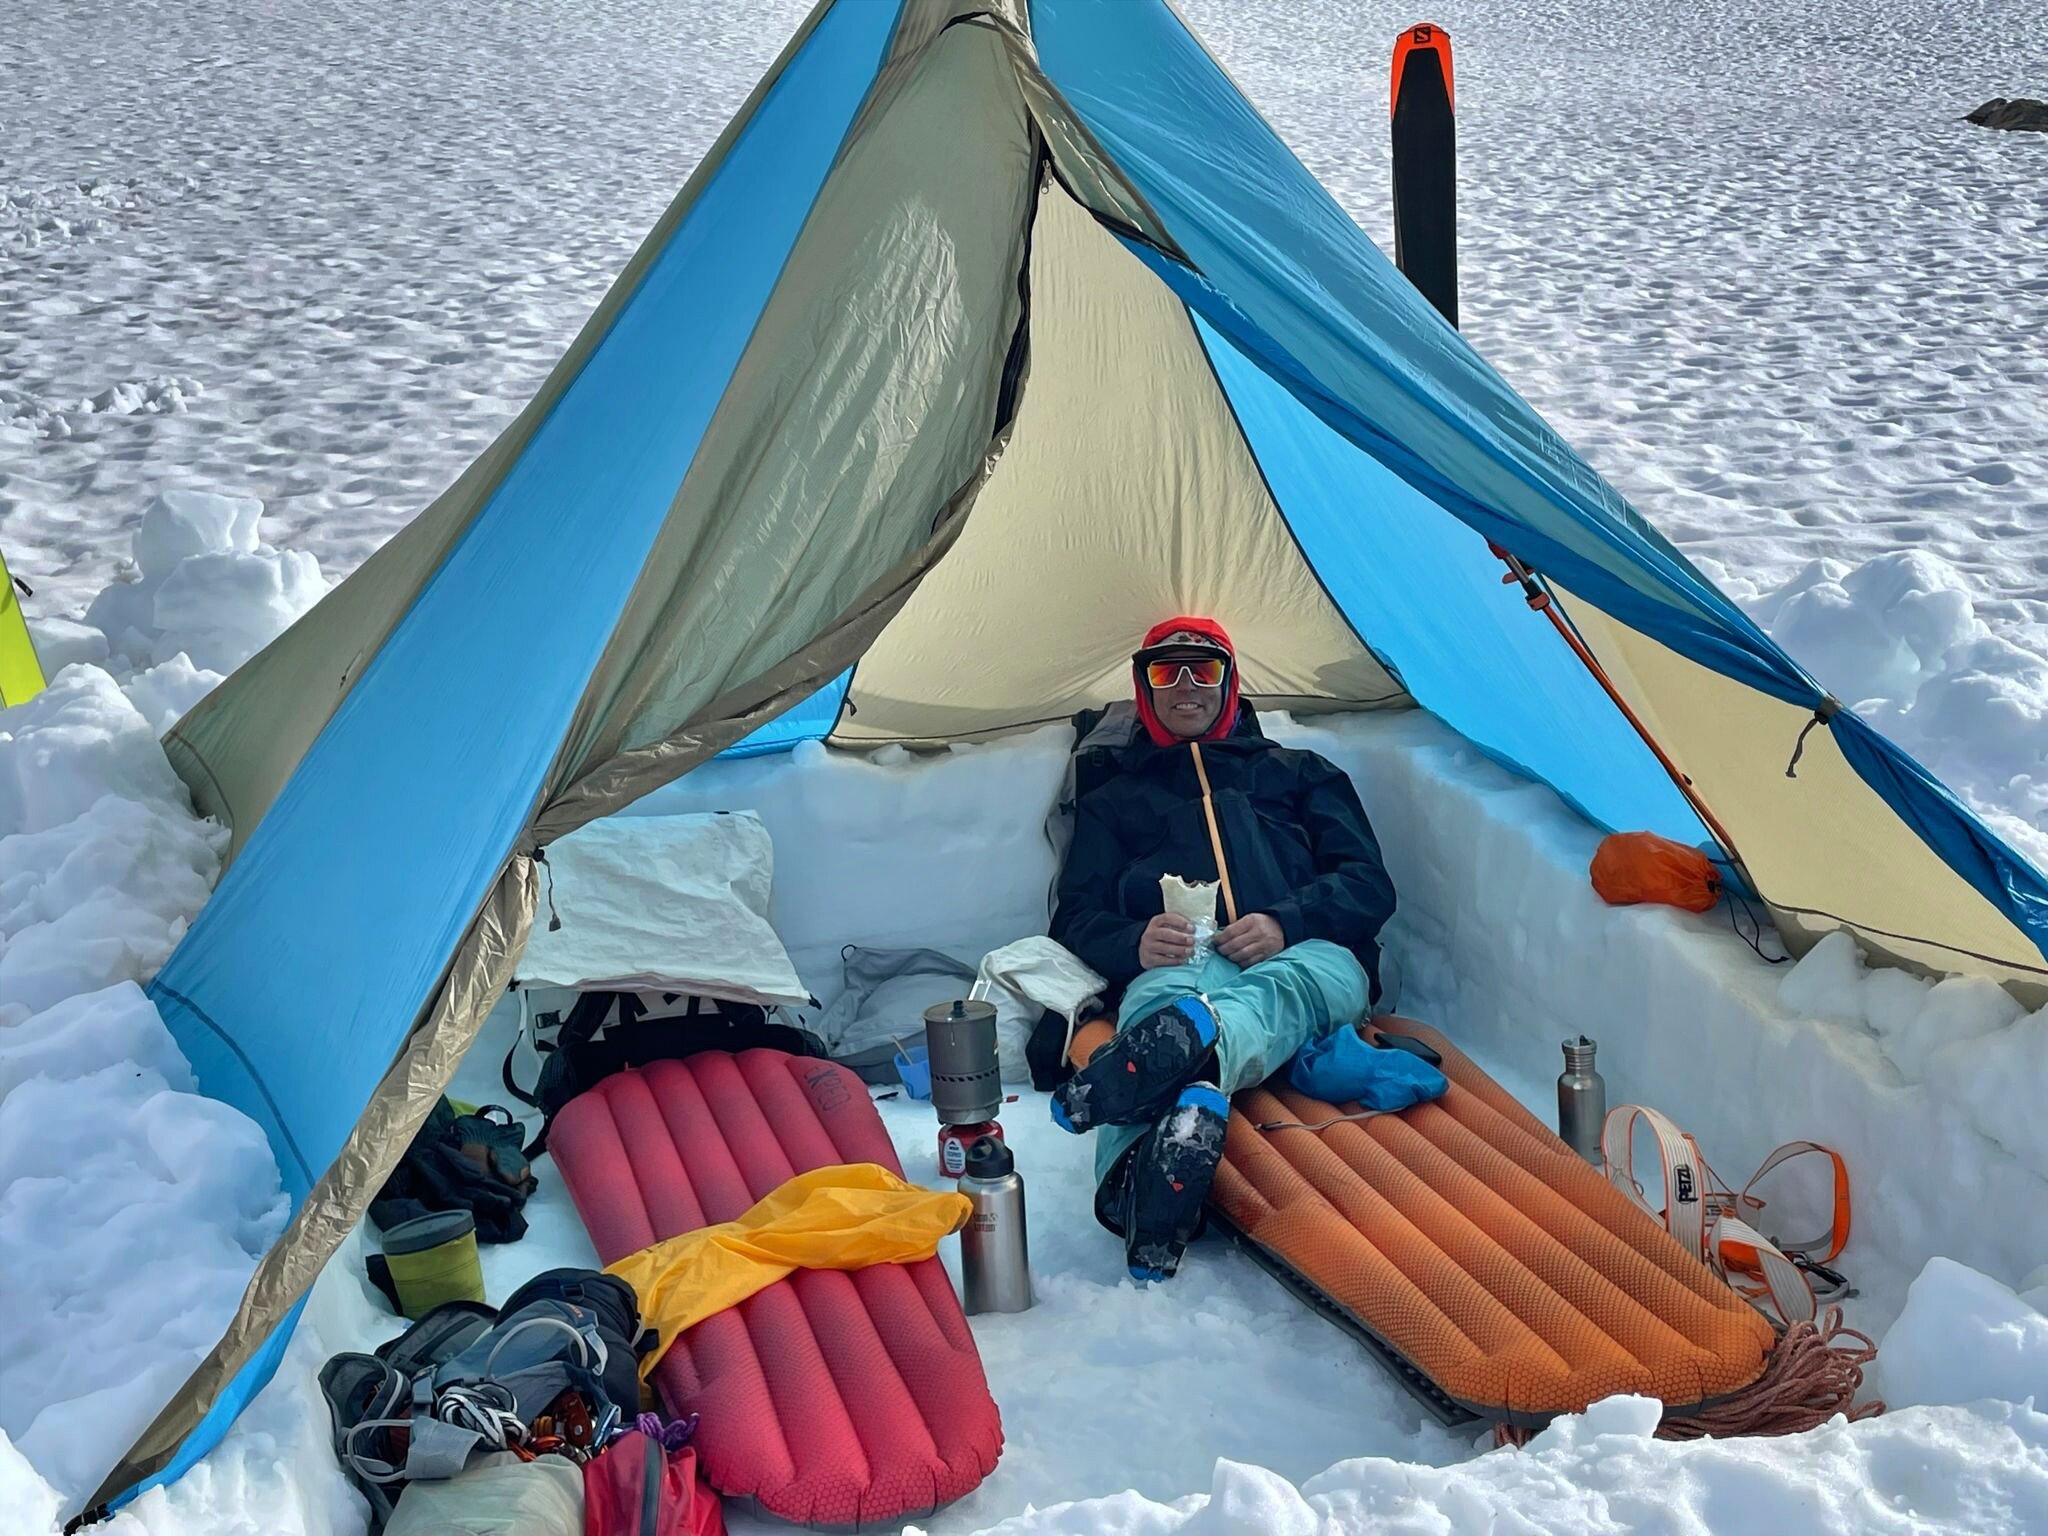
You can customize it for space and comfort: dig a footwell for legroom, make a snow table in the middle for cooking, or using the slope of the hill as a backrest.
Better climate control: Lift up the bottom a bit if you need some ventilation, or bunker down from a storm by putting snow blocks on the outside.
If you rig it as shown below with ski poles, there's no center pole, which saves some weight and gives you even more space inside.
Because of the extra space and ventilation, it's safer and more convenient to cook inside your tent (even though this is still probably against manufacturer recommendations.) This makes a pyramid tent a popular choice for expedition climbing, like on Denali.
Floorless, so no more sleeping in a puddle of accumulated meltwater.
Speaking of melting water, no need to go outside to get snow; just grab a handful and put it in your stove, all from the comfort of your sleeping bag.
And, last but not least . . . you can pee inside your tent. (Hopefully in the opposite corner from where you collect snow for your meltwater. =^)
As shown in these photos, you're using your skis and poles as part of the tent structure. This works fine if you’re on a tour and moving along every day. If instead you're using the tent as a base camp, use buried “deadmen” anchors like sturdy plastic bags or stuff sacks to anchor the corners.
With your ski poles making an A-frame as shown here, you of course need to remove them the next day when you go skiing. Simply flatten the tent and put a few snow blocks in the middle to keep it from blowing away when you're gone.
Timewise, this typically takes two people about an hour, and a bit faster after you've done it a few times.
A few FAQs about pyramid tents in the snow . . .
How do they handle high winds and storms? Better than you might think. Using tents like this for the kitchen or “living room” is standard practice on Denali which of course gets some pretty crazy weather, so that gives you an idea. The snow blocks around the edge are crucial. Do a Google image search for “Denali cook tent” to see many photos of pyramid tents on expeditions.
How about sewing a “skirt” on the bottom to better seal out the weather? That is a common modification that many people do on pyramid tents. Adding a skirt gives more interior space, because you fully stretched out the walls and still have fabric to pile on snow blocks to seal the tent. Check out the photo at the bottom of the page. The tent from Black Diamond has a “skirt”.
What are some other options for anchoring the corners instead of your skis? Any sort of a deadman anchor that you can bury works. Maybe sticks that you pick up on the approach hike, or my favorite, a reinforced 1 gallon Ziploc freezer bag filled about 2/3 of the way with snow. Using a deadman of course makes your skis available to go on a tour and come back to a tent that is fully functional.
Can I use a center pole instead of the A-frame with the poles as shown below? Absolutely. When you’re staying in the tent, using your ski poles as support with no center pole is really nice. When you head out for the day and take your poles, install the center pole to keep your tent upright.
How does this work in faceted or unconsolidated snow? Not so well. It's harder to dig out of the blocks that you need to hold down the perimeter as well as forming the back rest and foot well inside of the tent. If you expect those kind of conditions, this may not be the best choice.
Here's how to set up a pyramid tent for snow camping
Here's a photo sequence and pro tips from Graybird Guiding showing how to prepare your campsite and set up your tent.
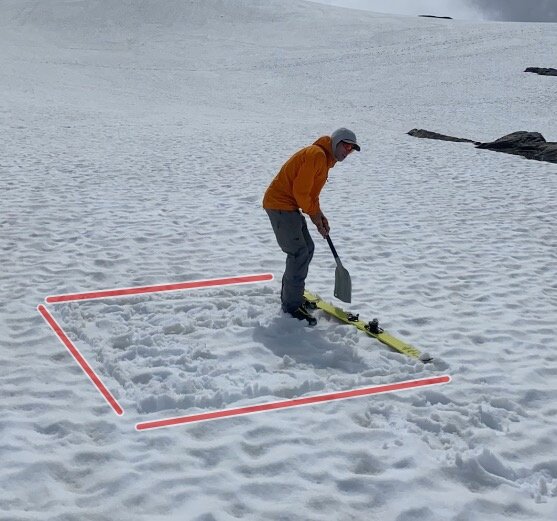
1) First, choose a gentle slope. This gives a backrest and added height so you can stand up inside. Next, use your ski as a guide / straight edge to start digging.
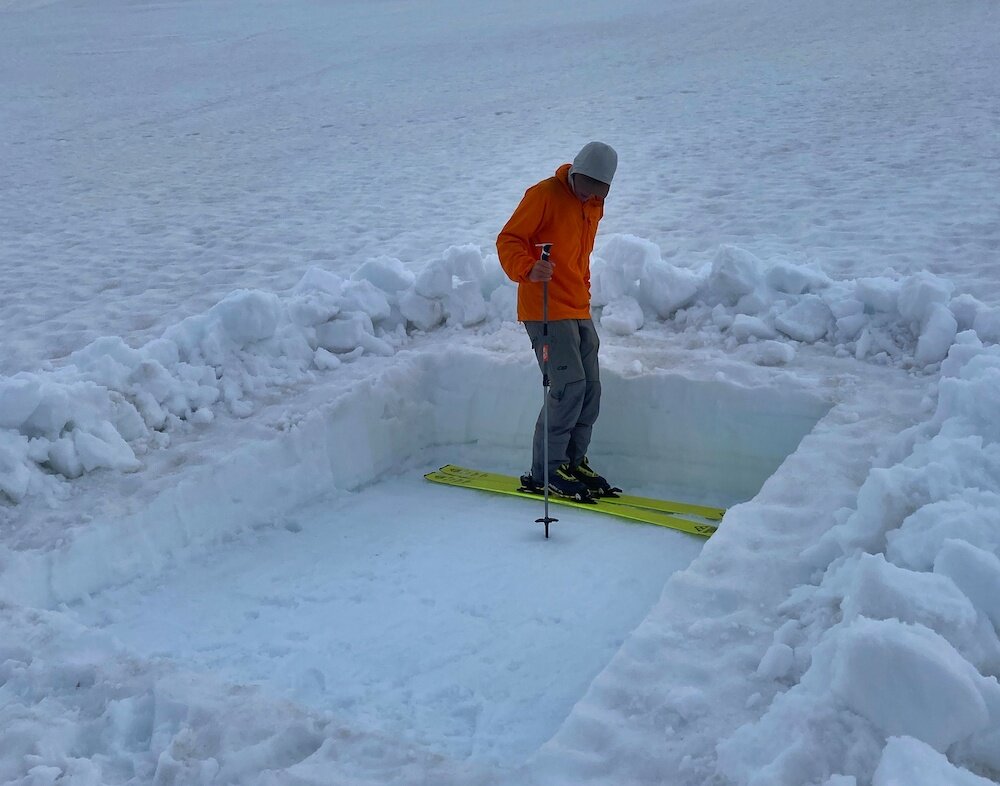
2) Remove snow in blocks, which you’ll use later. (Bonus: good practice for avalanche rescue digging.)
3) Stomp out pad with your skis. Without skins, point your skis downhill. If your platform is level, you won't slide.
4) Optional: Dig a footwell for even more interior space. Makes putting on your boots a bit easier. You can make a foot well because we’re using an A-frame support, not a center pole, see below.
5) Use your skis (or buried bags) to anchor the four corners.
6) Once the tent is anchored, bury the edges with the snow blocks you made earlier.
5) Rig an A-frame with four ski poles and Voile straps for better stability and more room. Not having a center pole in the way is really nice! Plus, check out the backrest which comes from digging into a slope, clever!
All done!
Check out this short (2:40) video that shows how all this comes together.
Sounds good, where do I get one?
Here are two of many options.
While different versions of this tent have probably been around for thousands of years, Black Diamond was one of the first (early 1990s?) to make a commercial model, which I think was the Megamid. Here's one of the newer models, the Mega Snow 4P, specifically designed for snow camping. Sleeps four people, weighs 1650 g (3 lb 10 oz). Note the “skirt” around the bottom edge; you can stack snow blocks on this to seal up the tent.
image: blackdiamondequipment.com
Here's a fancier model from Hyperlight Mountain Gear that's made from Dyneema composite fabric. Sleeps two, weighs a hair over 1 pound. Pricey but maybe worth it if you use it a lot.
image: hyperlitemountaingear.com


