Rigging your rope for glacier travel
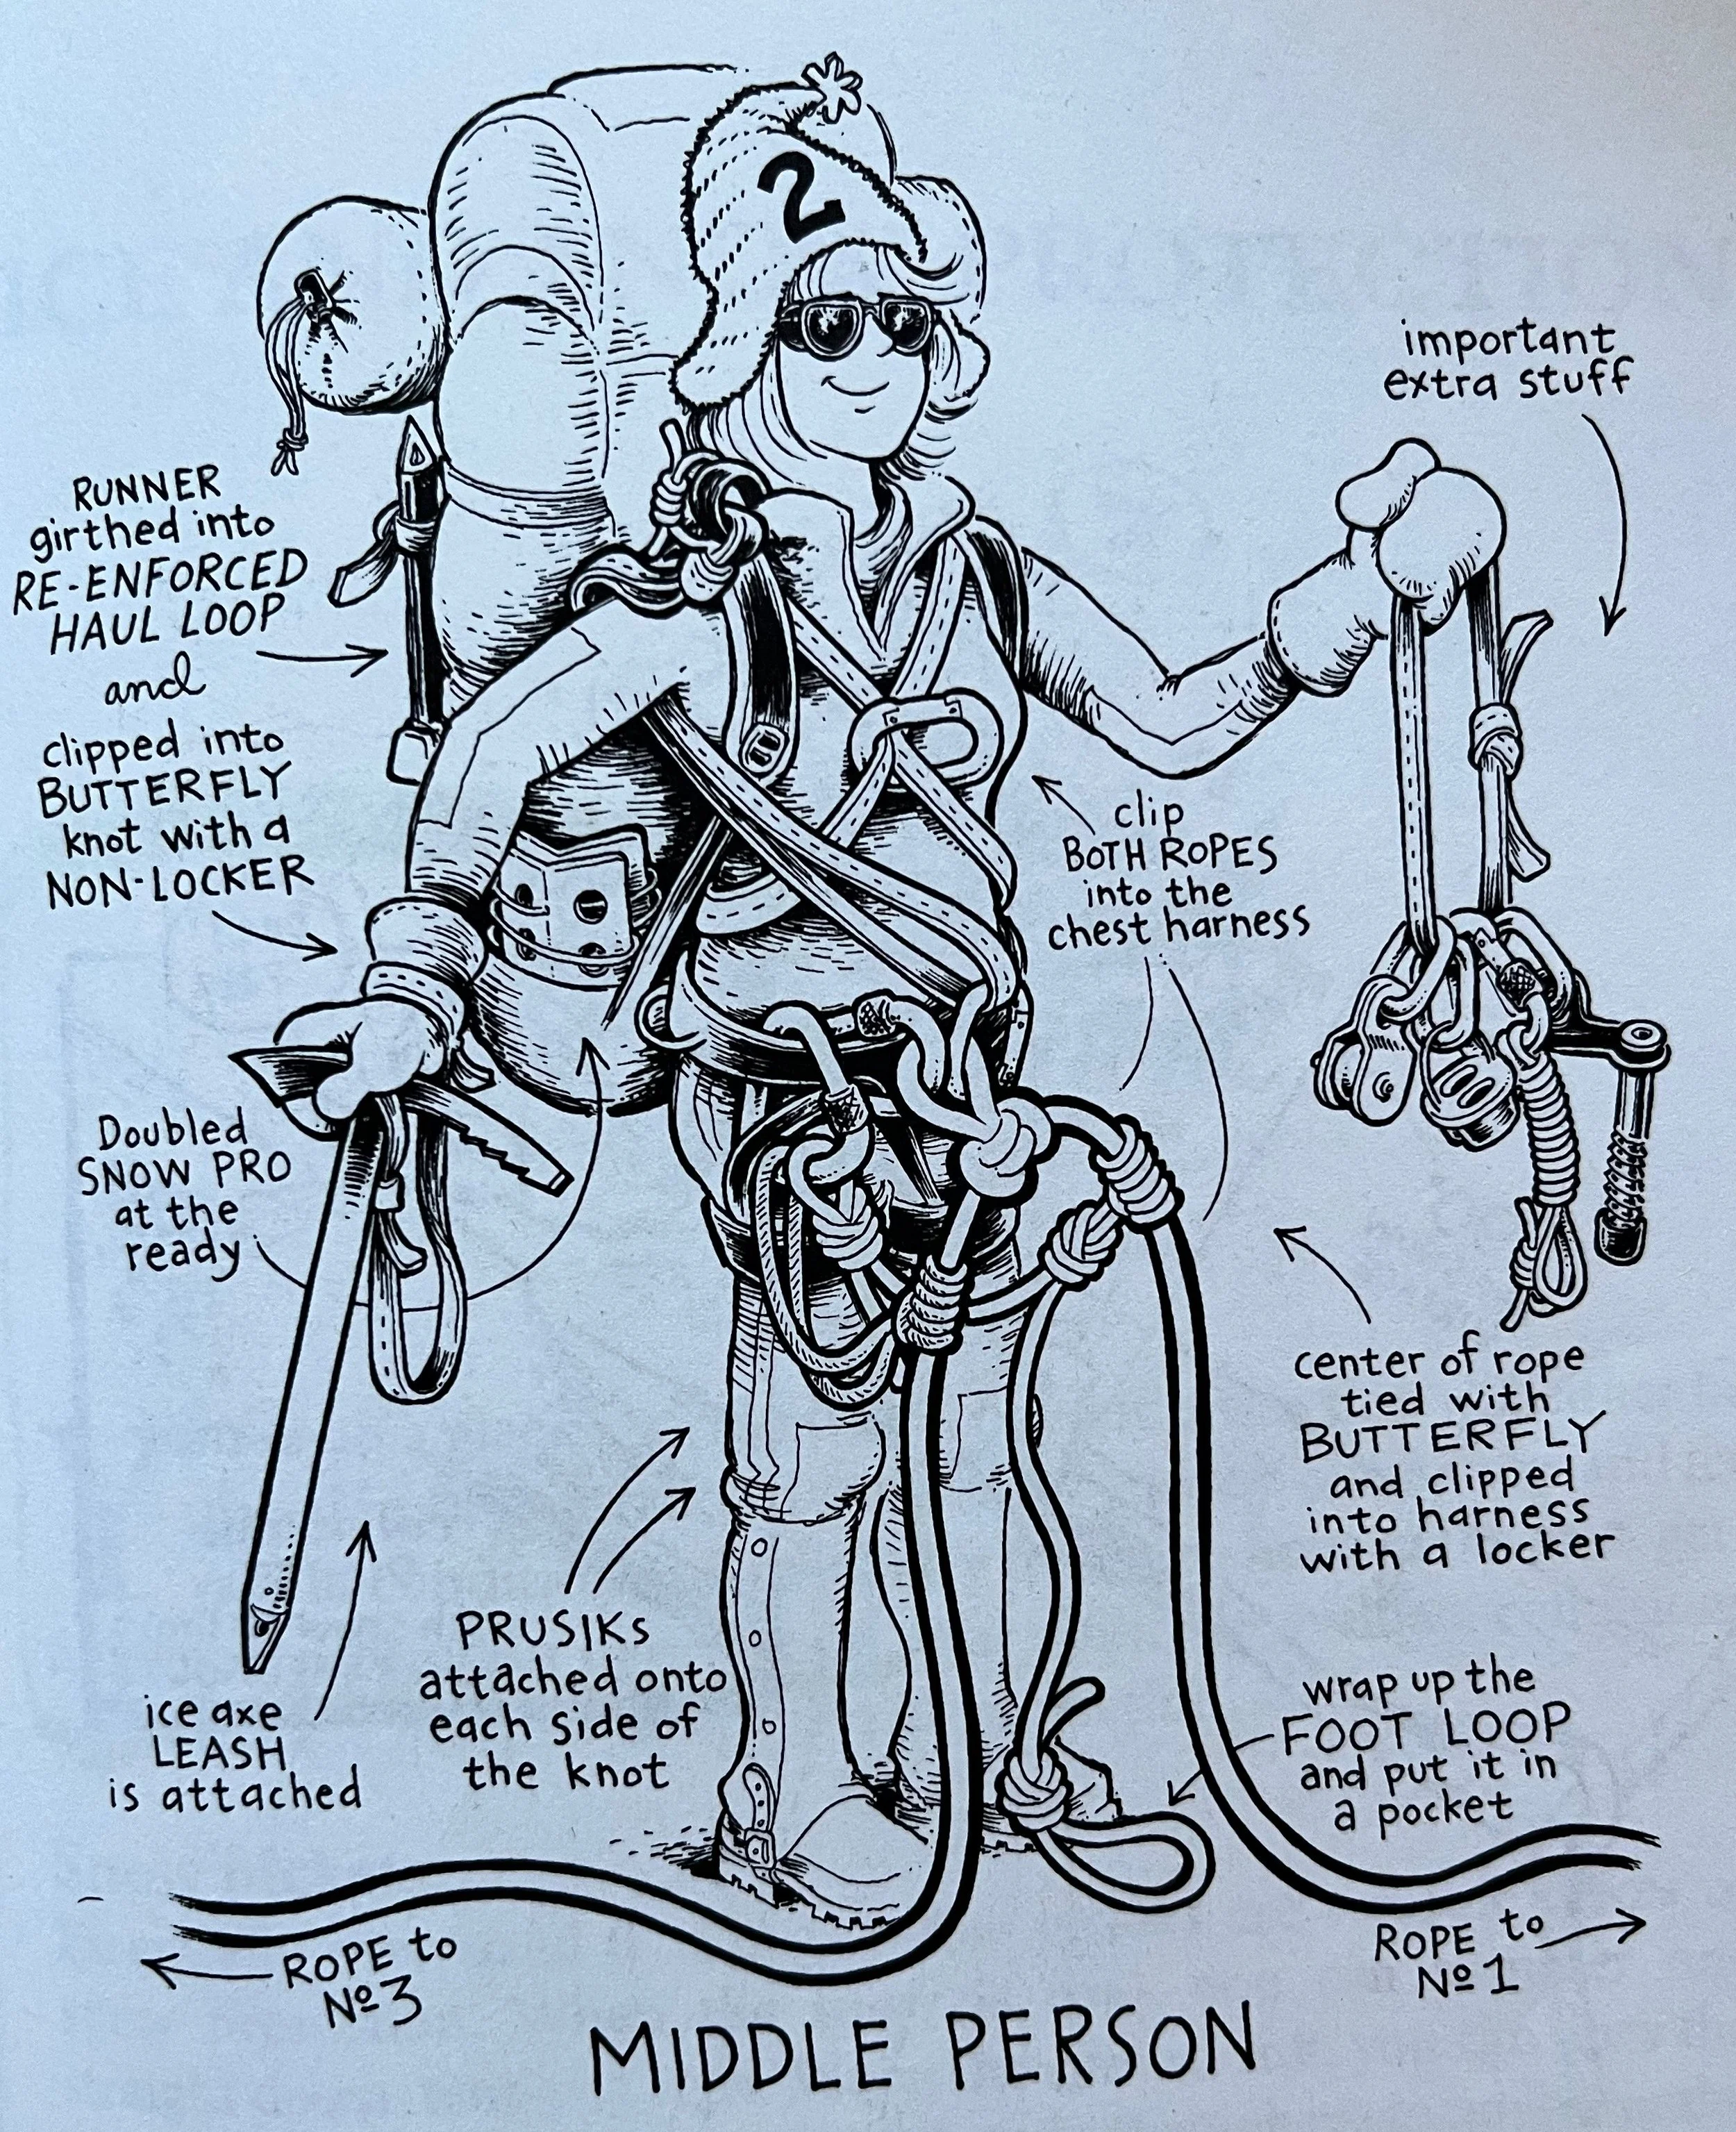
Image: from the highly recommended and hilarious book, “The Illustrated Guide to Glacier Travel and Crevasse Rescue, by Andy Tyson and Mike Clelland. Anyone setting foot on a glacier would do well to get this book. The method shown is a bit outdated, but it's still a great drawing!
(There are a few different book editions with different covers. They're all good, get whichever one you can.)
credit: Mike Clelland
I remember when I first learned crevasse rescue WayBackWhen, it was pretty darn simple. Two people tie to each end, one person ties to the middle, and off you go! 50 meter rope, 25 meters between everybody.
Turns out that has a few problems:
Communication can be difficult because people are further apart.
All the extra rope gets hung up on ice blobs and snow-sickles.
How do you do a rescue if the middle person falls in?
Happily we’ve moved into the modern era, where you climb a bit closer together (at least in my neighborhood, the Pacific Northwest), and the end people carry extra rope to initiate a rescue. But, that still leaves a few questions:
What distance should you have between climbers?
It sort of depends on the potential size of the crevasses you may be facing, but for moderate sized crevasses typical of the Pacific NW, here’s a quick and easy to remember how to set up the rope spacing. It varies a little bit, depending on the size of your team.
Take the number of people on your rope team, and subtract that from 10. That gives you the number of double “arm spans” between climbers.
2 climbers: 10-2 = 8 - 8 arm spans of rope between climbers (need to leave a few extra meters to tie brake knots . . .)
3 climbers: 10-3 = 7 - 7 arm spans of rope between climbers
4 climbers: 10-4 = 6 - 6 arm spans of rope between climbers
Notes . . .
This is known in some circles as the “10 minus equation.”
If you’re on a two person team, it’s best practice to tie 4-5 brake knots in the rope between each climber. It's optional for 3 and 4 person teams, but if the terrain is hairy then go ahead and tie some.
Generally, you want to put the least experienced person(s) in the middle, and the two more experienced/skilled people on the end. The end people will be more responsible for route finding and probably initiating a rescue if you need one.
Note - there are lots of different ways to rig your rope team for glacier travel. This is one of many that works. In areas with larger crevasses, like Alaska and the Himalaya, you’d probably want more distance between people than what I’m describing here.
Pro tip: If you're doing an alpine start, rig your your rope with knots and coils the night before. It's one less thing to do at 0:dark:30 by headlamp when you're sleepy.
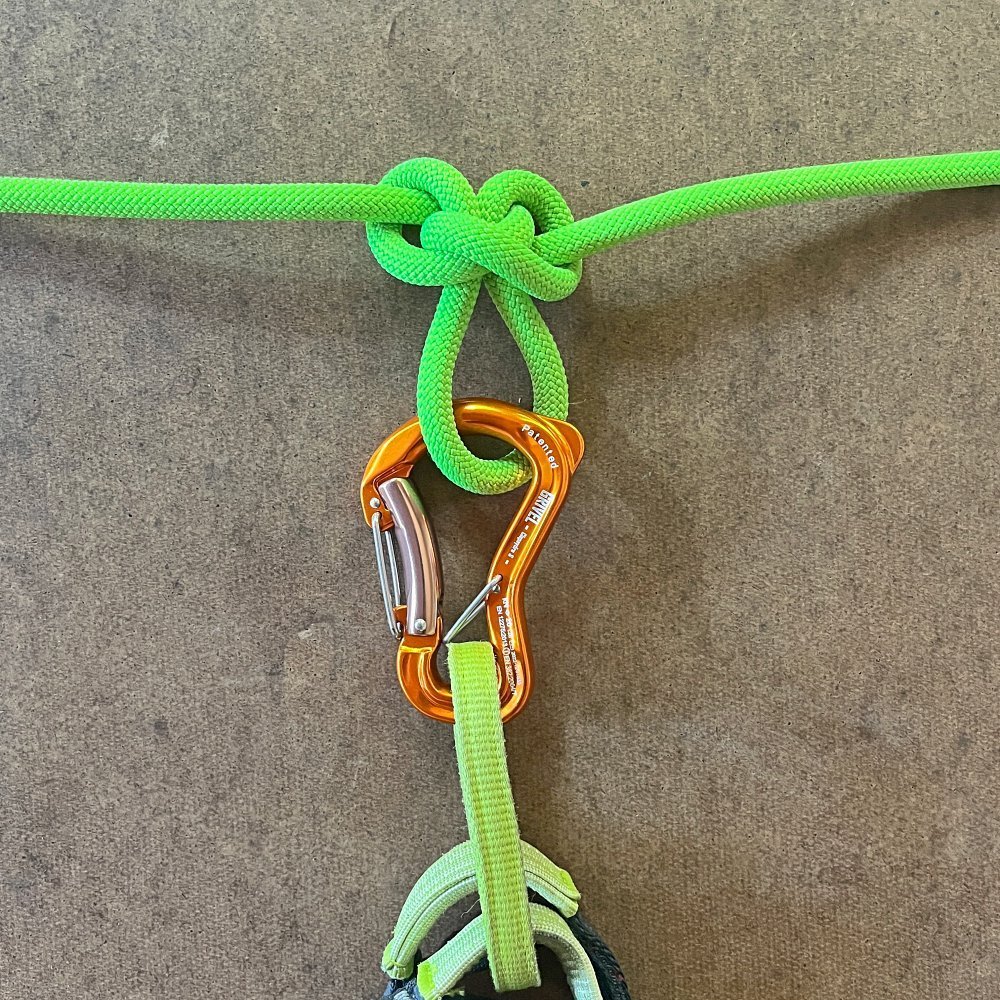
Generally, it's best practice to have all team members clip to a knot with a locking carabiner, rather than tying the rope through the harness. Doing this allows you to unclip from the rope more easily, which is convenient when performing a rescue.
The end people need a good way to secure the extra rope. Some people advocate stuffing it in your pack. Bad idea, because every time you want to get in and out of your pack you have lots of annoying rope coils. Much better is to secure the rope in a small butterfly coil, I like to secure the coil with a Voile ski strap. Yes, I know how to tie off a butterfly coil, but using a ski strap is faster and easier. I don’t like the coils around my neck unless there’s a good reason to do so, like moving from glacier to rock, where you need to take in coils and walk close together.
The standard approach to clipping to the rope is to use two carabiners, opposite and opposed usually with at least one a locker. Here's my alternative, using the odd-looking Grivel Clepsydra S carabiner. It has a wire clippy thing so it can never be cross loaded, and it has a double gate that will never freeze shut or wiggle open during a day of tromping around on the glacier. It's my new favorite.
A team of two can require a longer rope (60 meter minimum) than a team of three or even four.
Yes, this is a little counterintuitive! If you're using the modern standard of a drop loop C, that means you need about twice the distance between climbers at a minimum for a typical rescue. A party of three or four will ideally build an anchor at the closest team member to the fallen person. This allows them to use the rope between the other team members for the drop loop and thus they can carry fewer rescue coils on each end. A team of two is probably not able to do this.
This means that it's best practice for a two person team to be on a 60 meter rope at a minimum, while a three person or four person team can probably use a 50 meter rope.
Check out the below diagram for a two person team. With 8 arms spans between climbers, and with 4 brake knots which each take about 1 meter, that leaves just 15 meters in rescue coils for each person to carry.
The good news is, if your drop loop turns out to be a little bit short, it's easy to extend it with whatever extra slings, cordelettes, etc. you might have available. This means that a two person team does NOT always need to carry twice the amount of rope between climbers. (Another alternative for a two person team with a shorter rope is that they do not use a drop C and instead use a drop end 3:1, which comes with its own set of problems and benefits. Here's a detailed article on this technique.
Either way, the bigger picture, if you’re a two person team in serious crevasse terrain, you absolutely have to have your systems dialed and be completely self-sufficient to perform a rescue. Two person glacier travel is recommended for experts only.
Rope rigging for a THREE person team (with at least two experienced climbers):
Find the middle of the rope, tie a butterfly knot for the middle person.
Measure about seven full arm spans from this middle knot towards one end, and tie a butterfly knot. Repeat for the other half of the rope. These are the clip in points for the two end people. The end people coil the remaining rope for use in a possible rescue.
If you have only one experienced person on your rope team, then the novices should probably clip in starting at one end of the rope with seven arm spans between them, and the more experienced person should carry all the the remaining rope. Let’s hope the guide doesn’t fall in . . .
Rope rigging for a FOUR person team:
Find the middle of the rope.
Measure three arm spans to the right of the rope middle, and tie a butterfly knot.
Measure three arm spans to the left of the rope middle, and tie another butterfly knot.
Finally, measure six arm spans from each of these knots toward end of the rope, and tie your final two butterfly knots for the end climbers. Again, the two end climbers should ideally be more experienced people capable of route finding and crevasse rescue. They also carry the remaining rope, either coiled over their shoulder or stuffed into a backpack.
Distance wise, this works out to be about 10 meters between climbers.
(Note the orange Voile ski strap securing the coils for the climber on the right, a quick and secure way to tame extra rope.)
Check out the nice video from AMGA Guide Jeff Ward to see how this works.


