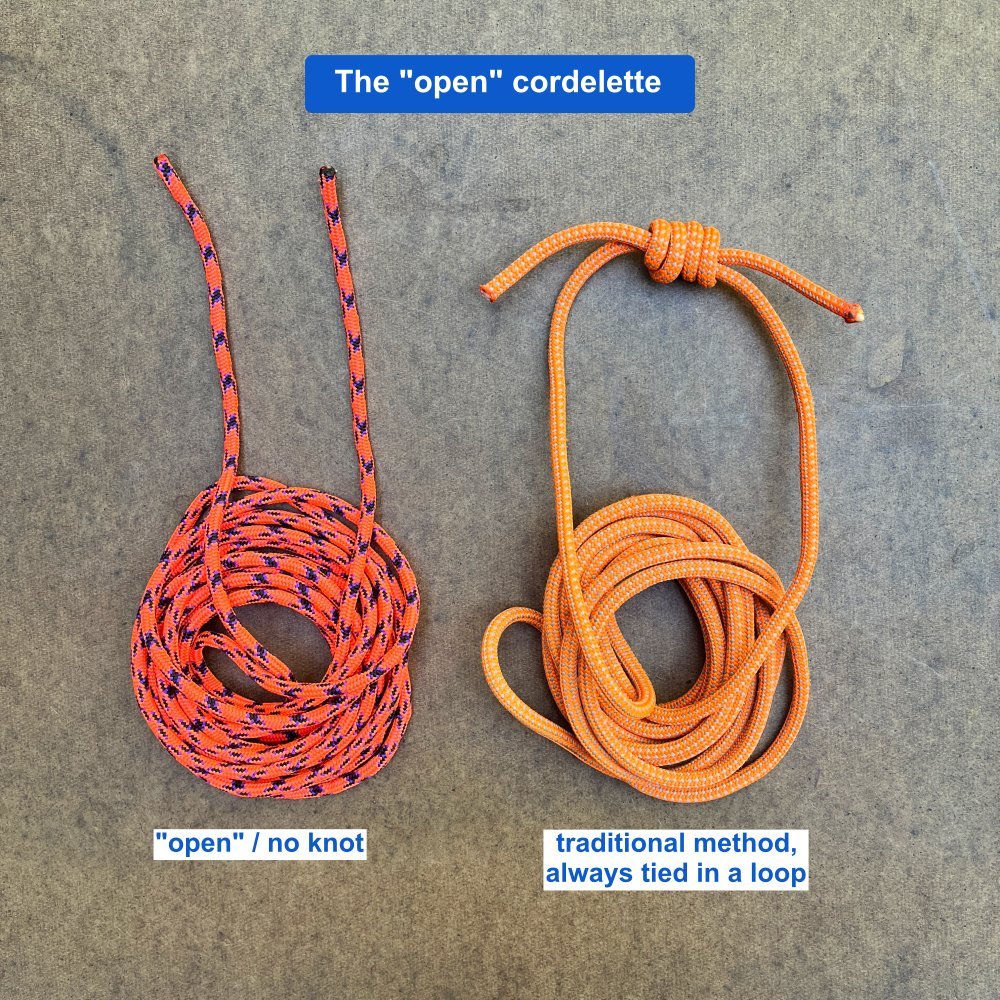
The "open" cordelette
While a traditional cordelette is about 16 feet of 7mm cord tied into one big loop, many climbers (if they carry one at all) prefer to leave it untied, known in some circles as an “open” cordelette.
Why use an open cordelette? It’s more versatile.
You can tie the ends together quickly in a big loop if you need it, with a simple flat overhand bend. (That’s right, no double fisherman’s knot required.) It’s fast to tie and easy to untie when you’re done compared to many other knots.
You can tie small loops in either end to make a ”bunny ears” cordelette. This can be handy when the gear is far apart, or you need to sling a big tree or boulder. Just tie a small overhand loop near the ends.
“Bunny ears” used to clip gear that’s far apart.
Ice climbing toprope
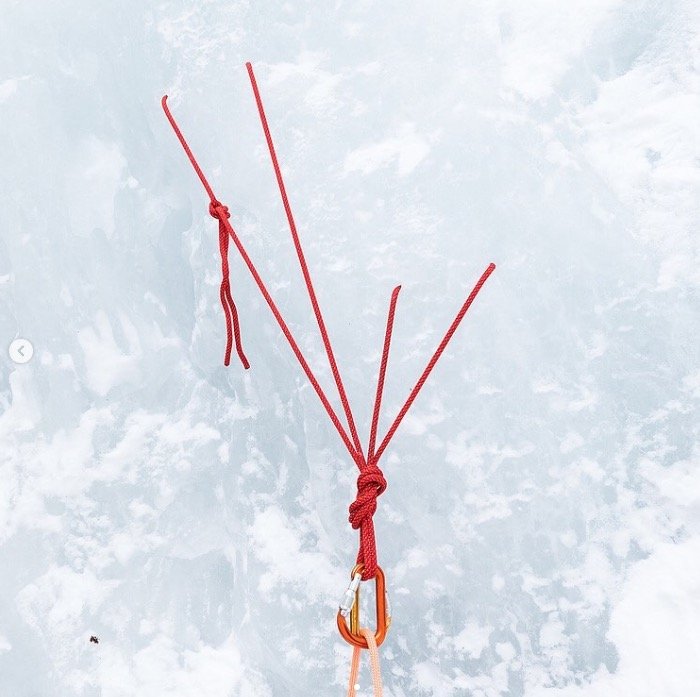
If you're setting up an ice climbing top rope anchor, you can make two V thread anchors and connect them both with a single cord, if you keep it untied.
Photo credit, Tim Banfield and Sean Isaac
Thread the open cord through fixed protection
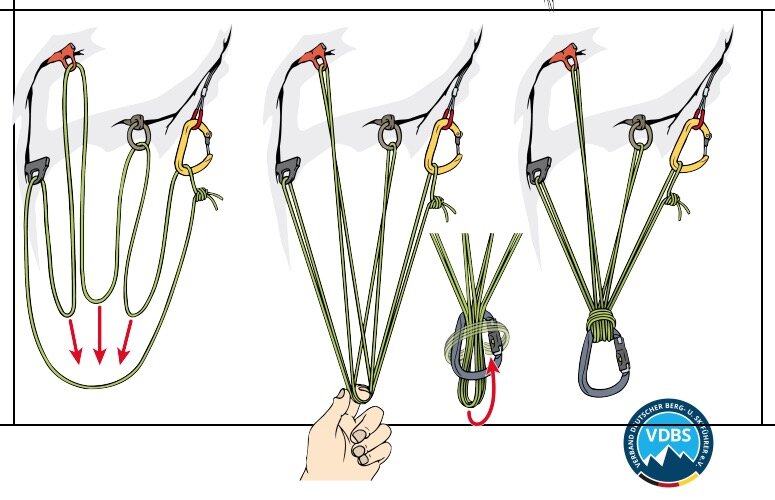
This example comes from a nice PDF file showing some European style anchor techniques, made by the German Mountain and Ski Guides Association (“Verband Deutscher Berg und Skiführer” or “VDBS”). Here, using an open cordelette lets you thread one and through the fixed gear that can’t be clipped. Also, note the girth hitch at the master point.
image: Standplatzlogik VDBS 2019 - Ausbildungsstandard VDBS & Alternativen
Crevasse rescue
After a crevasse fall is held by the team on top, the person closest to the crevasse can tie a prusik hitch with an open cordelette (about 5 meters of 6 mm cord) on the rope, tie an overhand to make a clipping point, and tie the ends through their belay loop.
The key here is that the ends can be passed through the belay loop and tied if needed in a rescue; the rest of the time it stays out of the way on your harness.
Image: https://www.ortovox.com/uk/safety-academy-lab-ice/chapter-3/rescuing-a-companion
Alternative anchor rigging
You can make an multi point anchor by not really tying any knots at all at least until the master point. Here's one way to do it, shown by my pal Ryan Jenks at HowNot2.com. It's a little hard to explain in words, so check out the video below.
Spoiler alert: 28 kN strong anchor made with 6mm cord, impressive!
Start it at 7:00.
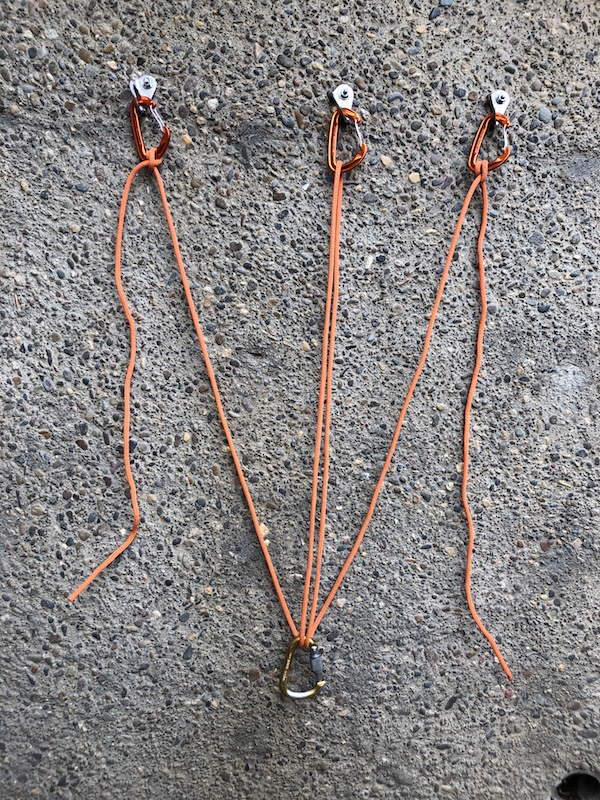
Here's another way.
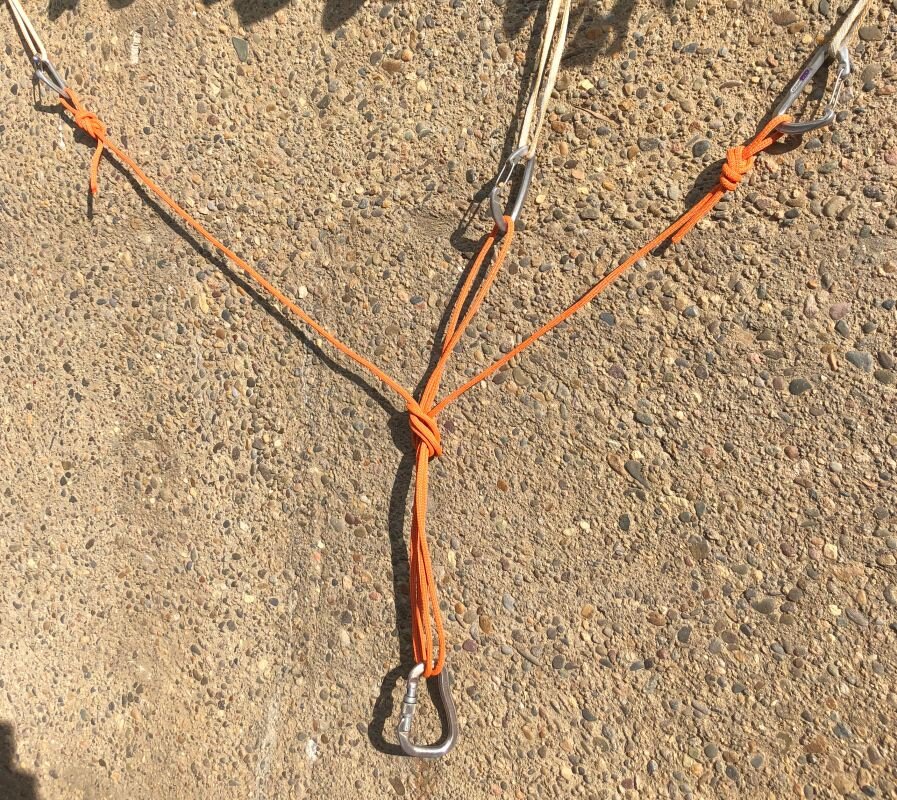
Place three pieces of gear, or in this case, three bolts. At least 1 foot from one end of the cord, tie a clove hitch and clip it to the left bolt. At least 1 foot from the other end of the cord, tie another clove hitch, and clip it to the right bolt. Then, take the approximate middle of the cord and clip it to the middle bolt.
Clip a locking carabiner through the two “U” shaped strands in the middle.
Tie an overhand knot (or figure 8) to make the master point. Done!
Note:
There is no redundant shelf on this anchor. The loop that goes from the masterpoint knot to the middle bolt is probably okay for clipping a backpack, but not for belaying.
This anchor is easily adjustable. If the pieces are far apart, or farther away from you, tie the clove hitch nearer to the end of the cord (while still leaving a foot or so of tail, and snugging down the knot.) If, like in this case, the pieces are very close together, you can tie a clove hitch with longer tails, making a more compact / higher master point.
This anchor can be easily adjusted if the direction of pull changes. If the direction of pull changes to one side, say the left, then the strand of cord going to the left anchor is going to go slack, which means it's not taking any of the load. You can easily adjust this by shortening the clove hitch going to the left bolt, which can regain a nice three point load distribution.
You only have about half rated strength of the cord going to the single arms. A 7 mm cord is rated about 13 kN, so half of that is around 6.5, which should be fine. However, a 6 mm cord is only rated 7.5 kN, so halving that brings it down to 4 kN, which is sort of in the danger range. So, if you're ever going to use this technique, please use a 7 mm cord.
Hey, don't take my word for it. Here's a short (31 seconds!) video by expert climber Hans Florine (multiple speed climb record holder on The Nose on El Capitan, among other things) showing this technique.

