
Hauling directly from a Traxion pulley
Credits: This system is also known as the “far end haul”. I believe it was originally invented by legendary Yosemite dirtbag Chongo, and shown to me initially by Mark Hudon. Check out Mark’s great website for more on this.
Note the haul line going directly to the Petzl mini Traxion.
(Also note the haul line clipped in with a locker to the top part of the swivel as a backup.)
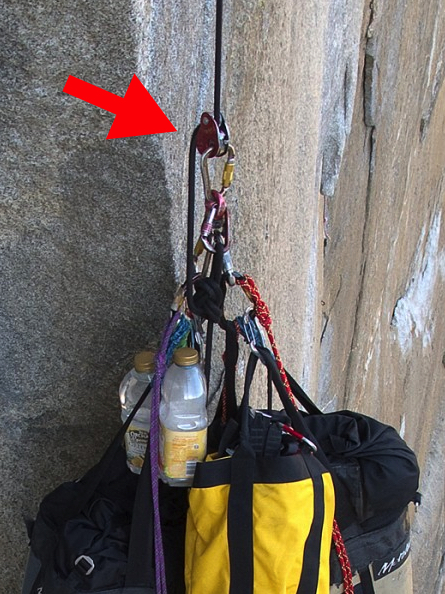
image: mark hudon
The traditional big wall set up to rig your haul rope to the haul bags is to pretty much connect them directly, something like this:
Figure 8 on a bight (or better yet, a butterfly knot, easier to untie after loading) on the end of haul rope
Locking carabiner
Swivel (optional but highly recommended)
Another locking carabiner attached to haul bag(s)
However, with the addition of just one more piece of (admittedly expensive) gear, you can make your life a whole lot easier in certain situations. All you do is add a progress capturing pulley, (aka PCP) like a Petzl Micro Traxion, to the locking carabiner upstream from the swivel, put your haul rope through that. Note that you set this up on the ground from the very first haul, and keep it on the system the entire climb.
Also note that you do not remove this PCP and use it as part of your hauling system, you need a separate PCP for that. (Yes, this sport is expensive . . .)
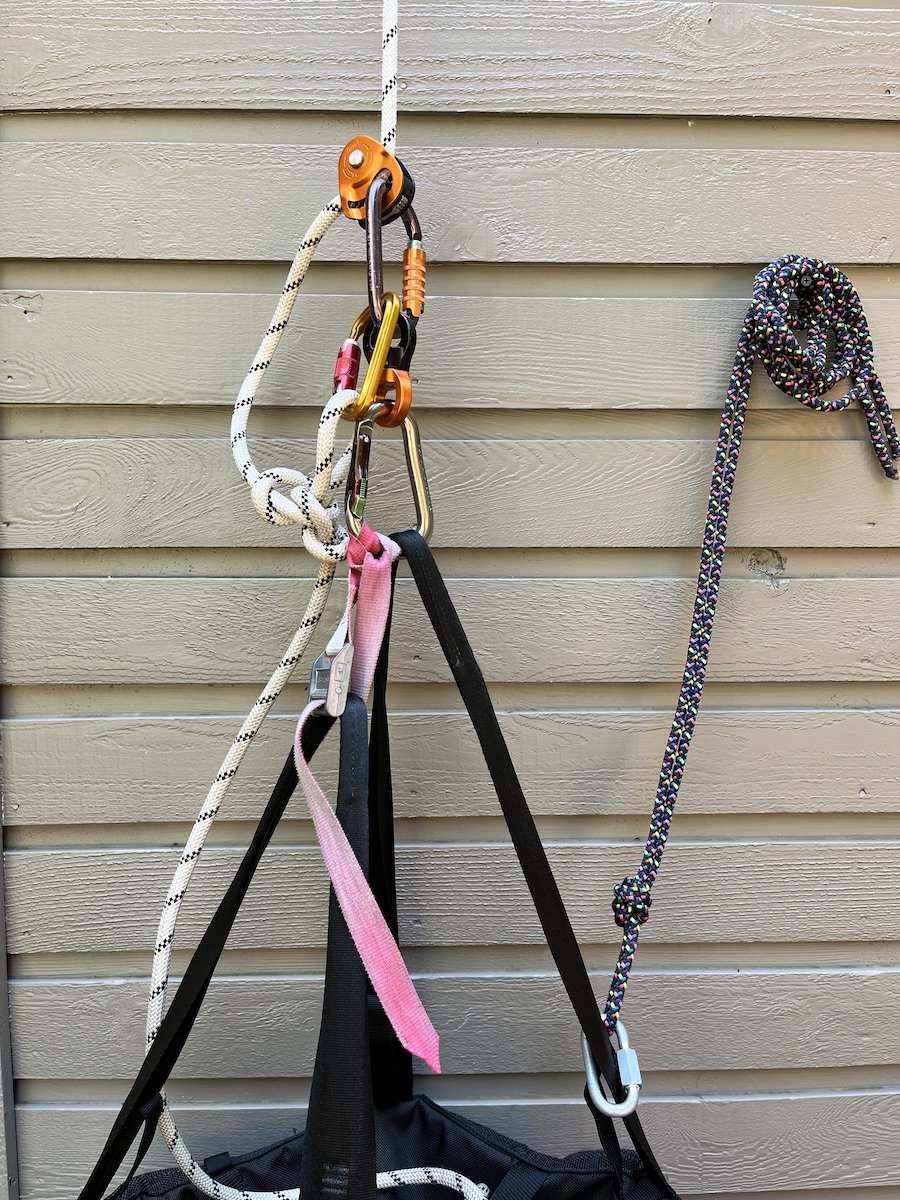
The rig looks like this:
Haul rope through Micro Traxion (make sure it’s threaded the right way, duh)
Micro Traxion to locking carabiner
Locking carabiner to top of swivel
Bottom of swivel to locking carabiner
Locking carabiner to haul bag(s)
Here’s a close up or one way to rig it. Note the haul line is clipped above the swivel with a locker as a backup to the Traxion. Docking cord is attached to the long haul bag strap with a quicklink.
No, the teeth on the pulley do not damage the rope. That was my first reaction, isn’t the rope going to get shredded? But nope, it does not. (You ARE using a burly haul rope with a stout sheath, right?)
About the only downside to this system is that you’re adding one more bit of gear that costs about $100. But the upsides can be significant.
Here's a fancier way to set it up, from big wall expert Skot’s Wall Gear.
Here, Skot is using a pair of rappel rings (gold) along with a combination swivel and locking carabiner (appears to be the Director Swivel Boss from DMM). This makes a more compact set up, with zero chance cross loading the rings. Sweeeeet!

PHOTO: @SKOTFROMTHEDOCK, HTTPS://WWW.INSTAGRAM.COM/P/C2NMW-BY0-3/
The far end haul
Having a Traxion on the load also lets you set up what’s called a “far end haul”, which at first seems like some sort of sorcery. The far end haul system allows you to lift your load with a theoretical 2:1 mechanical advantage (MA) by pulling on the “far end” of the rope, rather than from the primary anchor. Here's a detailed article on how to set it up, along with some how-to videos.

But, even if you’re not soloing, it has a few advantages.
You never again need to futz with the old school “water bottle knot protector” that slides up and down the haul line and gets in your way. If you don't have a knot, you don't need a knot protector, right?
You can pull all the extra haul line through the Traxion before you release the bags from their docking cords, and use the extra haul rope to lower out the bags. (Remember to tie that back up knot after you pull all the extra rope through the Traxion; it’s easy to forget this,)
You never have a loaded/welded haul rope knot to untie.
The far end haul can minimize rope abrasion, because the haul rope doesn’t move.
If you have to haul from a point or over a ledge with a LOT of rope friction, you can instead far end haul and have zero friction.
You can easily move the bags around at the anchor; more below.
Simply by redirecting the tail end of the haul rope through a higher anchor point, you can generate a 2:1 mechanical advantage to unweight the bags. This lets you do various shenanigans like transferring the docking cord from one part of the anchor to another. And I can tell ya, if you’re a beginning wall climber, you are just about guaranteed to have some flavor of anchor fustercluck that will require this, ask me how I know this!
If you didn’t have this set up, unweighting the bags once they are settled on the anchor is probably going to be a significant pig wrestle. You want to avoid pig wrestling whenever possible.
Here’s a video by wall ace Mark Hudon who shows exactly how to do this. Rather ingenious, no?