
How to rack your aiders
This tip was shown to me by Libby Sauter, expert climber and holder of the women’s team speed ascent of the Nose on El Capitan. Thanks Libby!
A good rule of thumb for just about any kind of climbing is never have anything hanging below your knees. So, what to do about those pesky aid ladders that always want to trip you up, when you're either gearing up at the base of the route, or transitioning between aid climbing and free climbing?
Here’s a crafty way to quickly roll up your aiders to get them out-of-the-way, yet make them instantly accessible to unroll when you need them. And if you do it right, there won't be any twists.
Take the second step of your aid ladder, and pass the hero loop under the step.
Repeat with the fourth step of the ladder, and again with the sixth.
Finally, clip the hero loop onto your aider carabiner. This should be a designated carabiner that always lives on the business end of your aiders.
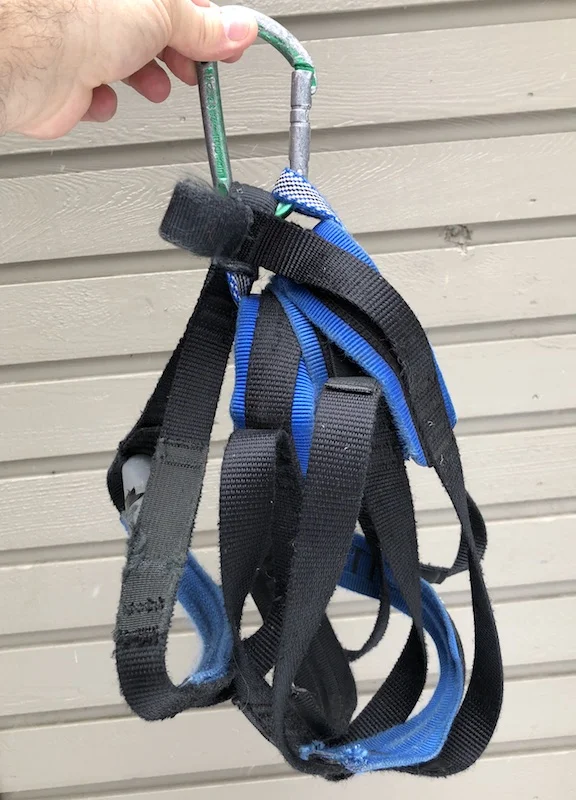
You should have a nice compact bundle, looking like the photo below.
To deploy, just unclip the hero loop from the carabiner, and give a shake. The aider should fall down untwisted, ready to climb.
It’s a better show than a tell. Here’s a short video showing how it’s done.